Zapier: creating Pipedrive deals with Gravity Forms


You can create new deals in Pipedrive through Gravity Forms using Zapier.
What you need
To create a Zap to connect your Pipedrive and Gravity Forms accounts, you’ll need:
To get started with Gravity Forms (creating an account, setting up forms, etc.) check out their support documentation.
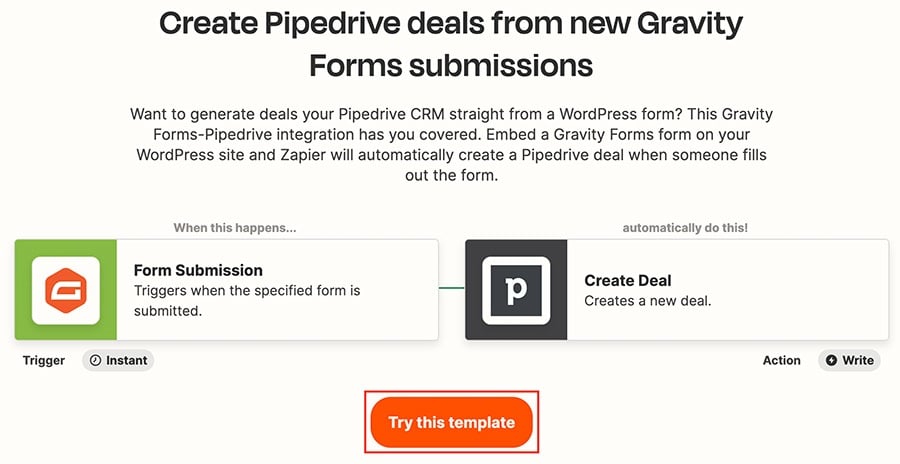
Creating your Zap
Zapier provides a template you can use to create deals from Gravity Forms submissions.
Click ”Try this template“ and you’ll be taken to the Zap editor, where you can customize your automation.
Click “Sign in“ to connect your Gravity Forms account for the Zap.
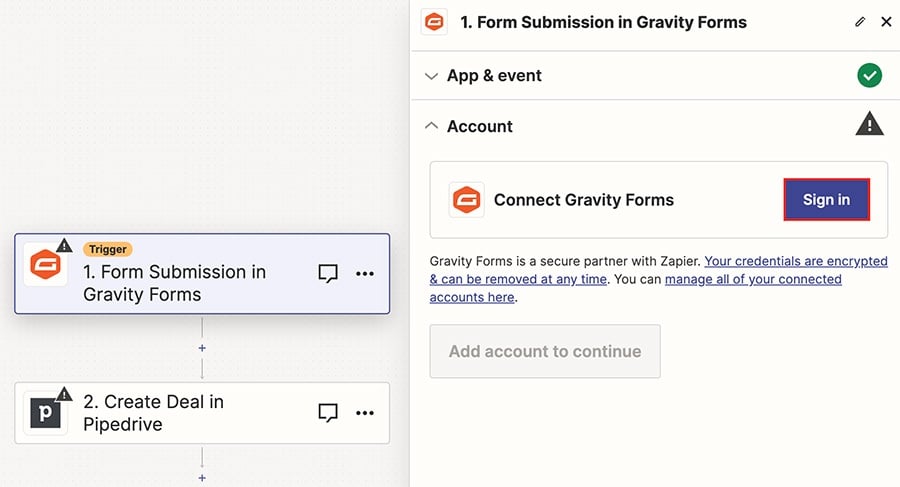
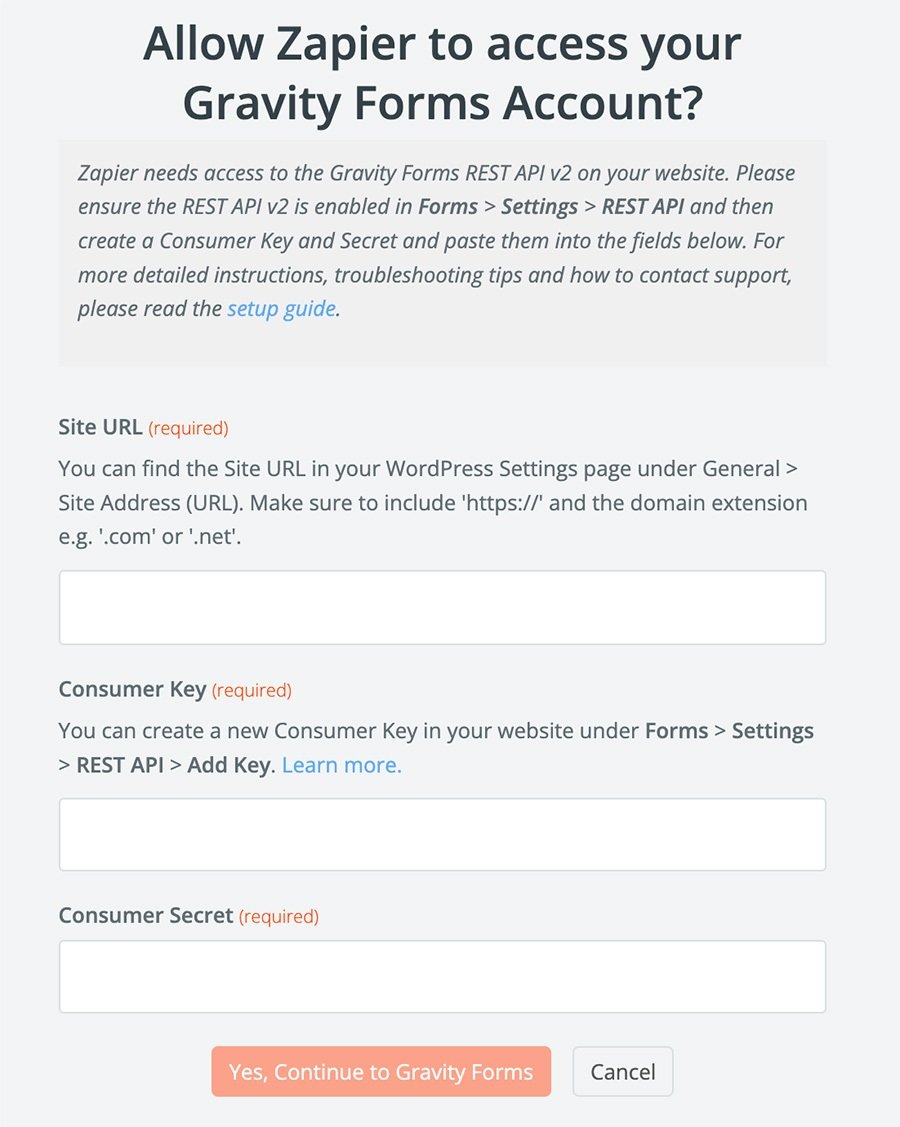
Unlike other connections between Pipedrive and Zapier, using Gravity Forms requires API. When you click ”Sign in,“ a window will open and ask for three things:
- Site URL
- Consumer key
- Consumer secret
All three of these can be found in your Gravity Forms account using the instructions in the window.
Once your Gravity Forms account is connected, do the same with your Pipedrive account in the other step of the Zap.
After you’ve customized and tested each part of your Zap, click ”Publish“ to save your Zap.
Was this article helpful?
Yes
No