Automations: webhook requests
The webhook action in Automations allows you to connect Pipedrive with external tools and apps by sending information to specific endpoints. This feature enhances your sales processes by allowing conditional event-triggered information linking between Pipedrive and the tool of your preference.
Unlike traditional webhooks, this approach offers greater flexibility and precision, allowing you to define detailed conditions and events for triggering webhook requests – a capability not available in standard webhook setups.
Create a webhook
Before you start adding webhook actions to your automations, you first need to add webhooks to your Pipedrive account.
Go to the Webhooks page. Then, click on “+ Webhooks” > Automation webhook.
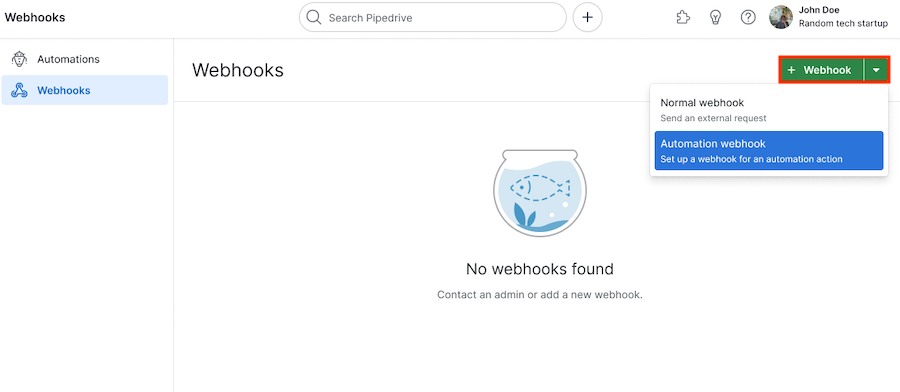
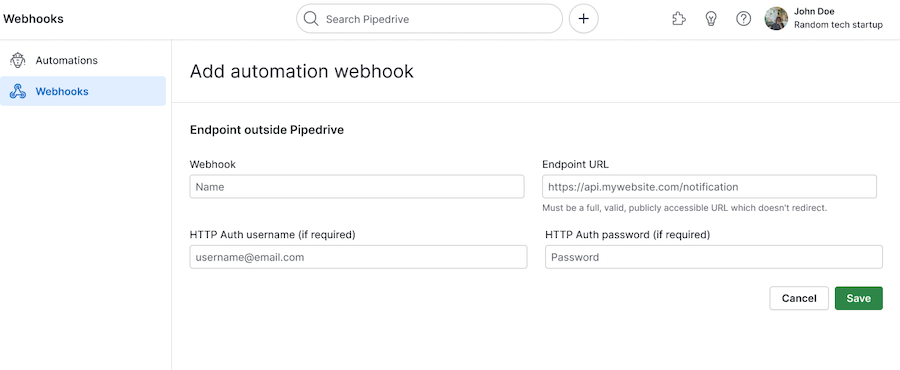
Add a name to your webhook. We recommend being very specific and clear, as you’ll have to choose the webhook by the name while building an automation.
Then, add the endpoint URL and provide authentication credentials if required.
Add a webhook to automations
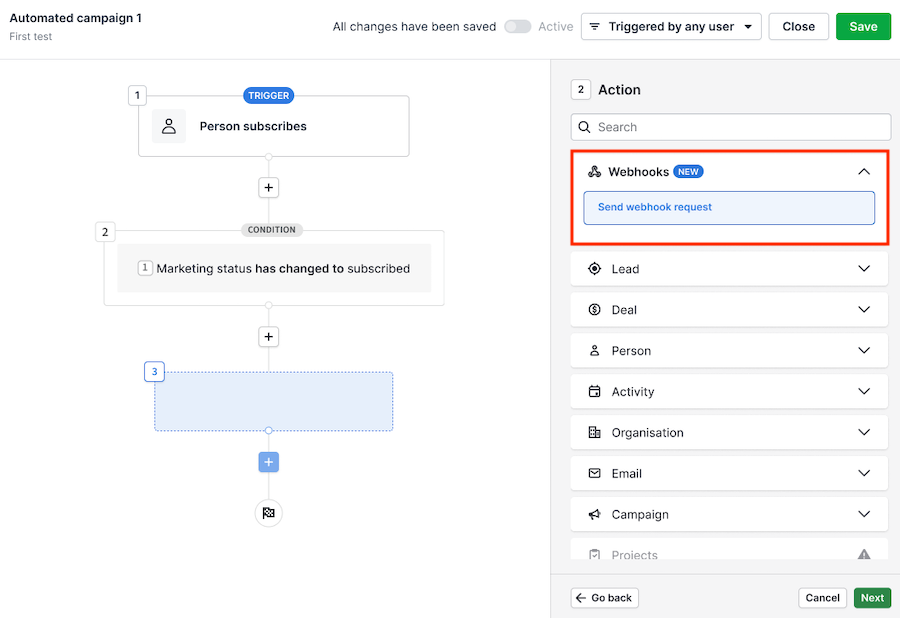
Once you’ve added the webhooks, you can head to automations and start building an automation with a webhook action.
You’ll see the following fields to fill in in the webhook action, being “Webhook”, “Method” and “Body” mandatory.
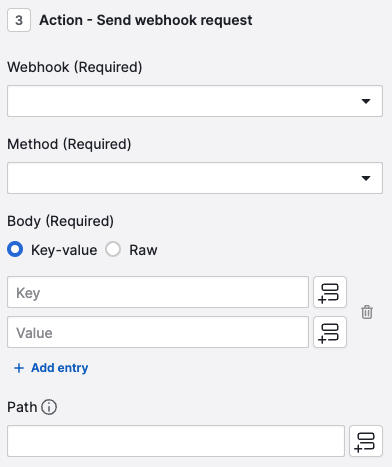
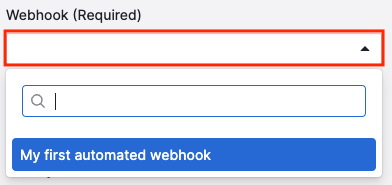
First, select the webhook you created from the webhook field.
Then, choose the method you want to use (POST, PUT or DELETE).
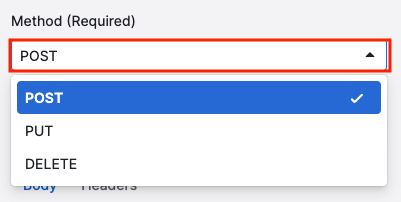
POST | Create resources |
PUT | Replace a resource with another one |
DELETE | Delete a resource |
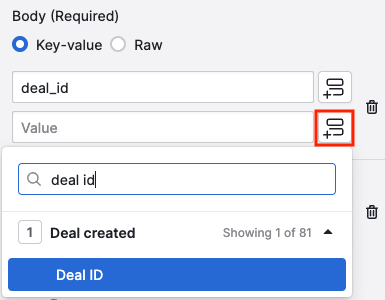
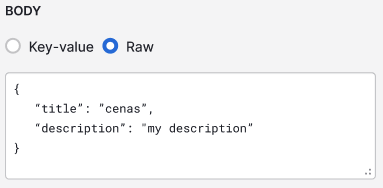
In the webhook body, you can choose to set it up by “Key-value” or “Raw”.
The key-value builder allows you to build the request body of the action and add more entries if needed. Here, you can select Pipedrive fields by clicking on the field button to open the dropdown.
The raw builder allows you to build your own JSON-valid body in case you want more control over the payload.
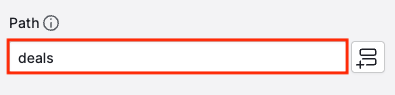
Finally, add the webhook path. The path will be added to the base domain defined in the webhook.
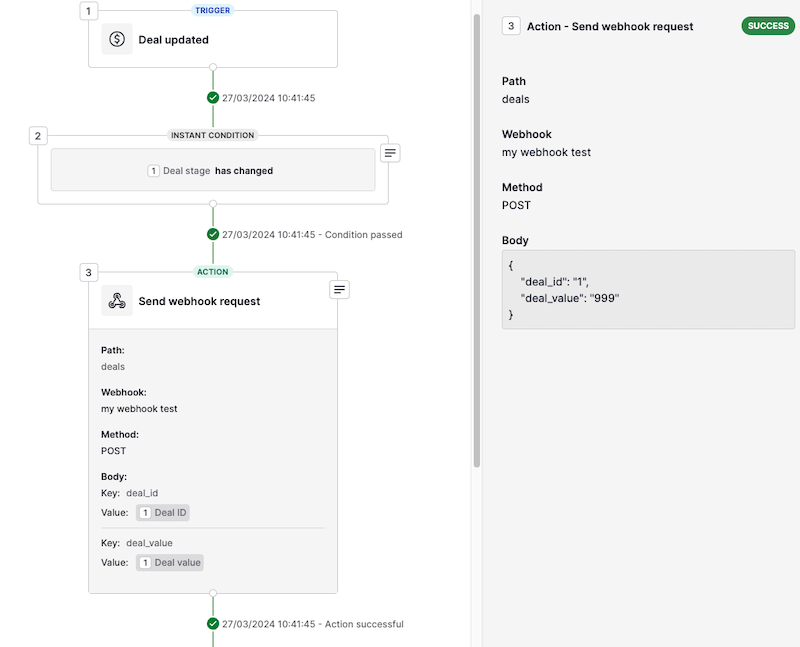
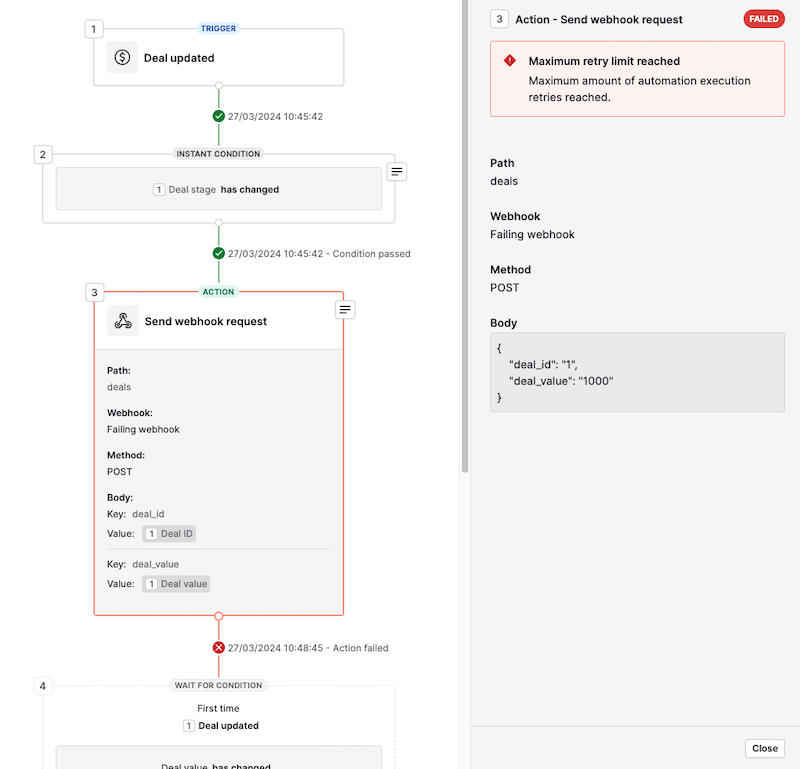
Execution history
You can have visibility over your webhook performance within the execution history. Here you’ll see the final body and path for the webhook request.
If, for any reason, the webhook is not working anymore or is missing authentication or permissions, the automation execution will fail.
Permissions and executions
Automated webhooks can be triggered by all users, regardless of their visibility permissions or admin status/permission.
Was this article helpful?
Yes
No