How can I create a web form that is GDPR compliant?
The implementation of the GDPR law in 2018 had a significant impact on sales and marketing companies, namely for lead generation, prospection and e-commerce. You can learn more about GDPR compliance for your sales team in this blog entry.
In Pipedrive, we have the Web Forms feature, one of the most valuable tools to capture leads from your website. However, as controller of the information and depending on the data you are gathering, you should notify your customers when and how you are processing their information to ensure GDPR compliance.
Learn more about Web Forms
Custom field setup
The first step is to think about precisely what is required from your customers. For example:
- I have read the Privacy Policy.
- I accept the terms and conditions.
- I want to subscribe to the newsletter.
Each authorization you need requires a custom field to obtain it, and we recommend creating person custom fields since it’s people you’re requesting permission from.
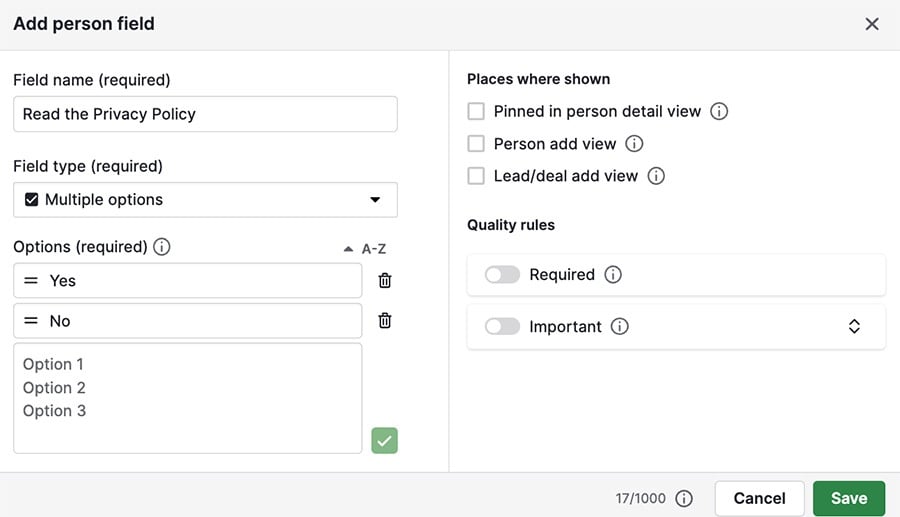
Privacy policy
For privacy policy, create a multiple-option field, name it accordingly and add options for yes and, if applicable, no.
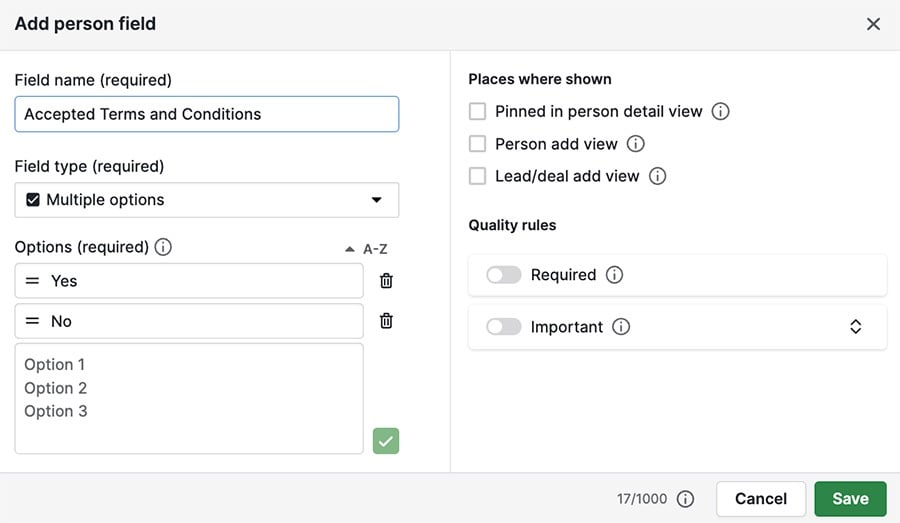
Terms and conditions
For terms and conditions, create a multiple-option field, name it accordingly and add options for yes and, if applicable, no.
Newsletter
Since a newsletter subscription isn’t mandatory, you can use a single option field, name it accordingly and add options for yes and no.

Once you have your custom fields created, you can set up your web form.
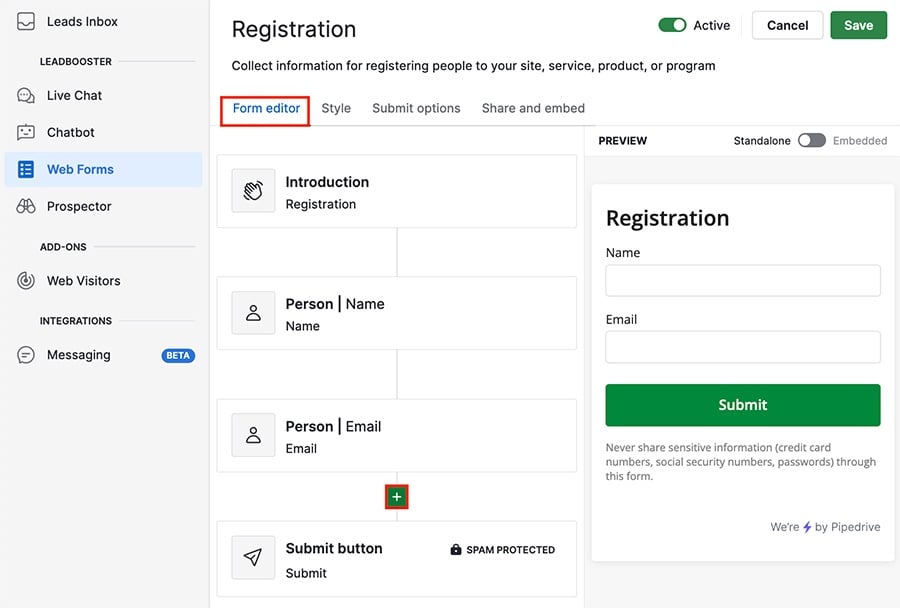
Web form setup
Go to Leads > Web Forms > “Form editor,” then use the “+” above the submit button to add your blocks.
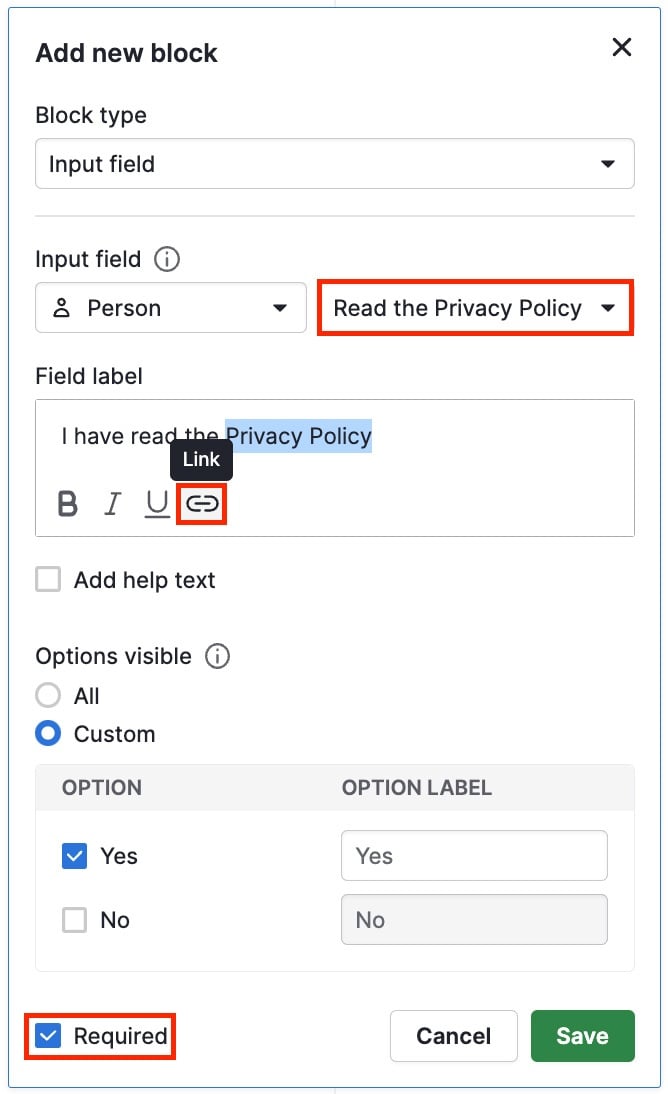
Privacy policy/Terms and conditions
Here are a few things to keep in mind when creating your web form blocks:
- Use an input field block
- Select the custom field you created from the drop-down under input field on the right
- Highlight your text and use the “link” option to hyperlink any documentation
- Use custom visibility if you only want only a single option available when filling out the form (e.g "Yes.")
- Check the required box to ensure the question can’t be skipped
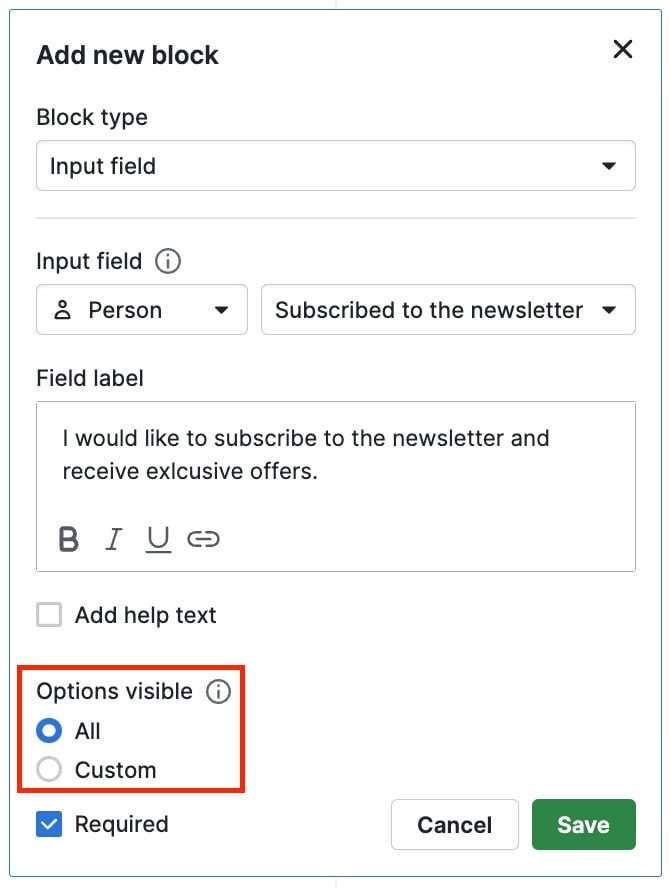
Newsletter
The only big difference between your newsletter block and the others is you don’t need consent to send it, and therefore don’t need to limit the available submission options to one.
Once you finish adding your blocks to your web form, click on “Save” at the top right corner of your screen:

You can check our article about web forms to learn how to configure them.
Was this article helpful?
Yes
No