Automations: delay step
The delay step pauses your automation for a set amount of time before it moves to the next step. Use it when timing is all that matters, for example:
- Wait two minutes after a deal is added before you send a welcome email
- Wait two days after a deal is marked as won before you create a follow-up activity to request feedback
If you need to wait for something to happen within the time limit, like a reply to an email, use a wait for an event step instead.
Add a delay step
Once you’ve set a trigger for your automation, select “Wait” and choose “Delay”.
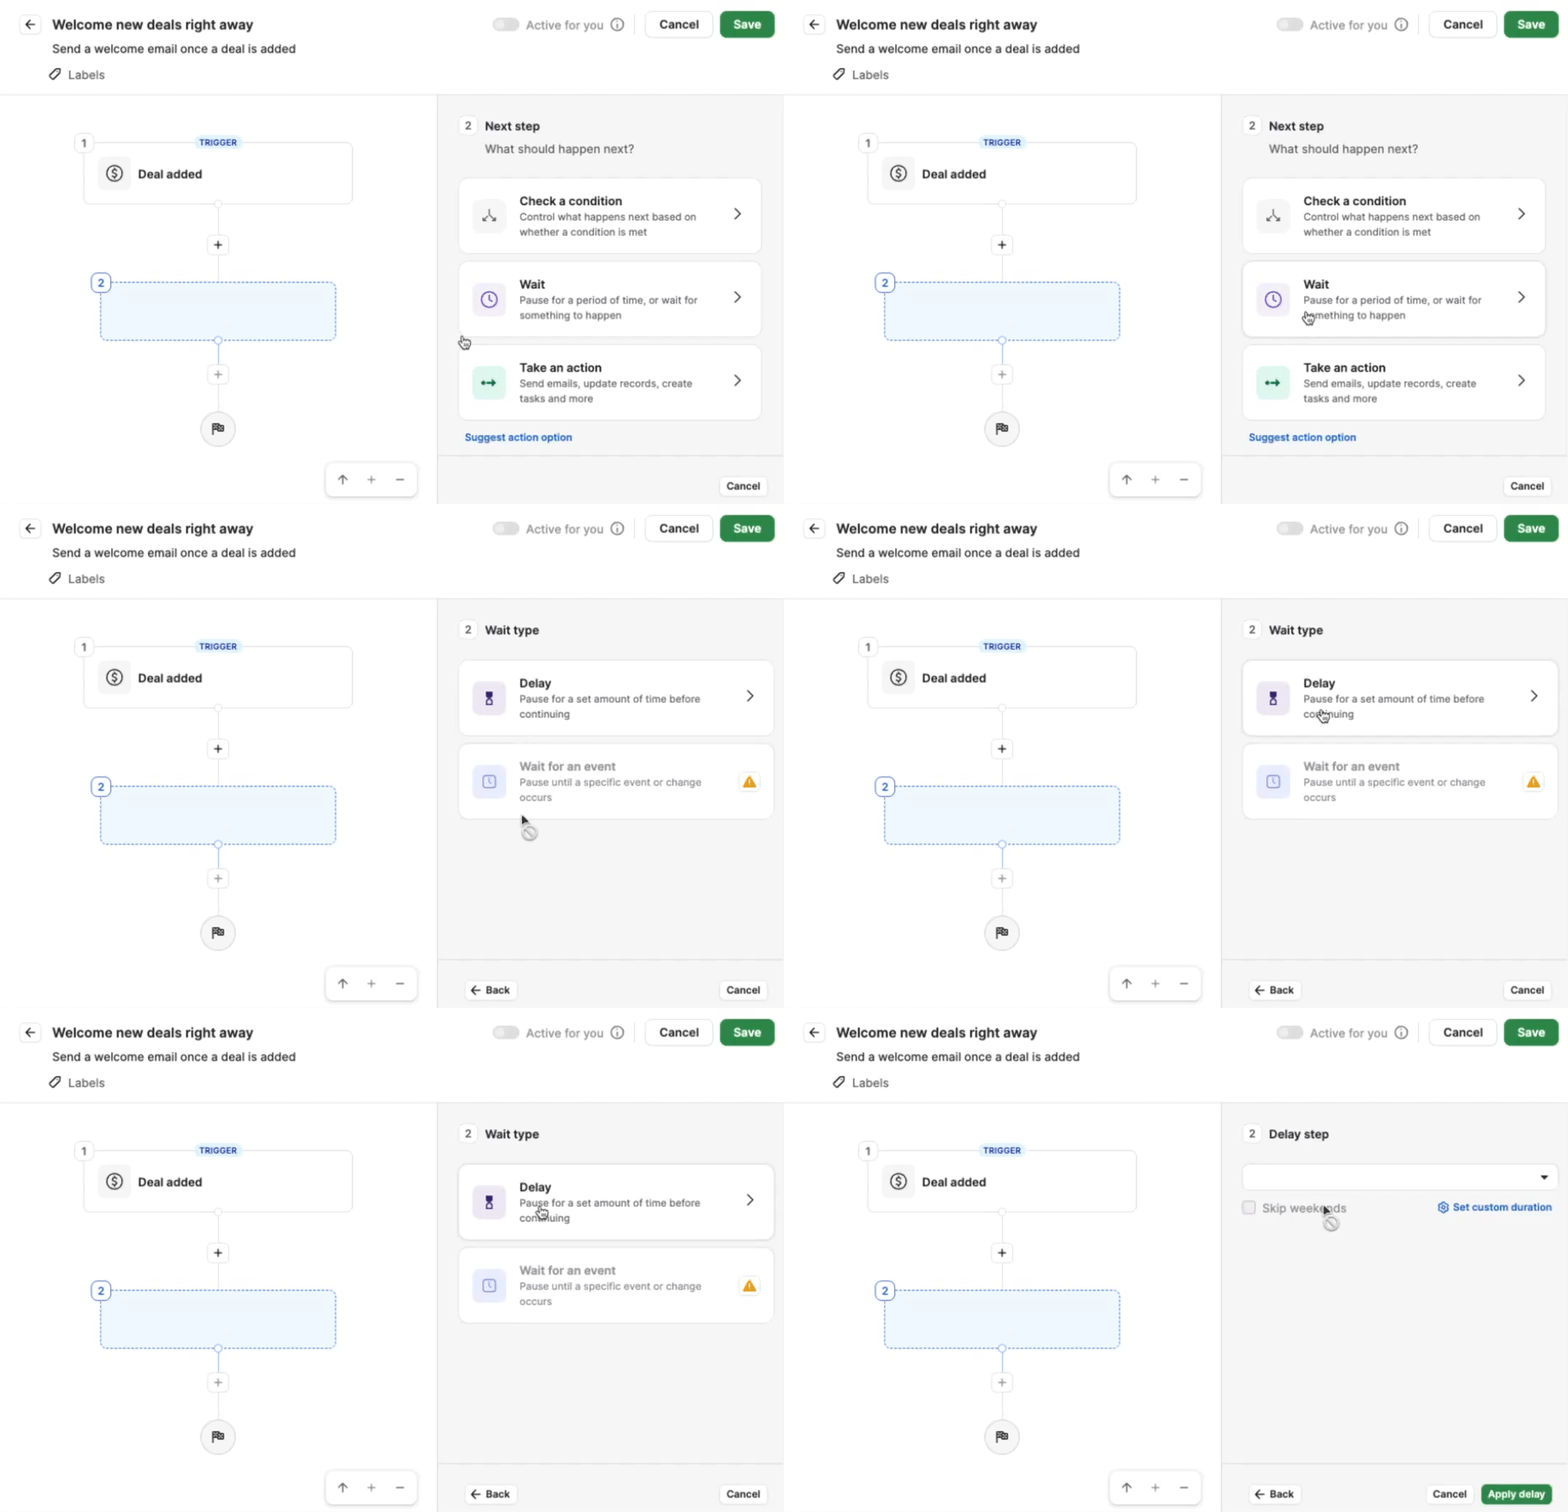
For example, you could add a delay step after the deal added trigger to send a welcome email two minutes later.
Set the duration
Next, set how long the automation should wait. Continuing the example above, you’d set the duration to two minutes.
You have two options for how to configure your delay:
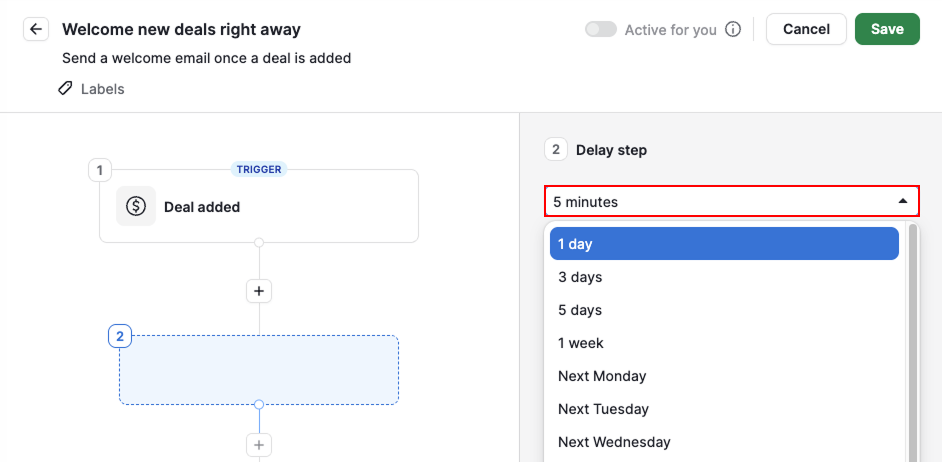
- Set predefined duration – choose a predefined option from the dropdown
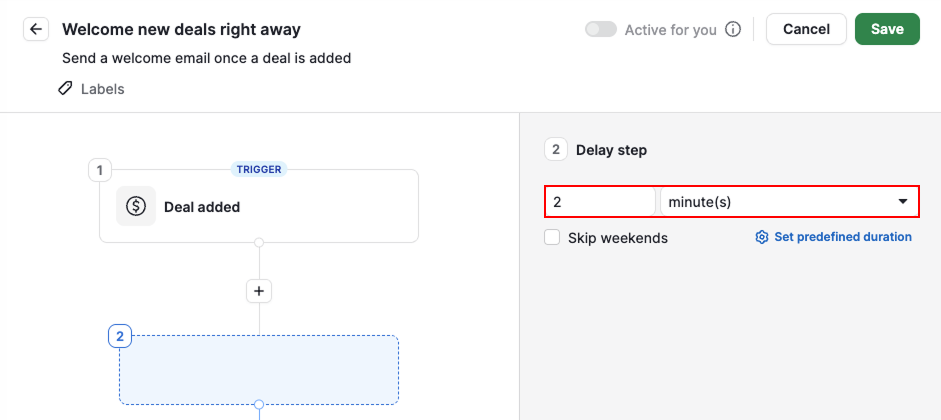
- Set custom duration – set a specific number and unit of time
Set a specific time
If your delay is set in days or weeks, you can also choose a specific time of day for the automation to continue.
Click “Set time”, then enter the time and timezone for the next action to happen.
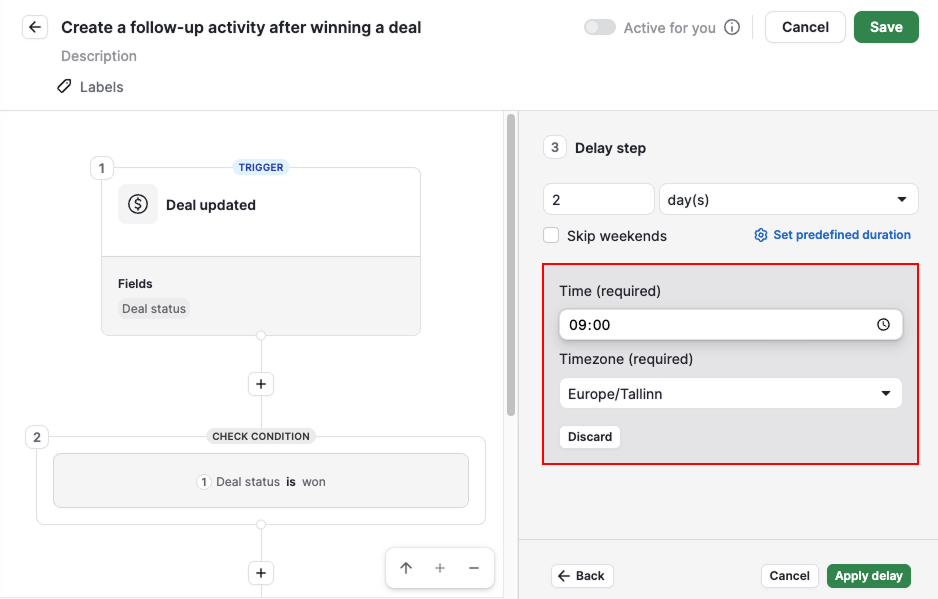
For example, if you want your follow-up activity to be created at 9 a.m. two days after a deal is marked as won, set the time to 9:00.
Skip weekends
Enable “Skip weekends” if you don’t want the next step to perform on Saturdays and Sundays.
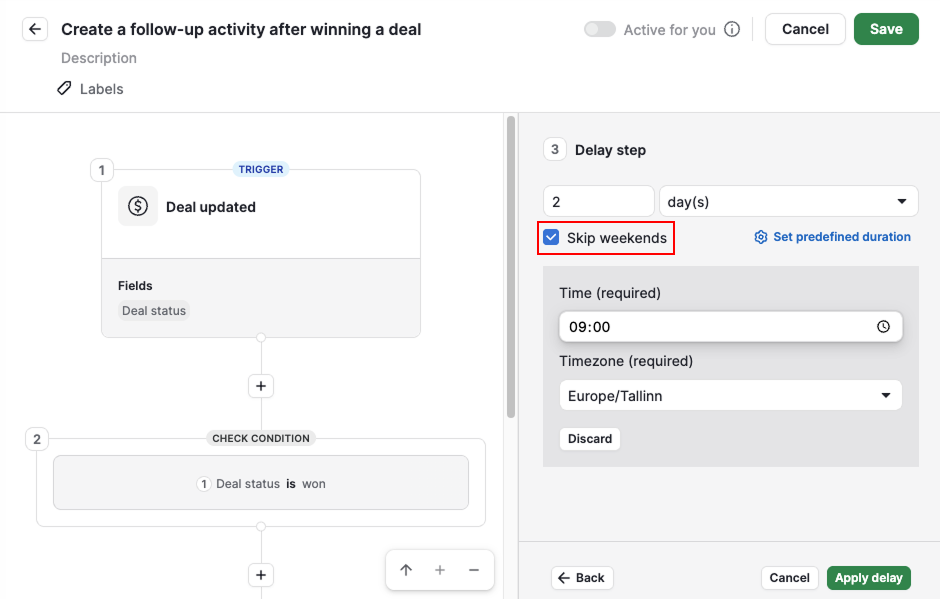
If the delay step ends during the weekend, the automation waits and continues on the following Monday instead.
To save the delay step, click “Apply delay”.
Steps you can add after a delay
After configuring your delay step, you can check a condition, add another wait or take an action as the next step.
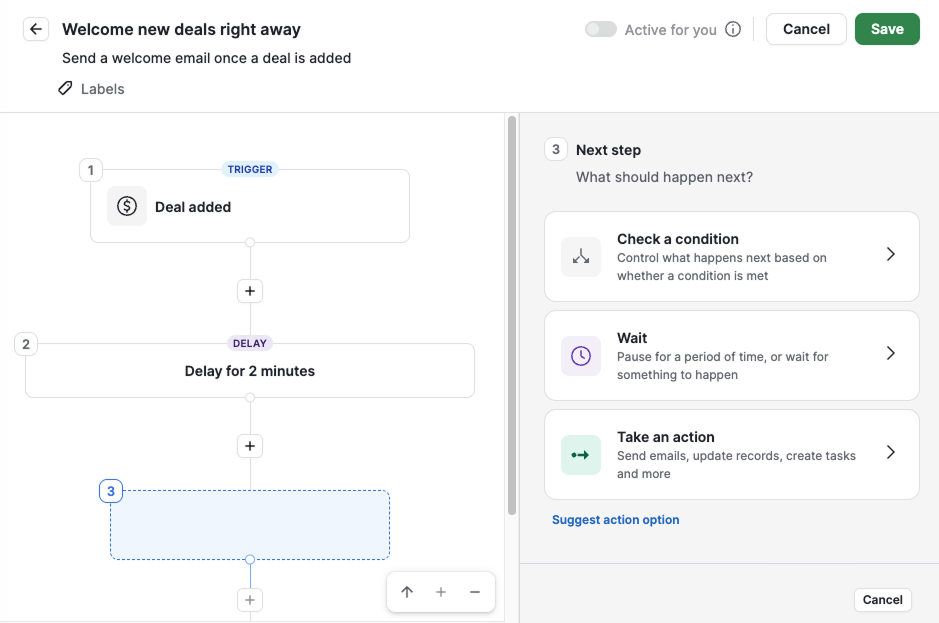
Since a trigger and delay aren’t enough on their own, you’ll need to add at least one “Take an action” step before you can save the automation.
Check a condition
Select “Check a condition” to add a regular condition or an if/else condition the automation checks after the selected amount of time has passed.
For example, you could check whether the deal includes a specific label before sending a welcome email in the next step.
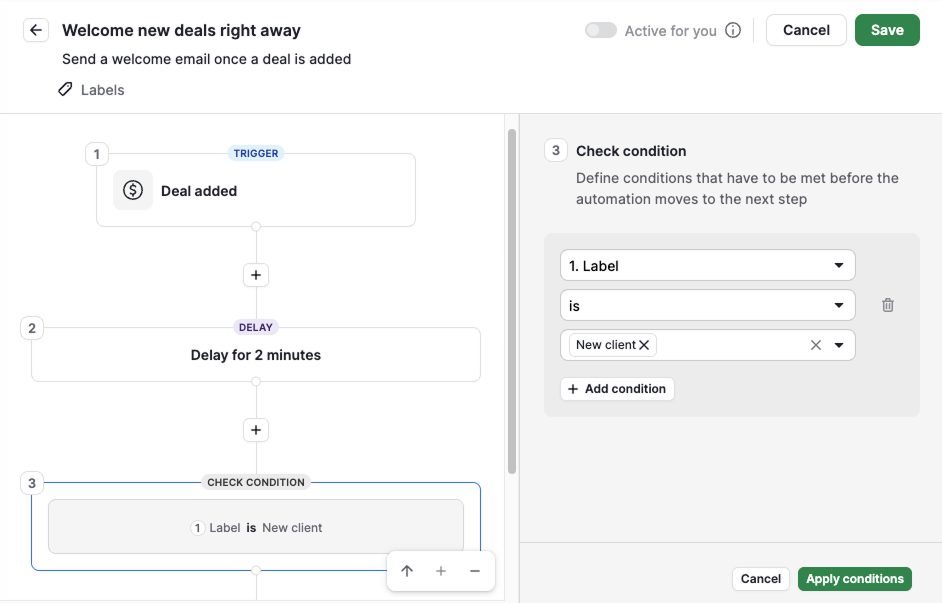
If the condition is met, the automation moves to its next step. If it isn’t met, the automation stops.
If you want to send a different welcome email depending on the deal’s label, an if/else condition lets you branch into two paths, each with its own action.
Wait
Choose “Wait” to add another delay or a wait for an event step.
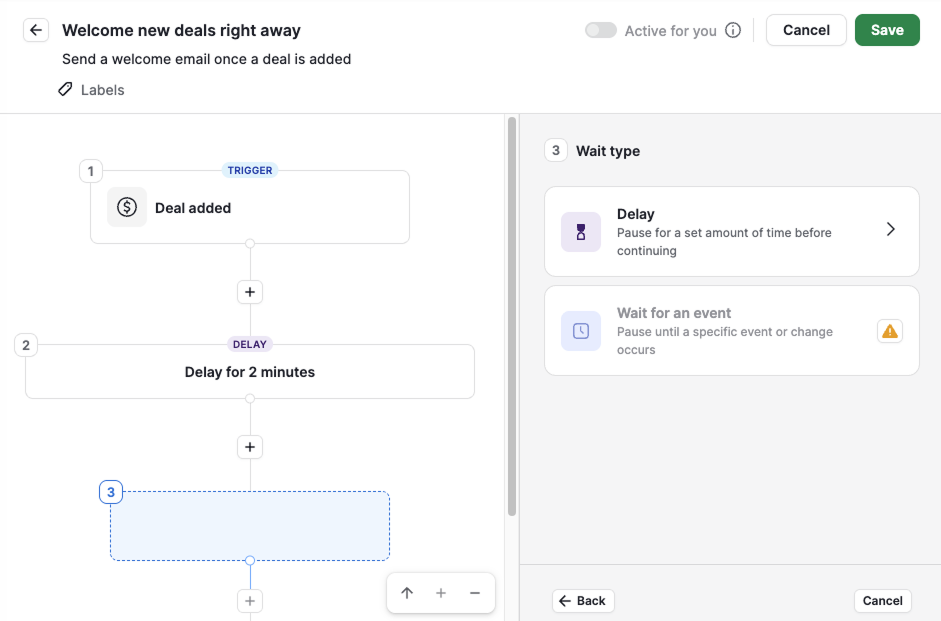
The two durations you select are added together. For example, a one-day delay followed by a 30-minute delay results in a total delay of one day and 30 minutes.
Take an action
If you choose “Take an action”, the automation waits until the specified time has passed, then performs the action.
Continuing the earlier example, the action here would be sending the welcome email.
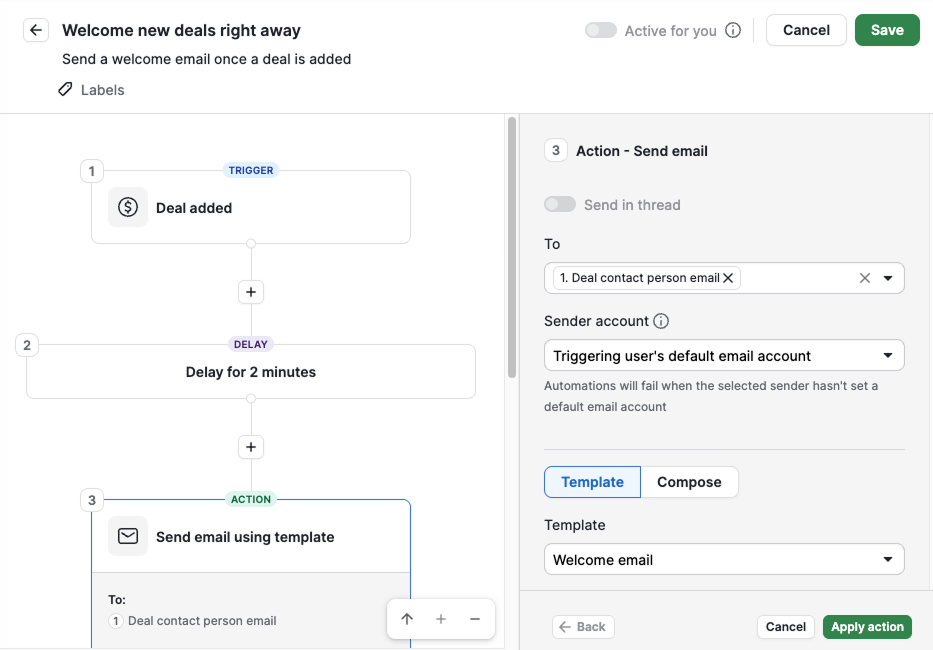
The welcome email is sent two minutes after the deal is created.
Manage pending executions
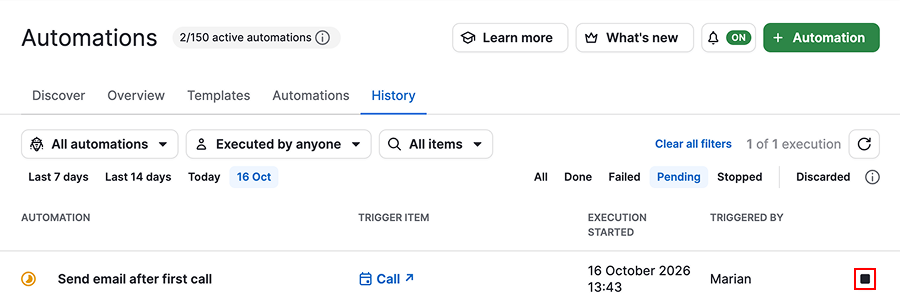
While a delay step is counting down, its automation shows as pending. You can see how many pending executions you have at a glance in the automations overview dashboard.
Stop a pending execution
Open the automations history tab, click “Stop execution” next to the execution you want to stop, and confirm your choice.
Deactivate an automation with pending executions
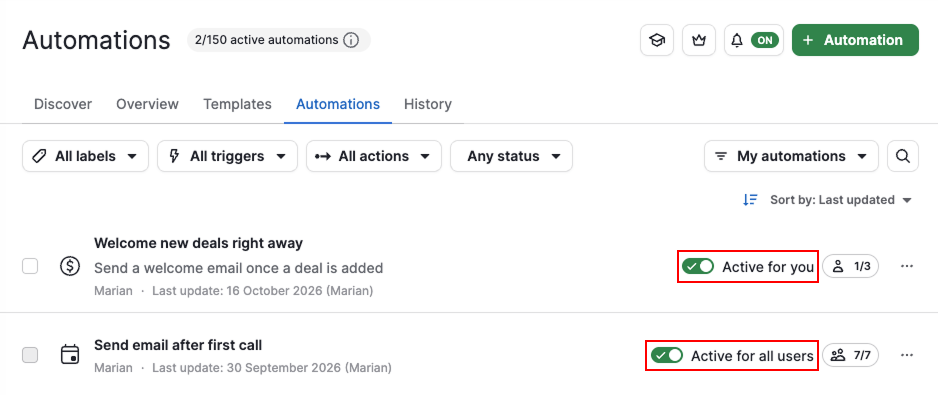
To deactivate an automation, toggle off “Active for you” or “Active for all users” in the automations list view.
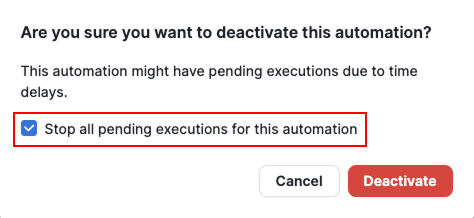
If it has pending executions, Pipedrive asks whether to keep them or cancel them all.
What to know before using delays with conditions
In some cases, changing an automation that contains a delay step causes Pipedrive to remove other steps from that automation.
References to the past
After a delay, Pipedrive can only check the item’s current values. Because of this, options that refer to an earlier value won't appear when you build a condition or action after a delay step:
- Conditions – past-tense operators, such as “Was” and “Was not”, aren’t available
- Actions – fields that refer to an earlier value, such as “Title before” or “Lead contact person name before”, aren’t available
If your automation needs to compare against an earlier value, set that up before the delay step instead.
Removing a delay before a change condition
“Has changed”, “has not changed” and “has changed to” conditions compare a value before and after a specific time. The delay step is what creates that time gap. If you remove the delay, there’s nothing left to compare.
For example, say your automation checks whether a deal’s owner has changed, two days after the deal was marked as won:
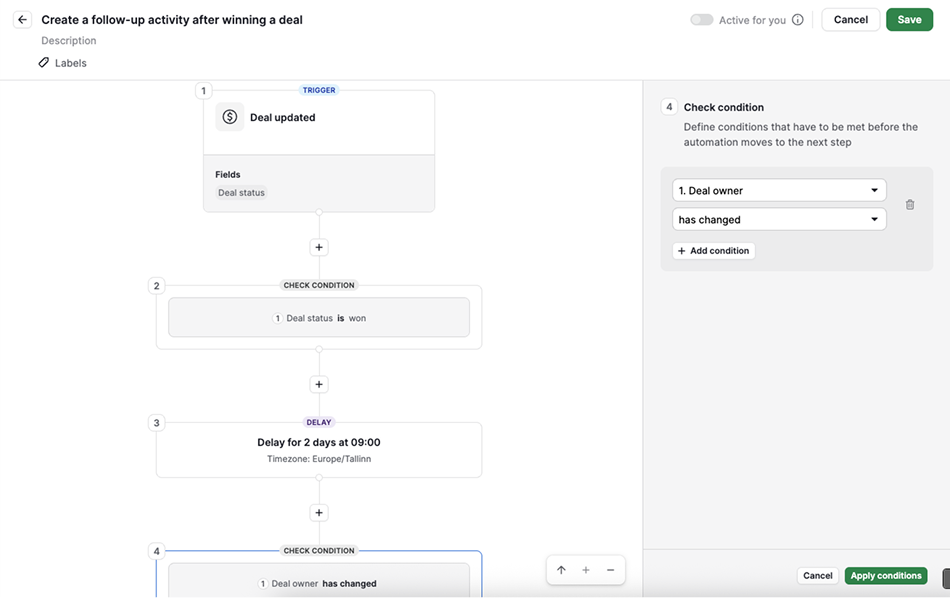
Without that two-day gap, there’s no window for the owner to have changed in.
Was this article helpful?
Yes
No