Automations: delay feature
When using automations, there are times when you’ll want an automated step performed at a later time or date, rather than immediately.
With the delay feature for the automation tool, you can set up actions to be performed automatically and at your preferred time and date.
Learn more about sales automations in our blog post.
Where to find the delay feature
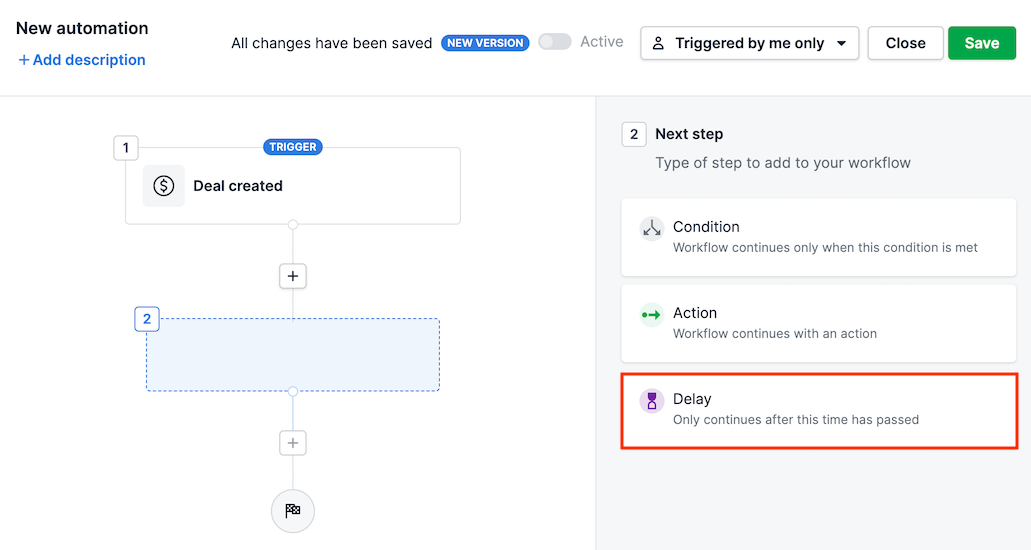
When you create your automation, you’ll start by choosing a trigger event (e.g., deal created).
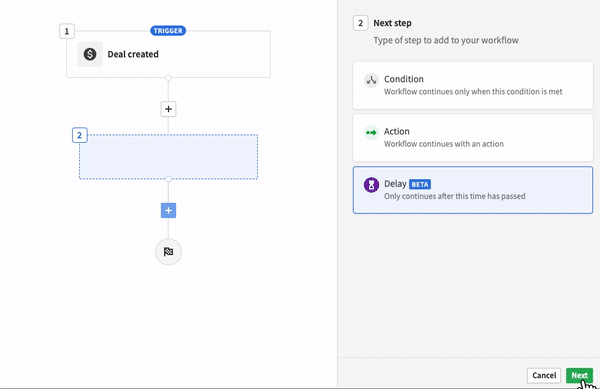
Once you have selected your trigger event, you’ll see three options for the next step: condition, action, and delay:
How to use the delay feature
Once you have located the delay feature, you can start adding time delays into your automated workflows. You’ll have two options for how to configure your delays – predefined and custom:
- Predefined allows you to select options such as a day of the week or a default number of hours or days
- Custom will let you enter a specific number and a unit of time
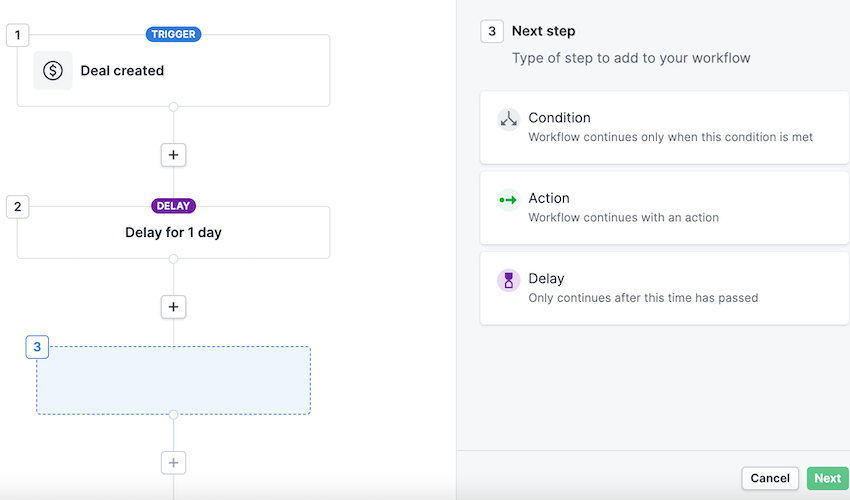
What you can add after the delay
Once you have added your delay step and specified the time that must elapse, you’ll then be able to add an action, condition, or even another delay as the next step in the automation:
Condition
If you add a condition step after your delay, the automation will wait the selected amount of time and check whether the condition has been met. For example:
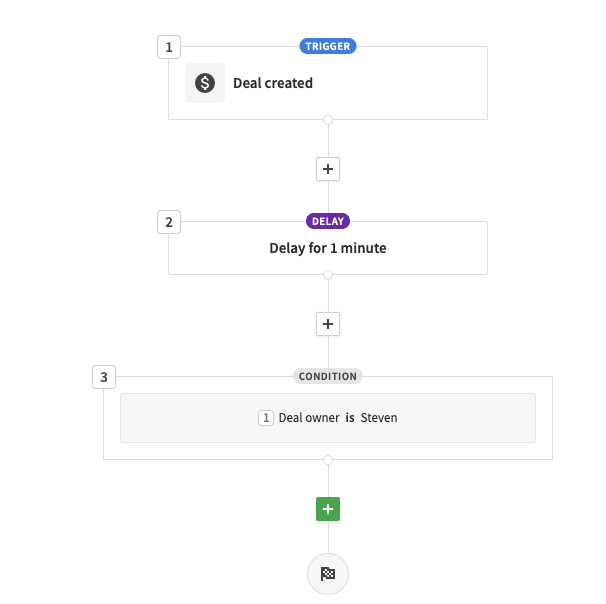
The deal owner condition will be checked after one minute has passed. If the condition is met after that time, the automation will proceed to its next step. If the condition is not met after that time has passed, the automation will be stopped.
Action
If you add an action step after your delay, the automation will wait until the specified amount of time has passed, and then perform the specified action. For example:
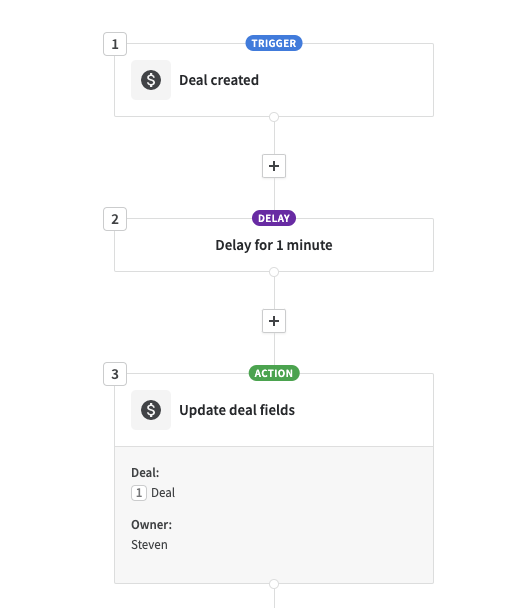
The ownership of the deal will be transferred to the selected user after one minute.
Delay
If another delay step is added directly after a previous delay, the time is added to the previous delay.
For example, if you add a one-day delay step followed by a one-hour delay step, you'll have a delay of one day and one hour.
How to cancel a pending automation
There are two ways you can cancel pending automations.
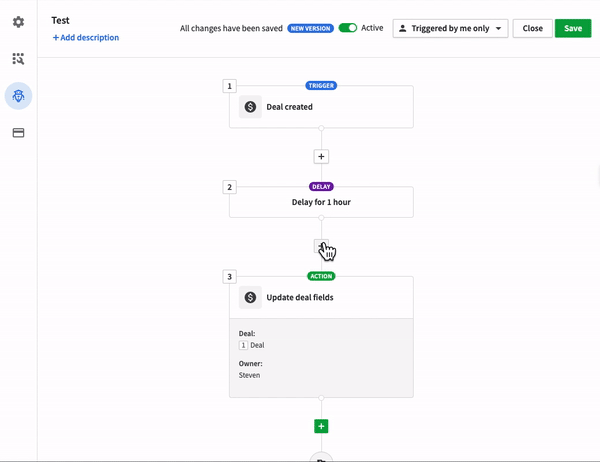
- The first is to go into the automation and deactivate it in either the editing view or the automation list view, then save. This will prompt a window, giving you the option to either maintain or cancel your pending executions:
- The other way to accomplish this is by making a change to either the trigger, condition, or action within your automation. After doing so, you’ll see a different prompt:
If you check “Cancel all pending executions”, any pending actions will be stopped. If you leave the box unchecked, pending actions will continue to fire after those changes are made.
How many delays can I use in an automation?
The number of delays per automation is dependent on your plan:
| Growth | Premium | Ultimate | Enterprise |
| 30 active automations per user | 60 active automations per user | 90 active automations per user | 100 active automations per user |
| 10 actions per automation | 10 actions per automation | 10 actions per automations | 10 actions per automation |
| 3 delays per automation | 10 delays per automation | 10 delays per automations | 10 delays per automation |
| Total Time Limit: 90 days | Total Time Limit: 90 days | Total Time Limit: 90 days | Total Time Limit: 90 days |
The total time allocated to delays in your automation can’t exceed 90 days. This means you can, for example, have one delay with 90 days or six with 15 days each.
What can disrupt the delay feature?
In certain cases, changes to an automation containing delays may require removing additional steps from that automation.
Past tense operators
Adding a delay before a condition with reference to the past will lead to all steps following the delay being deleted:
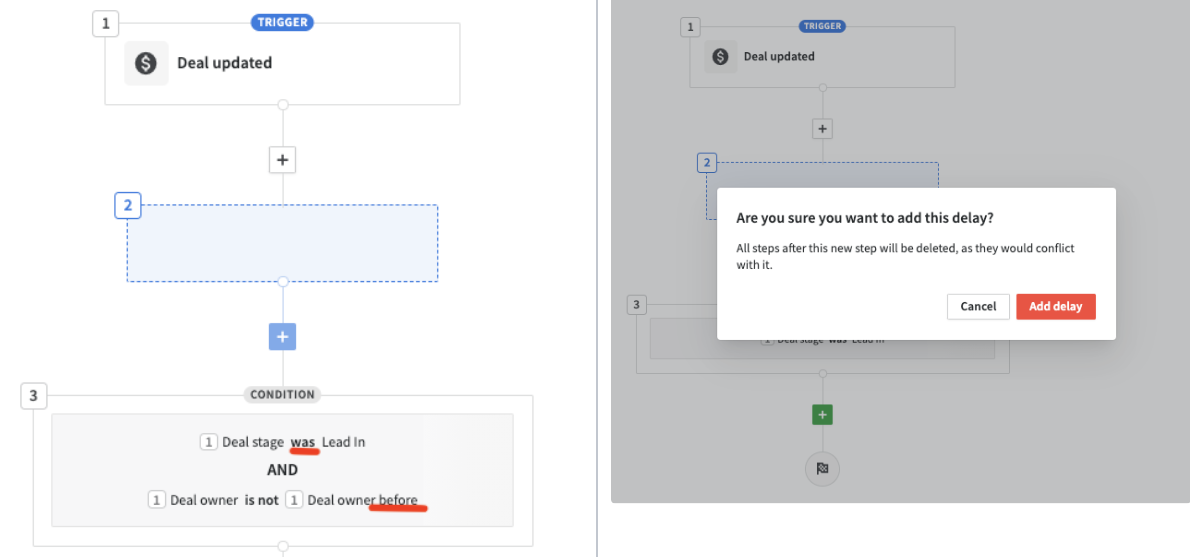
A workaround is to modify the condition first so that no past references are configured and, only after that, add the delay.
Deleting delays preceding “change” conditions
When an automation has changed/has not changed/has changed to conditions, and they come after a delay, if the delay is deleted, there is no support for those comparators anymore. An example of this would be if you have a has not changed condition set to be assessed three days after a deal is created:
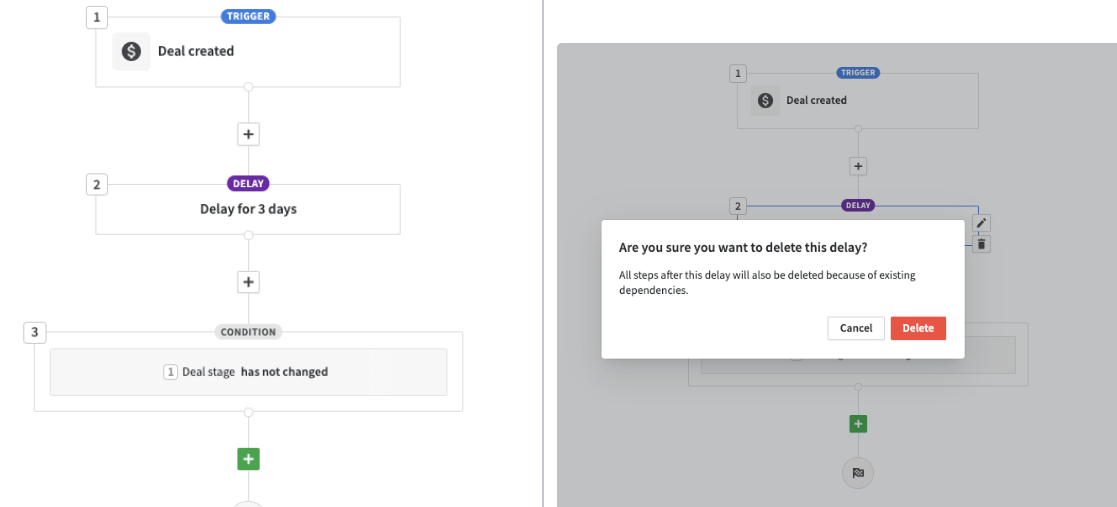
In this case, if you remove the delay step, what you’re left with is a deal created trigger event that has a has not changed condition. This is not possible since changes in a deal can’t be assessed if the deal was just created.
Was this article helpful?
Yes
No