Chatbot
With Pipedrive’s Chatbot system, your customers can better qualify themselves as potential customers for your company using a scripted playbook embedded into your webpage.

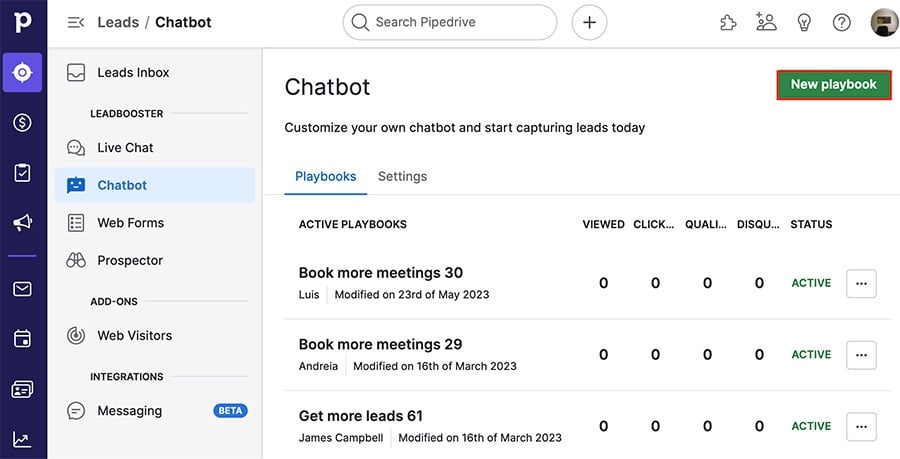
Where to find it
To create a Chatbot playbook, go to Leads Inbox > Chatbot > “New playbook.”
Building your playbook
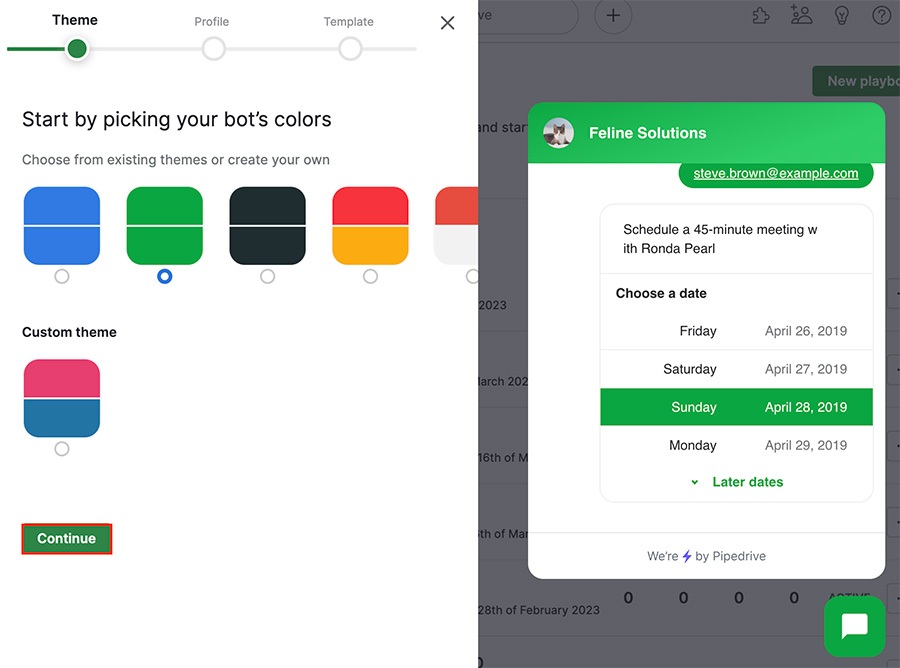
When initially creating your playbook, you’ll have three windows for editing:
- The first window lets you choose a color palette
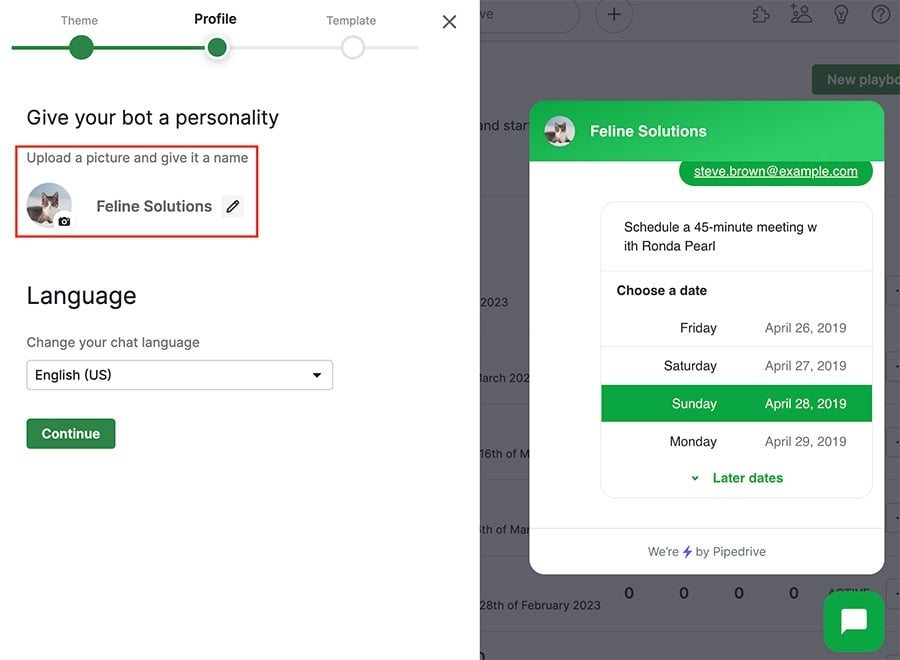
- The second is for editing the name (the pencil icon,) profile picture (the camera icon,) and language
- The third window is to choose a starting template to populate your playbook responses
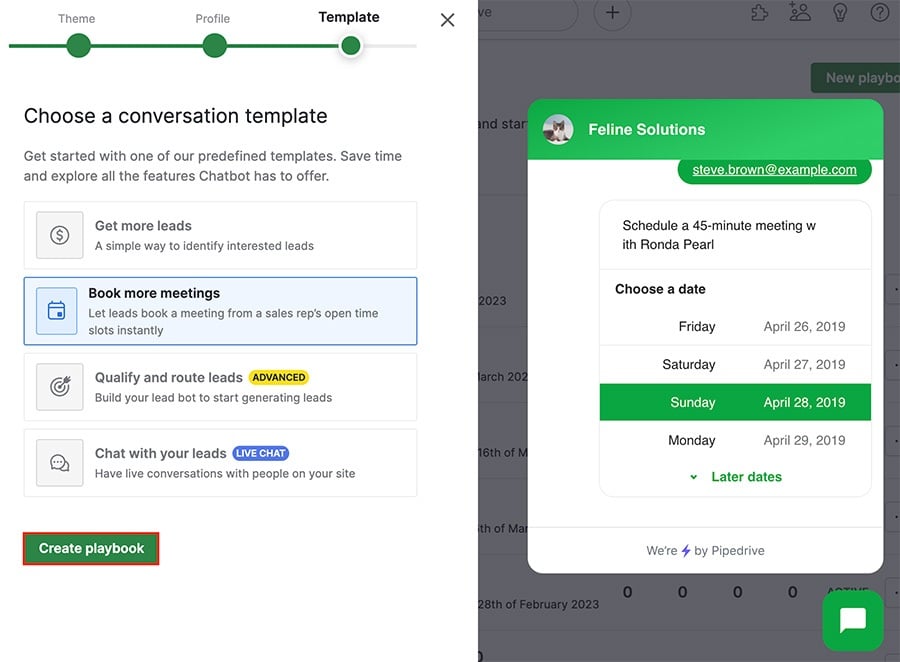
In this third step, each template offers a unique starting point for your Chatbot playbook:
- Get more leads – designed to fill your account with leads or deals
- Book more meetings – schedule specific activities with people interested in your company
- Qualify and route leads – let visitors qualify themselves as interested and have them be assigned to a specific user in your Pipedrive account
- Chat with your leads – Engage with your website visitors directly through live chatting.
After you’ve selected a template, click “Create playbook” and you’ll be redirected to the playbook editor.
Editing your playbook
Playbook editor
Once you’ve finished creating your playbook, you can use the playbook editor to add, edit or delete cards from your playbook.
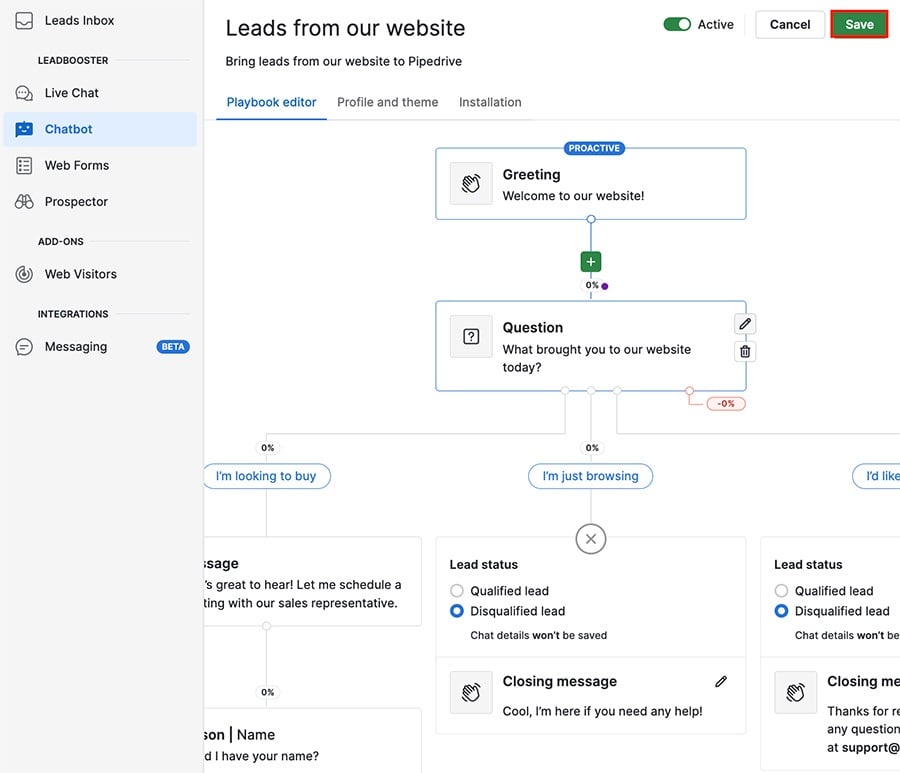
Here’s a list of functions available in the playbook editor:
- Hover over a card and use the pencil to edit it, or the trash can to delete it
- You can also hover over the name of your playbook or the note underneath and click the pencil to edit them
- Use the “+” in between any two cards to add a new one
- Use the active toggle in the top right corner to turn your embedded playbook on or off
When you’ve finished editing your playbook cards, click “Save” to confirm your changes.
Profile and theme
You can revisit previous editing options under “Profile and theme," including:
- Editing the name and profile picture
- Choosing a color theme
- Selecting your language and footer settings
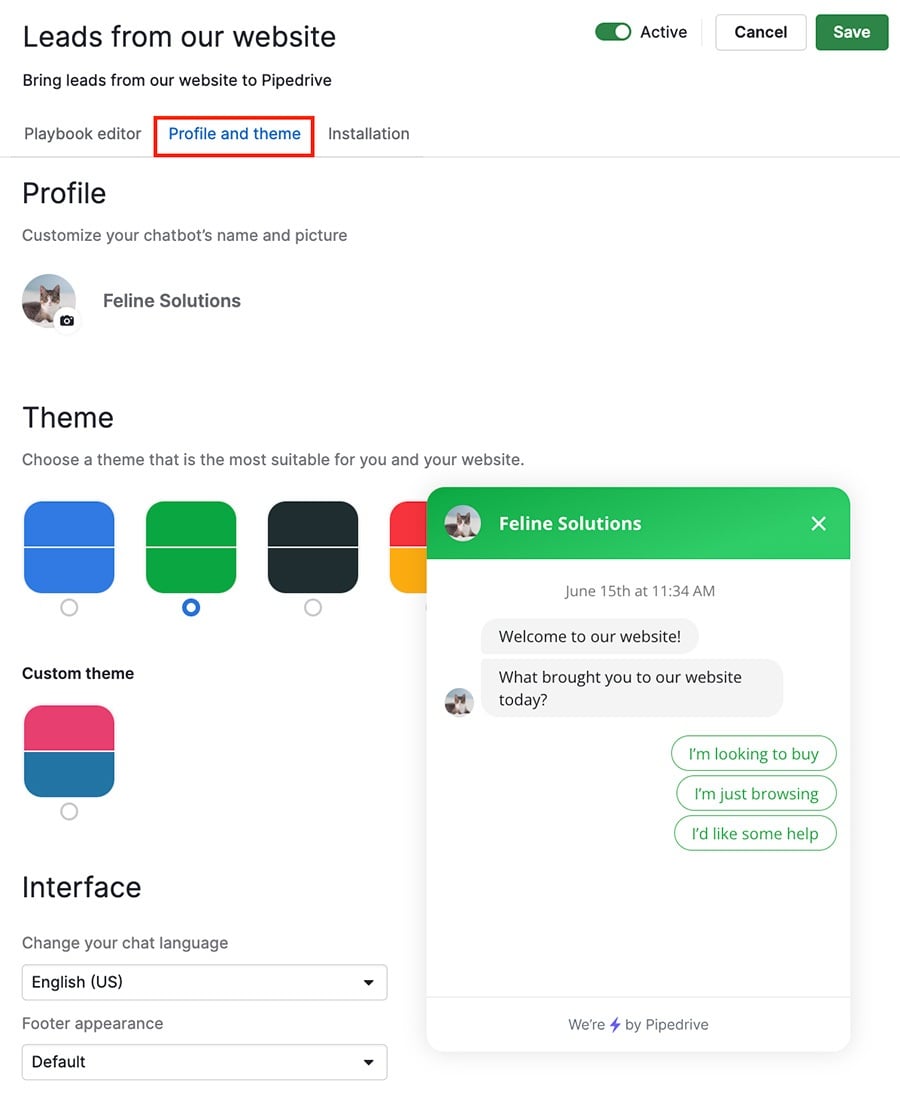
You’ll see a preview of the Chatbot as it appears on your webpage in this window.
Installation
Once you’ve edited your playbook cards and Chabot appearance, you’ll need to embed your Chatbot into your webpage.
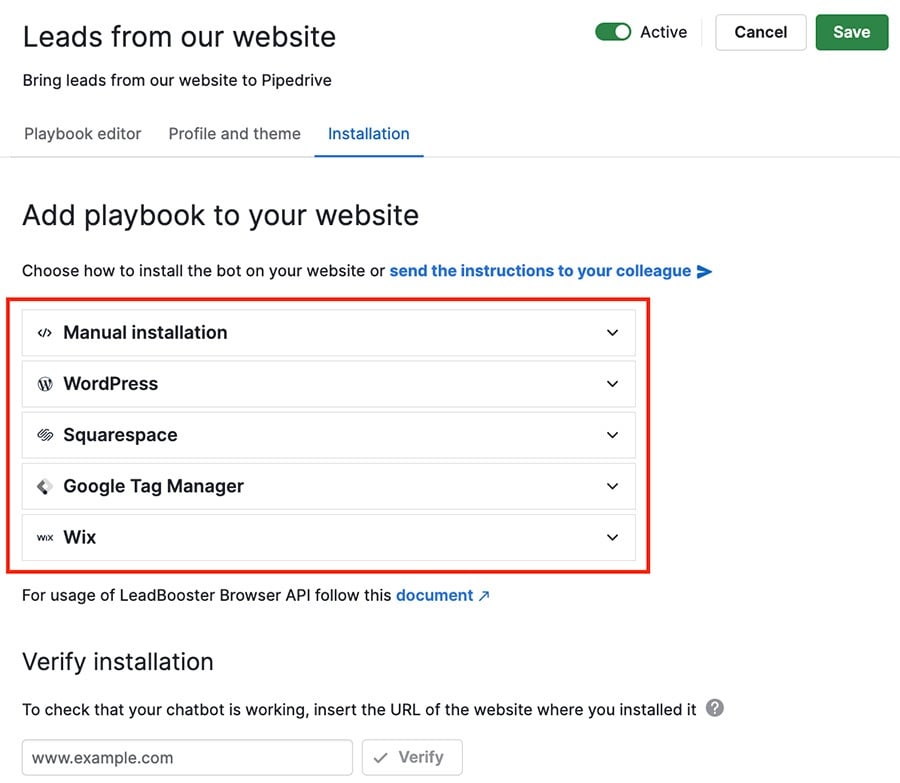
You have several pre-made code snippets you can embed onto popular web hosts, as well as a manual installation link.
Viewing your Chatbots
From the Chatbot section under Leadbooster, you can see all of your existing Chatbot playbooks:
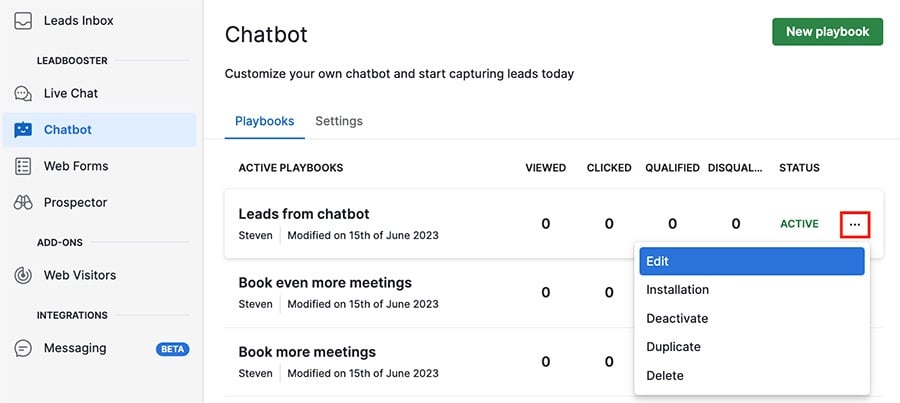
You can see the status of your Chatbot, the number of views and clicks, and how many leads were qualified or disqualified.
Click the “...” on the right side of any playbook to open up the options menu, where you can:
- Edit your playbook
- View the installation code for webpage embedding
- Deactivate your Chatbot (remains embedded on your webpage, but doesn’t function)
- Delete or make a duplicate of your Chatbot
Was this article helpful?
Yes
No