Projects: tasks and subtasks
When managing your Projects, there will be things you need to get done. Some of these things can be reflected as calendar activities on specific dates and times, but what about those that don’t need to show up on your calendar, and might not even need a due date or owner?
Using tasks and subtasks, you can create to-do's alongside your larger project activities, and keep your checklist of duties clear and sorted.
Where to find it
Within any project, you can find the "+ Task" button under the plan tab.
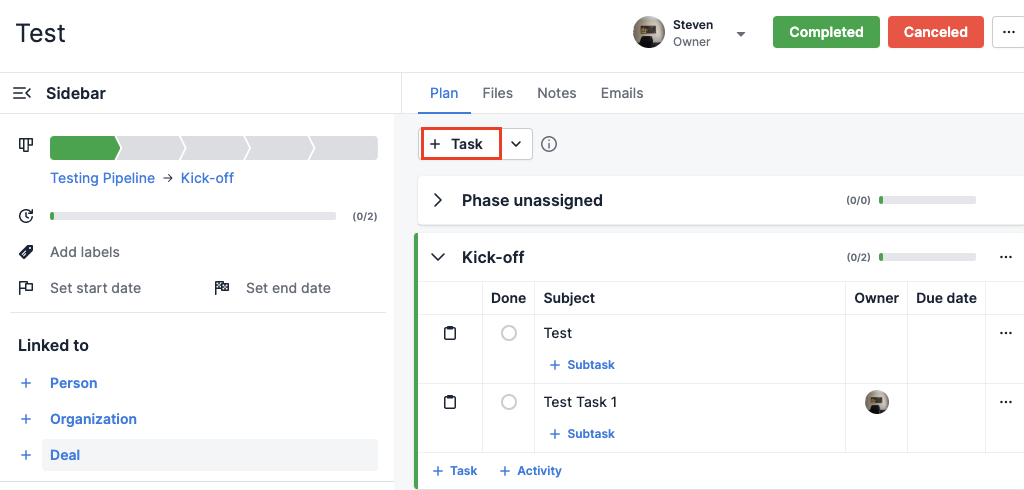
Additionally, the "+ Task" option below one of your phases will allow you to add one to that phase directly:
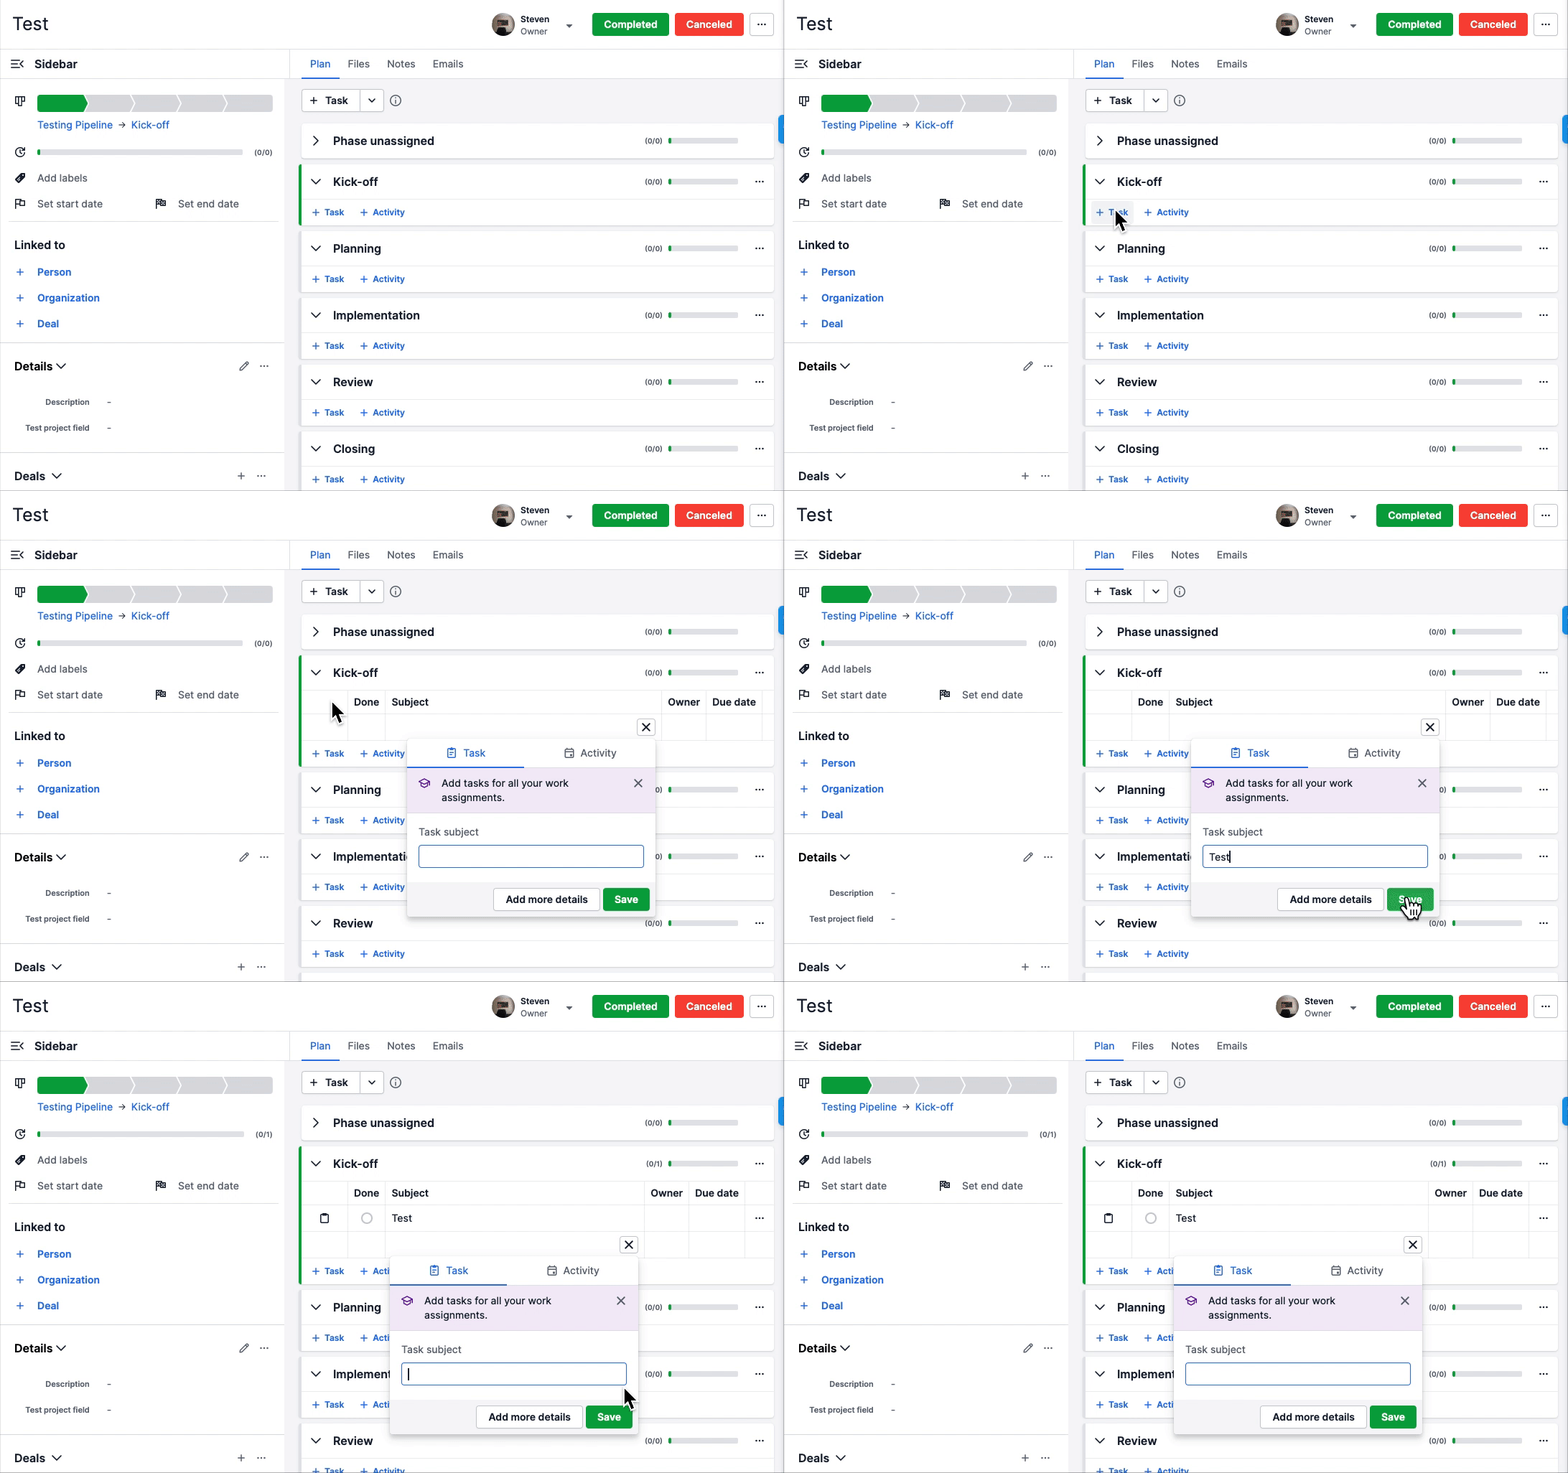
How it works
When you click the "+ Task" button, the contextual view will open and you will be asked for the following information:
Once you hit Save, the newly created task will appear within the specified project and phase.
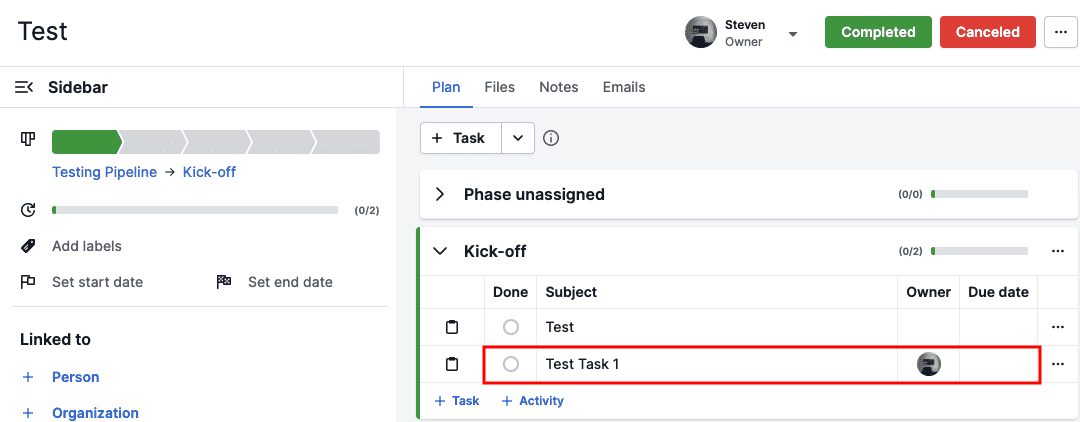
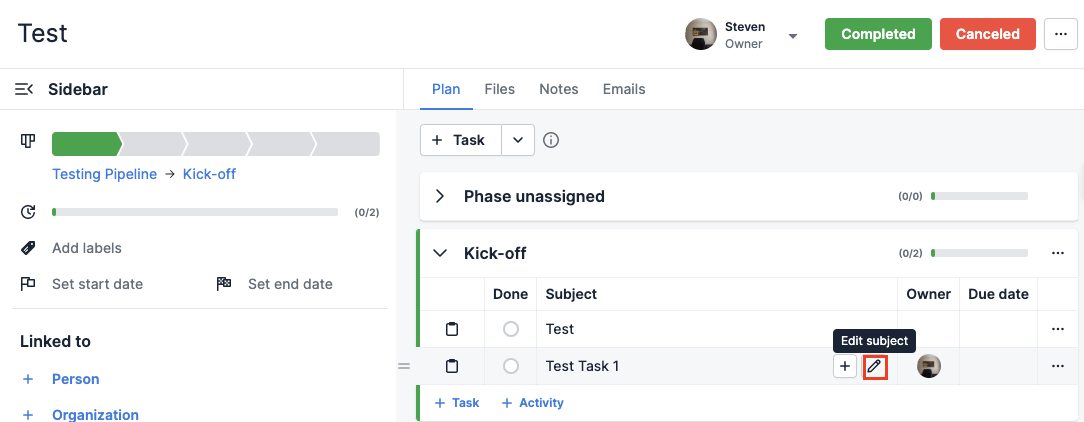
From the phase view, you will be able to edit the subject, owner, and due date, as well as add subtasks by clicking the "+." You can also mark your task as Done by pressing the circle on the left.
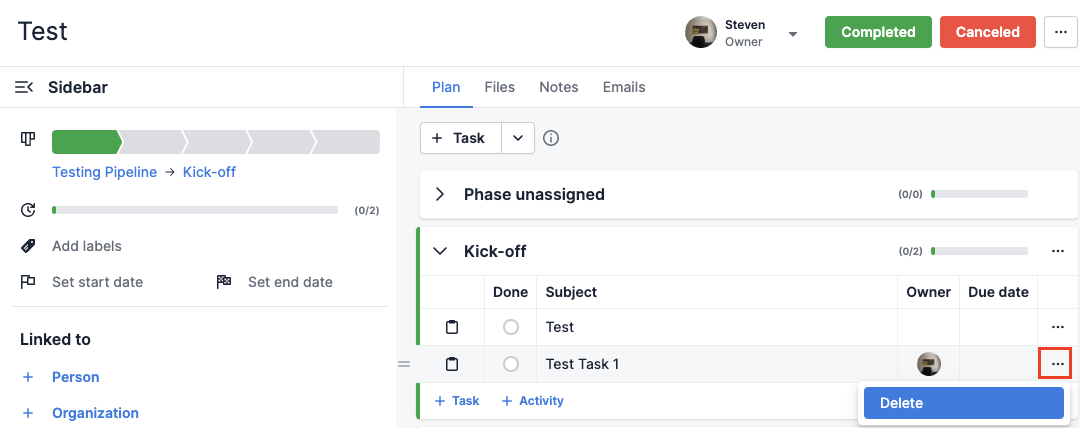
And if you want to delete a Task, just click the "..." to the right of the Task, then select Delete:
Subtasks
While some tasks are straightforward, others are more complex and may require subtasks to be completed.
To create a subtask, click the "+" within any of your existing tasks:

And once you have entered a subject and clicked Save, your subtask will appear beneath the linked task:

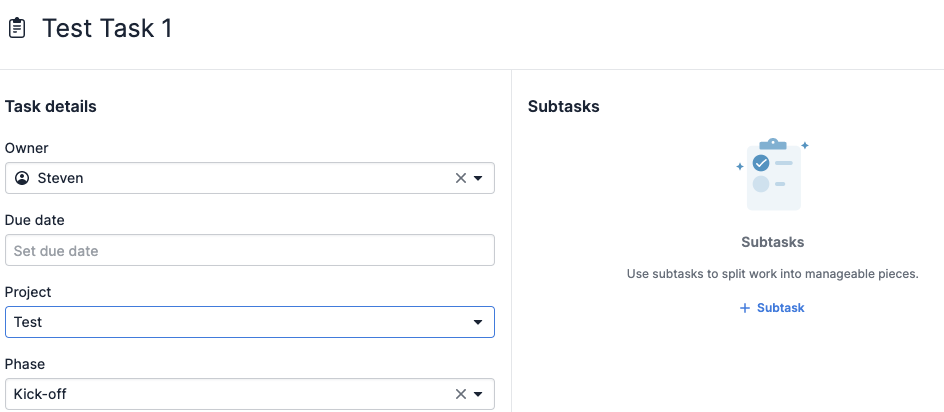
Another way to create subtasks is to click on a task, then create the subtask from within the task's contextual view:
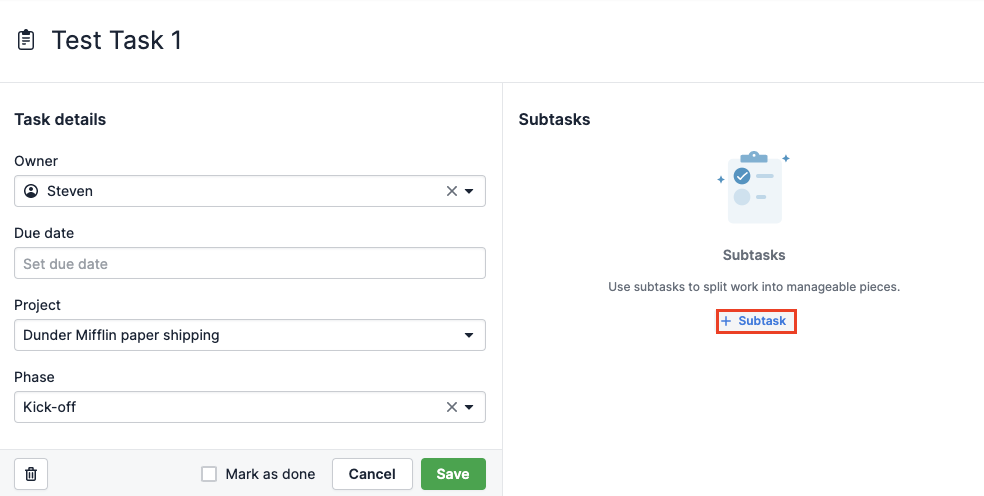
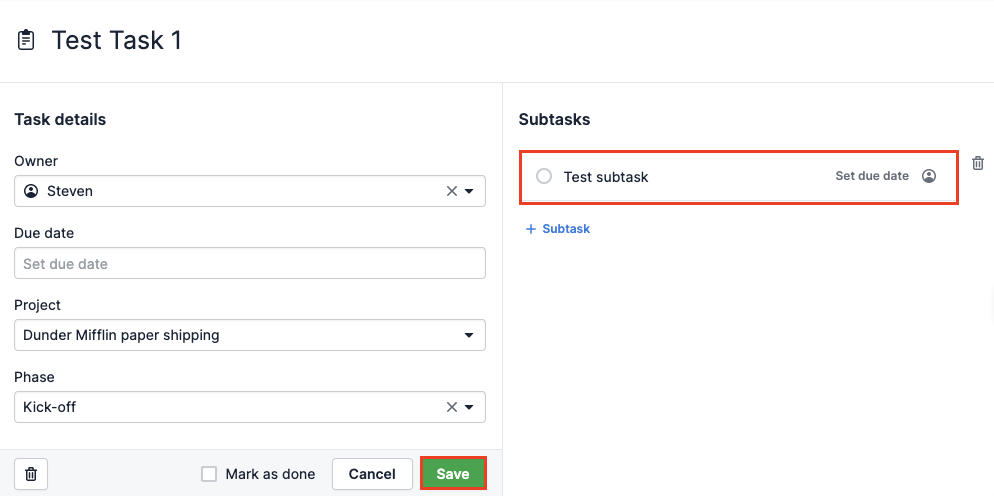
When you click "+ Subtask" you will see a new dialogue box open, where you can add a title and set a due date for your subtask. Then, click Save and the subtask will be added to your task.
Grouping
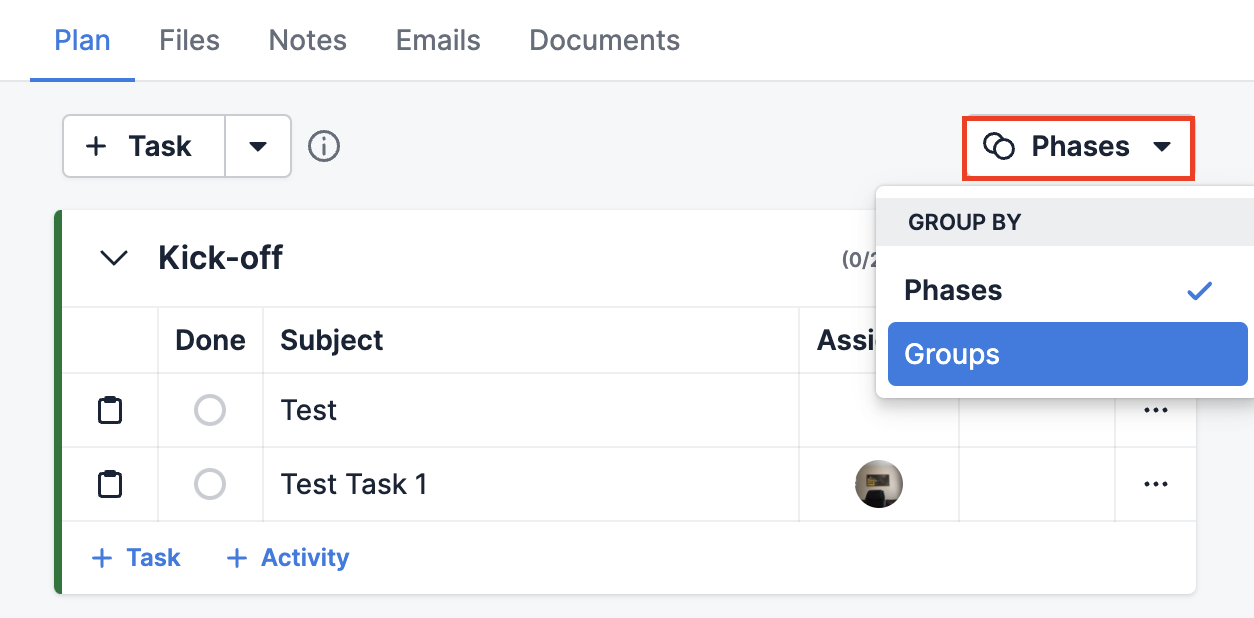
In addition to viewing your tasks, subtasks and activities by phase, you can view these items by group.
To create a new group, click the dropdown box in the top right corner of your project detail view, and select "Groups."
Then click the "+" and add a name:
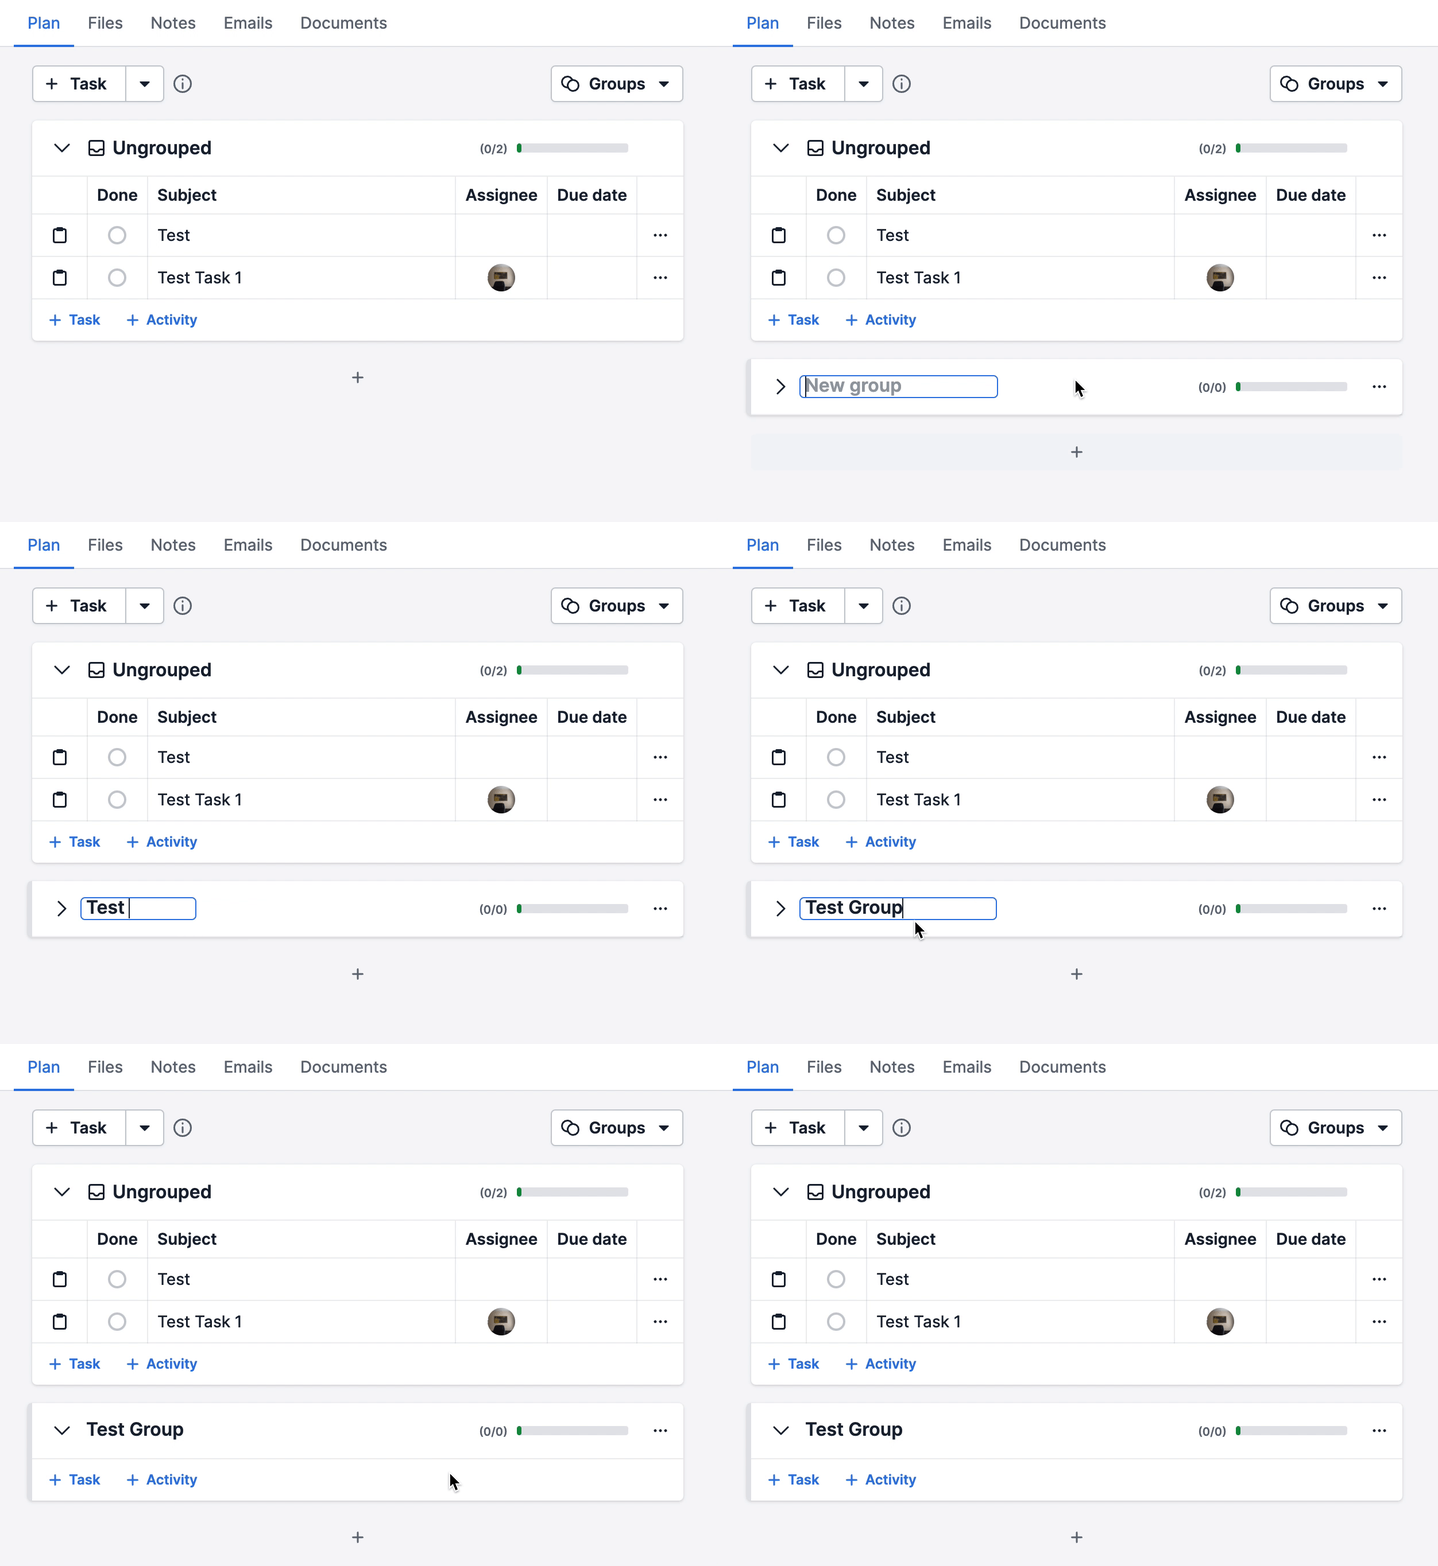
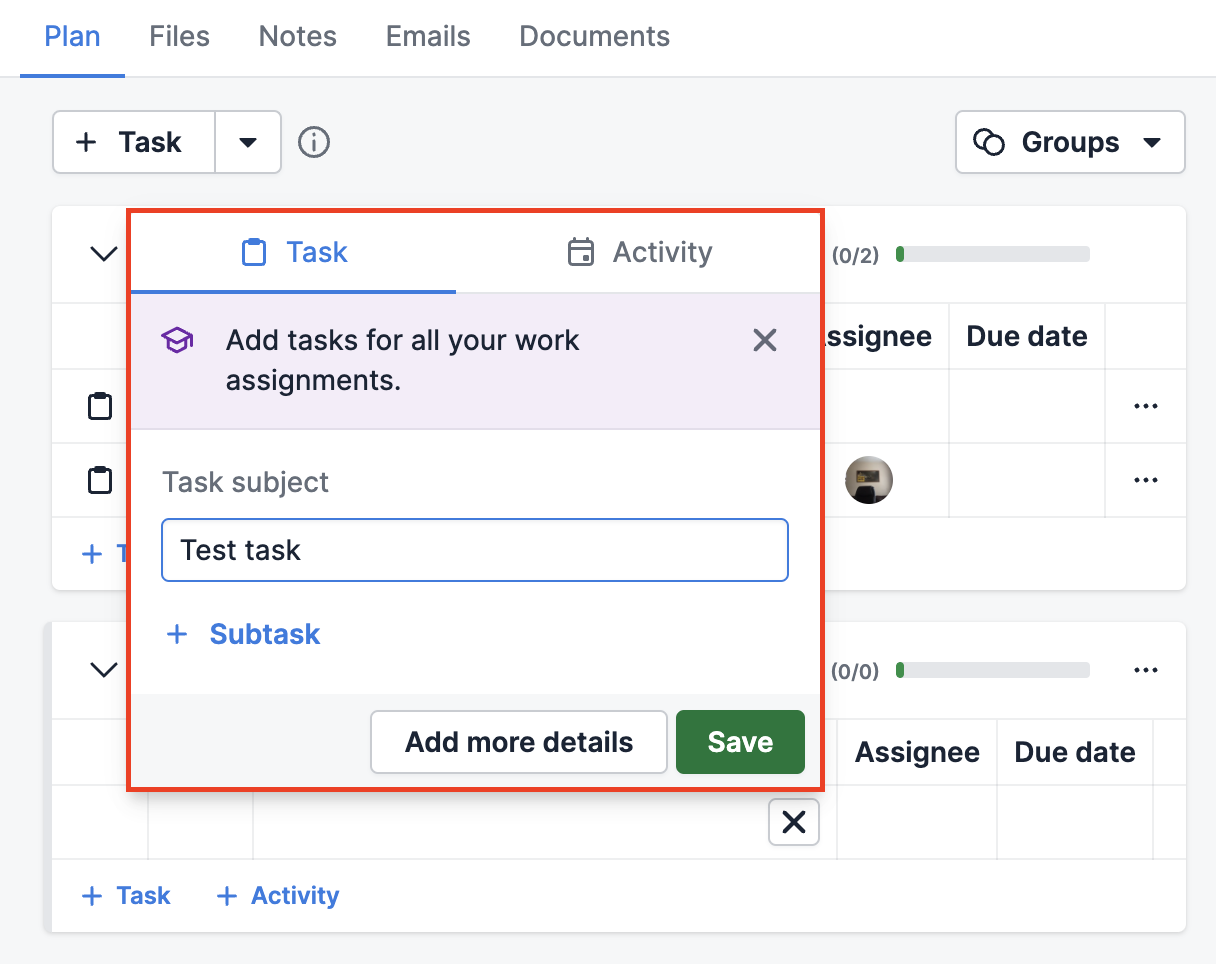
Once your new group is created, you can add new tasks, subtasks and activities to it by clicking the "+" next to those options:
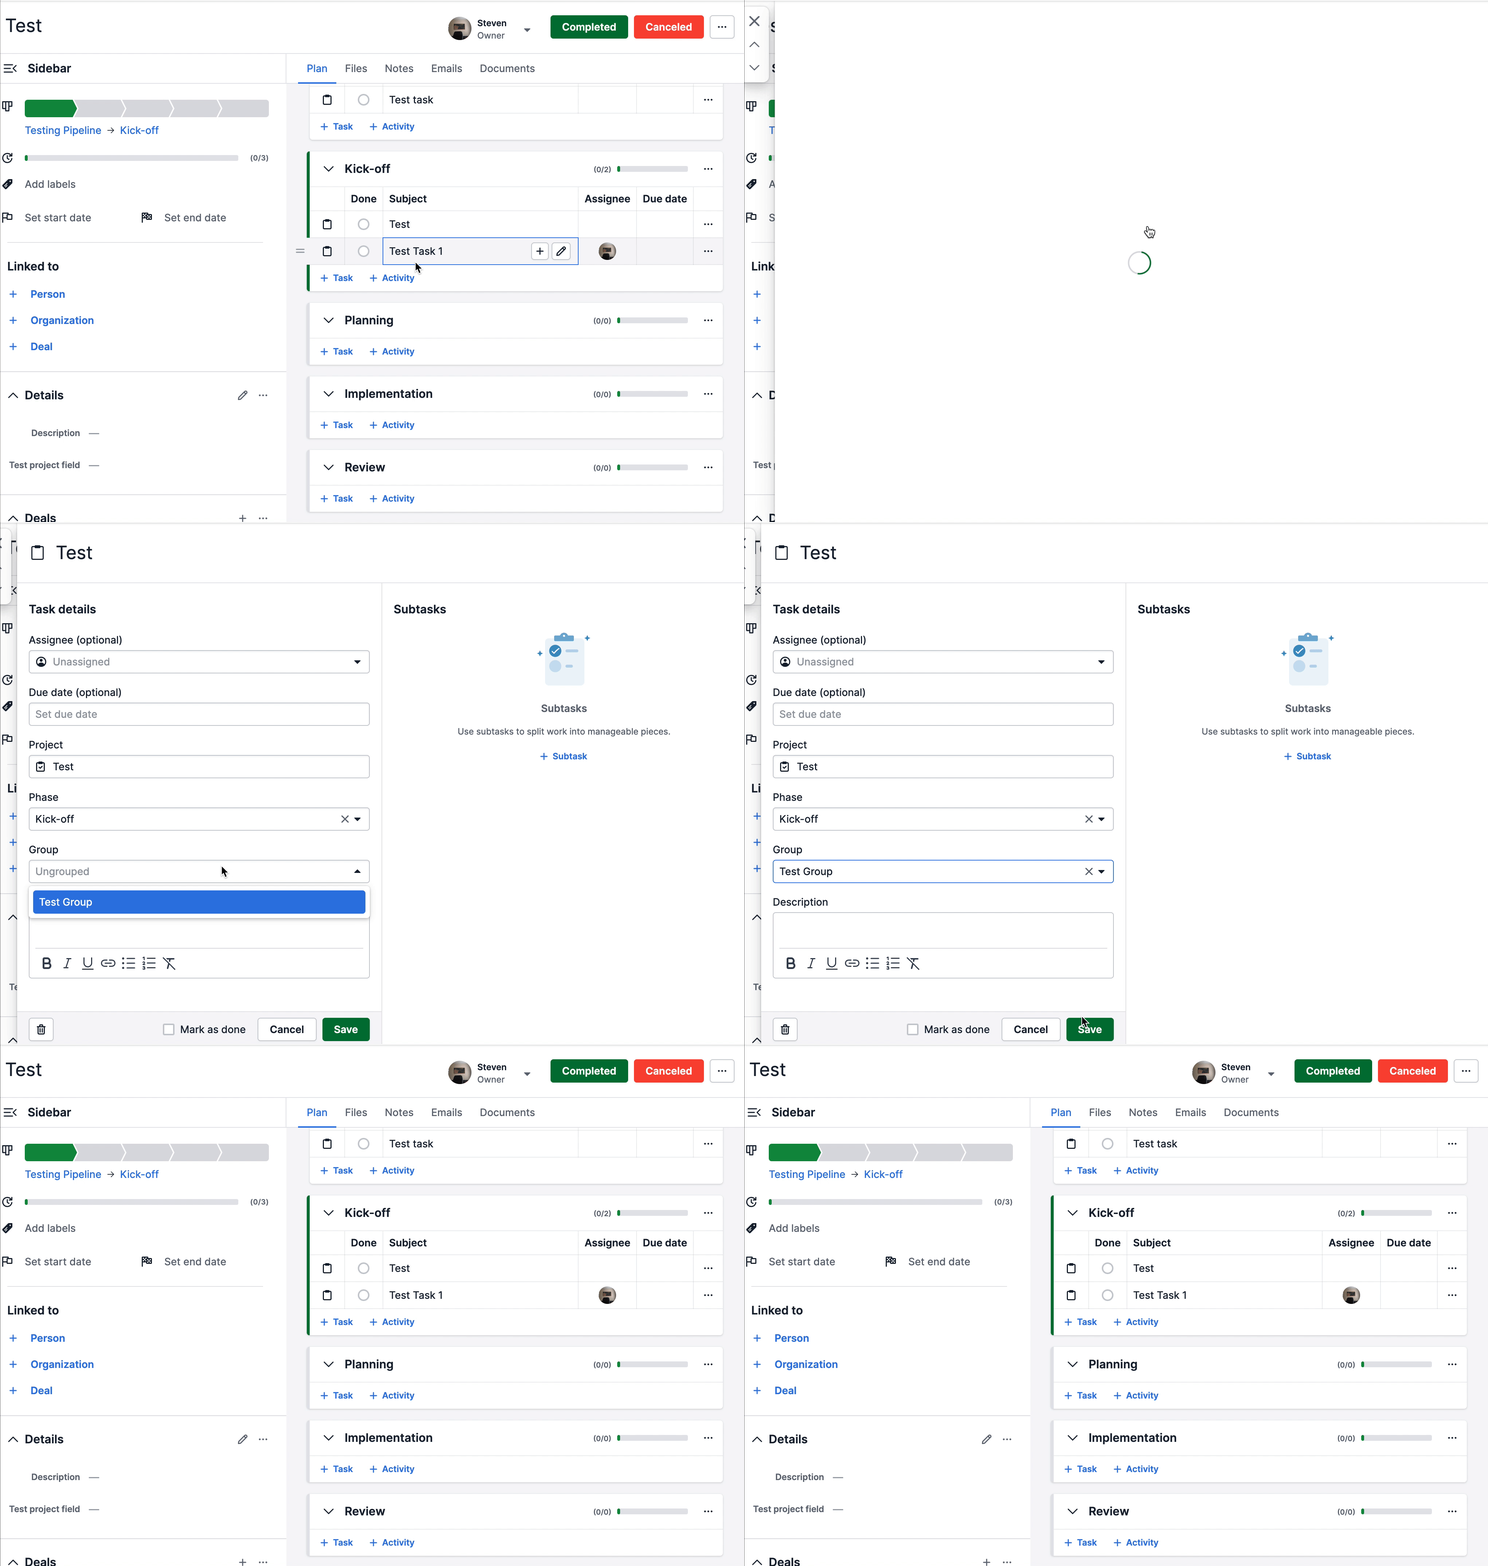
You can also add existing items to your groups by clicking on them in the detail view:
Tasks and subtasks vs activities
Here's a quick guide to the aspects that separate tasks and activities:
Tasks and subtasks | Activities |
| Do not appear on the calendar or activity list view | Do appear on the calendar and activity list view |
| Owner and due date are optional | Owner and due date are required |
| Appear in Projects only | Appear in leads, deals, contacts, and projects. |
| Will not appear in a synced calendar | Can appear in a synced calendar |
Was this article helpful?
Yes
No