Recurring products and installments
Use recurring products and installments in Pipedrive to track predicted revenue for deals that are paid over time.
Recurring products vs. installments
Both recurring products and installments let you predict revenue across a specific billing period. Here are the main differences:
Recurring products | Installments | |
Purpose | Track recurring revenue from subscriptions | Split one-time payments across a period |
Revenue type | Ongoing/ predictable revenue | One-time revenue paid in parts |
Calculates | ACV, TCV, MRR, ARR | ACV, TCV |
You’ll need to create products in Pipedrive before assigning either type to a deal.
The following terms help you understand the revenue values calculated by these features:
Term | Definition |
MRR (Monthly Recurring Revenue) | Monthly revenue expected from recurring products |
ARR (Annual Recurring Revenue) | Annual revenue expected from recurring products |
ACV (Annual Contract Value) | Total value of the deal for 12 months |
TCV (Total Contract Value) | Total value of the deal over the full term |
You define how often the customer is billed and for how long.
Add recurring products to deals
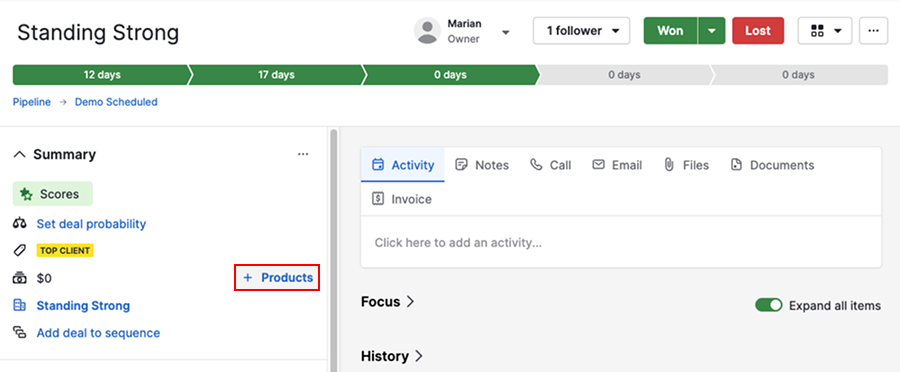
Open the deal detail view and click “+ Products”.
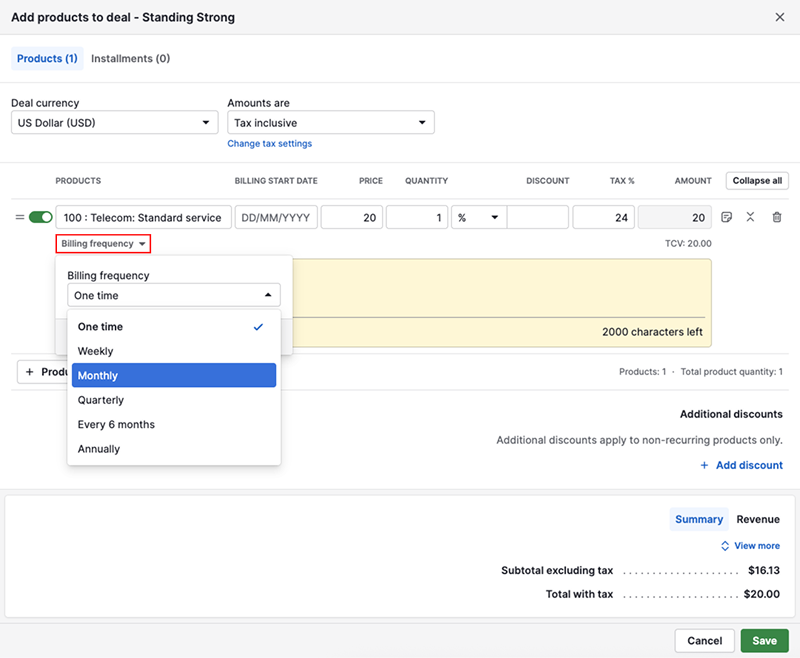
Select a product and choose a recurring billing frequency (e.g., monthly, annually)
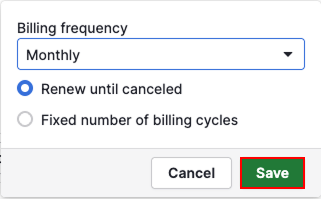
Define whether the product renews until canceled or has a fixed number of billing cycles (up to 208). Save your preference.
Set the billing start date and other details, such as tax or discount, to calculate the total value of the deal.
To preview your upcoming revenue, click “Revenue”.
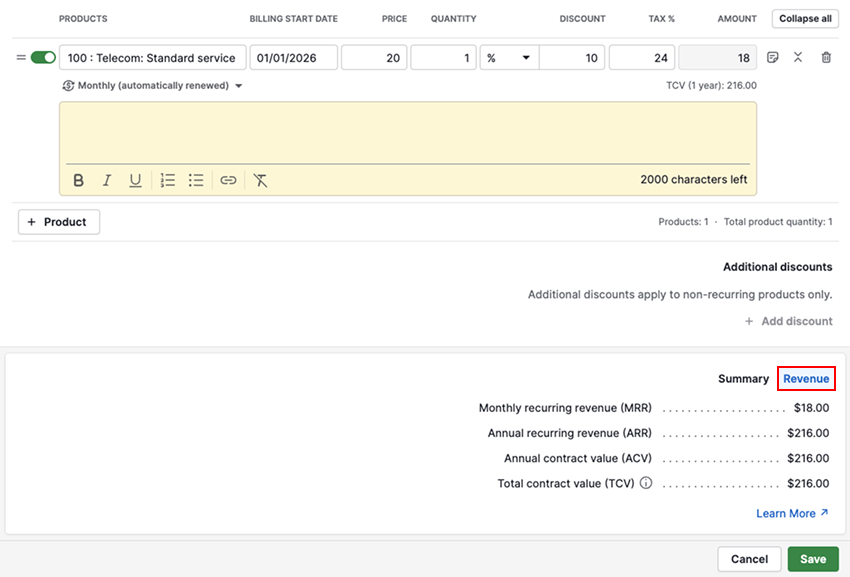
Once ready, click “Save”.
Create proposals for recurring products
Create a Smart Docs template to generate quotes with recurring product data. Product tables in templates automatically include:
- Billing frequency
- Product subtotals (recurring)
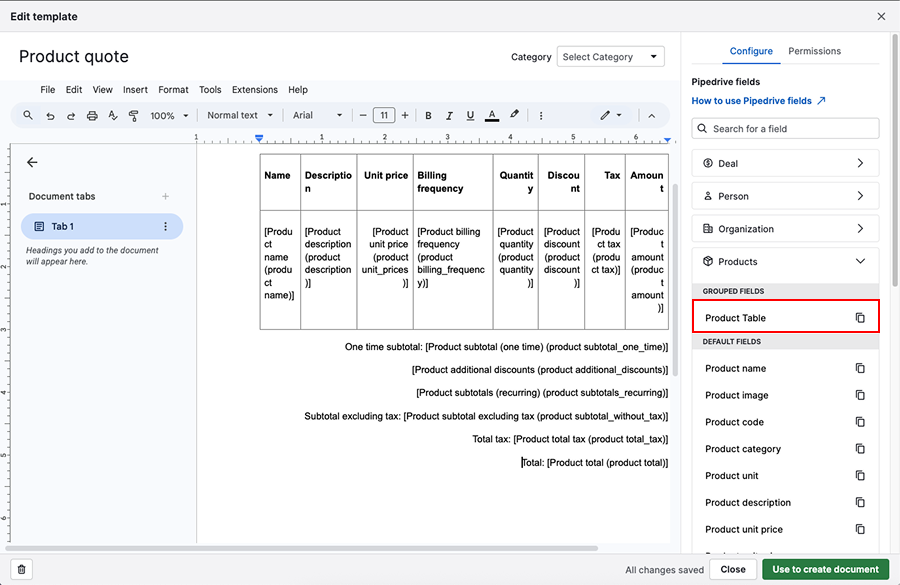
You can remove fields from the table and customize it by copying default fields from the right.
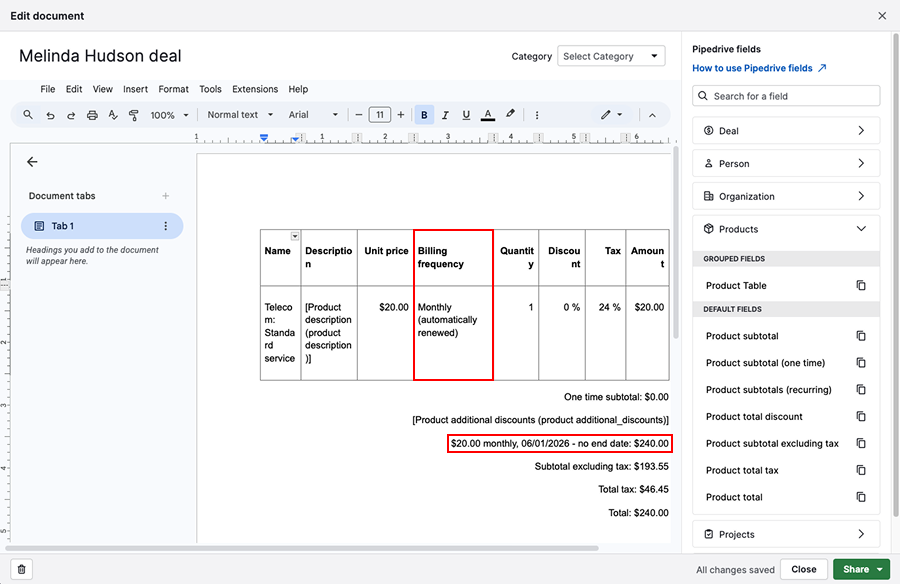
Once you generate the document from the template, the recurring product fields will be filled in with the respective recurring product information.
Add installments to deals
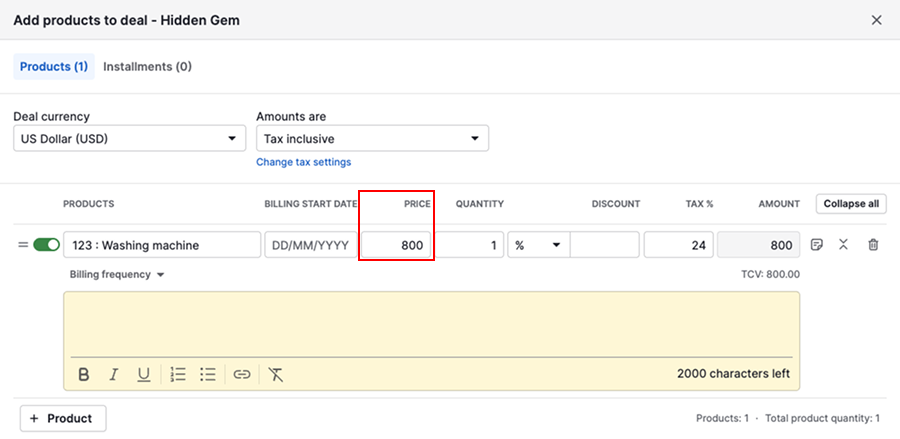
Open the deal detail view, click “+ Products”. Select a product and enter its price if it’s not already set.
Proceed to the installments section and click “+ Add installment” to set up installments. Define the description, billing date and amount for each.
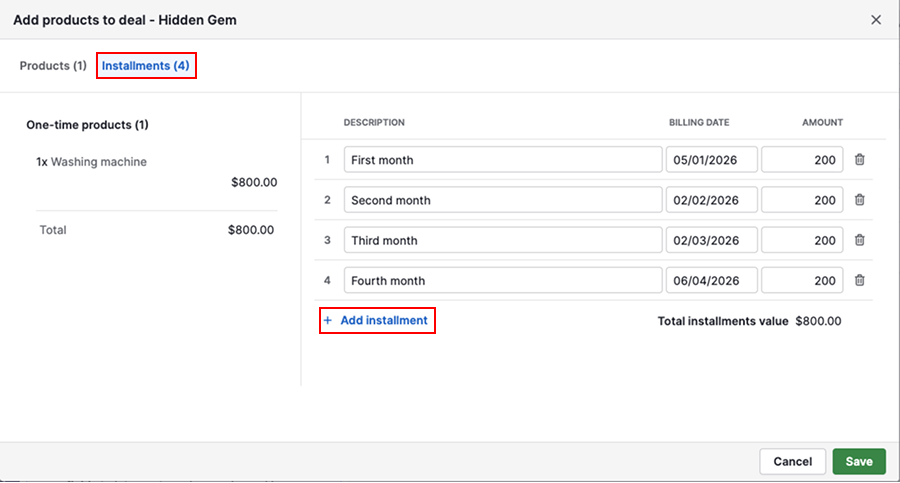
At the bottom of the list, you’ll see the total value considering all the installments entered. Finally, click “Save”.
Why is my installments tab disabled?
There could be a few reasons why your Installments tab is not clickable.
| No one-time products added | Installments only apply to non-recurring products |
| Recurring products active | Installments can’t be added to deals with recurring products |
View predicted revenue
When a recurring product or installment is added to a deal, you can view predicted upcoming revenue in these areas:
Deal detail view
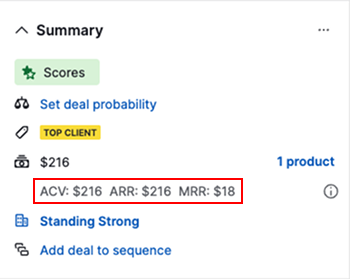
ACV, ARR and MRR are reflected in the summary group.
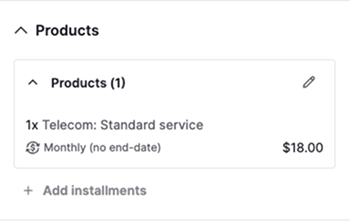
Scroll to the products section for a quick overview of the added product or installment.
List view
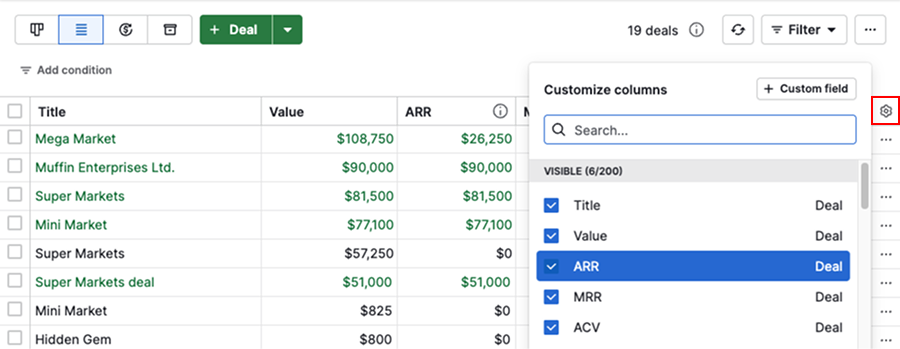
You can add ACV, MRR and ARR columns via the gear icon.
Insights
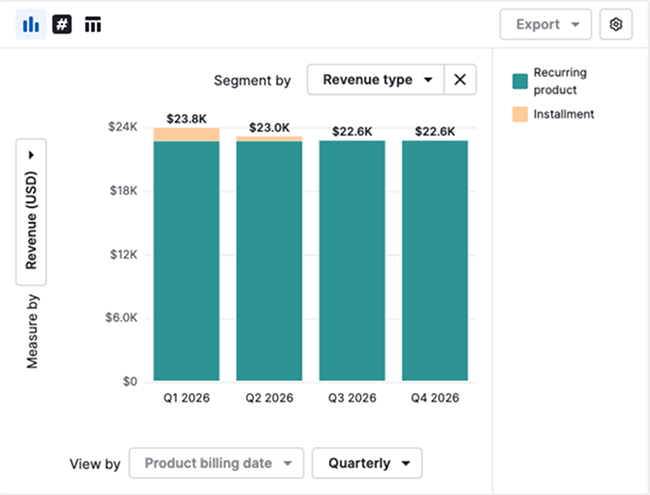
Use the product revenue forecast report to visualize revenue based on billing cycle and billing date data.
Was this article helpful?
Yes
No