Automations: wait for condition
When creating an automation, you always start by choosing a trigger event and an action. The “wait for condition” step allows you to have an action executed within a specific time period, as long as it meets the conditions you’ve defined.
Let’s take a look at some examples to better understand this concept:
Send an email when a deal is created and, as soon as the email is replied to, another email is sent out. If the email is not replied to within three days, then the automation will stop.
Create an activity and, as soon as the activity is marked as “Done”, create another follow-up activity. If the activity is not marked as “Done” within a week, then the automation will stop.
How to configure the “Wait for condition” step
Start creating your workflow as you usually do. If you need help, you can check our automations guide here.
In your workflow, you must have the following:
Trigger > Trigger condition > Action
Once you’ve added the steps above, you’ll be able to add the wait for condition step.
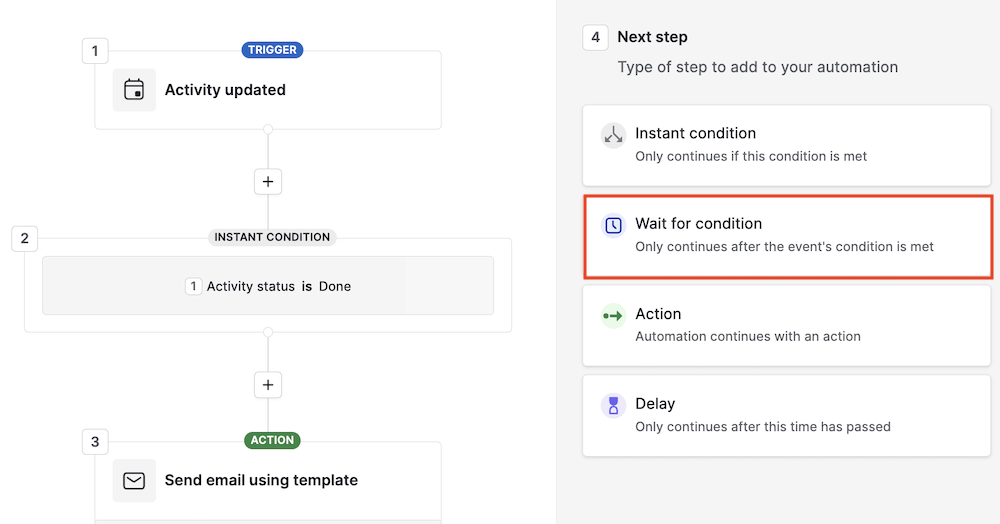
Once clicked, you’ll need to define the conditions for this step that need to be met before the automation moves to the next step.
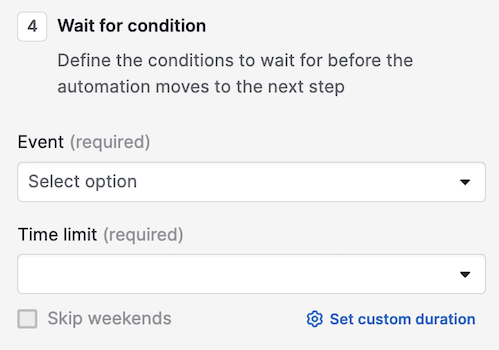
Events
The event will allow you to select a trigger or action – with the respective conditions – available in previous steps.
You can add a wait step for the following actions:
- Person
- Organization
- Deal
- Lead
- Activity
- Project
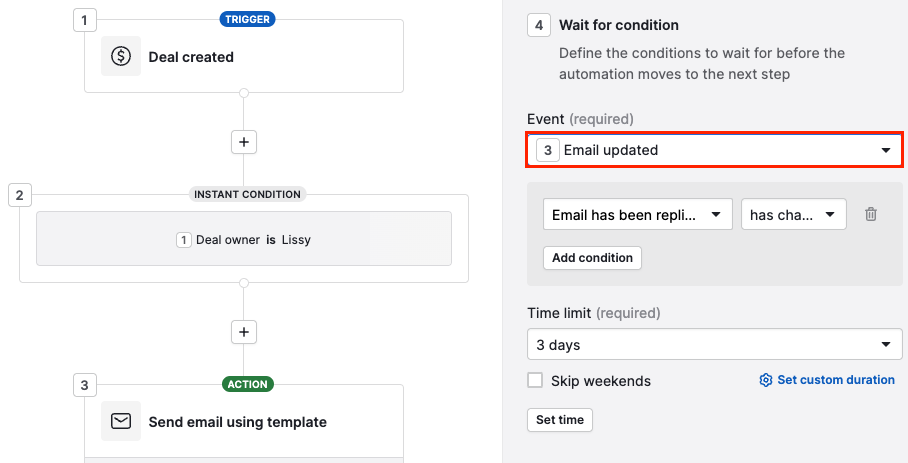
Time limits
The time limit will allow you to input a specific time range until the event and conditions are checked. You can select one of the predefined time frames from the dropdown or set a custom duration for granularity.
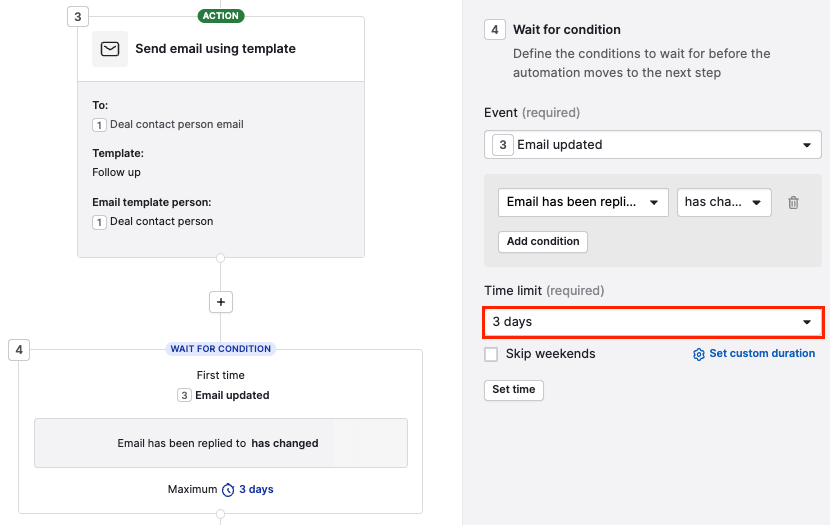
Once you save the wait for condition step, you can continue adding other steps.
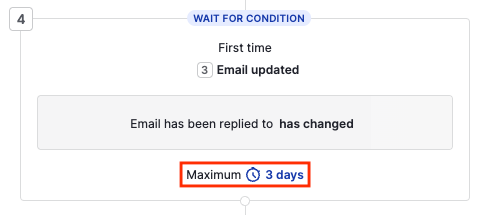
In the screenshot above we illustrate that, once the email has been replied to for the first time, the automation will continue to the next step in the workflow. This will only happen if the conditions are met in a maximum of three days.
The automation execution will appear as pending while the conditions are not met or time is not expired.
Pending executions
In this changing world, you might activate a workflow with a wait for condition step with a 7-day time limit then the context might change, or create a workflow with the wrong email template. Then, you’ll need to update the automation configuration to meet the new reality.
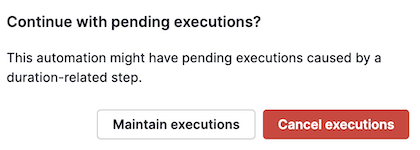
In this case, if you edit an active workflow and then resave it, you’ll have to decide if the pending executions in this step should be kept or canceled.
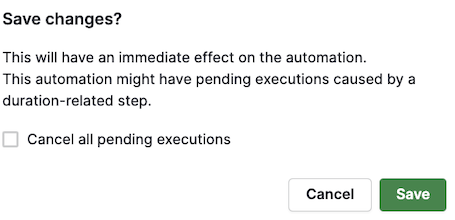
If you need to deactivate an automation, you must also decide whether to maintain the current executions or cancel them entirely.
Execution history
The automation history feature lets you view a record of the actions performed by your automation. For the wait for condition step there are three execution statuses available.
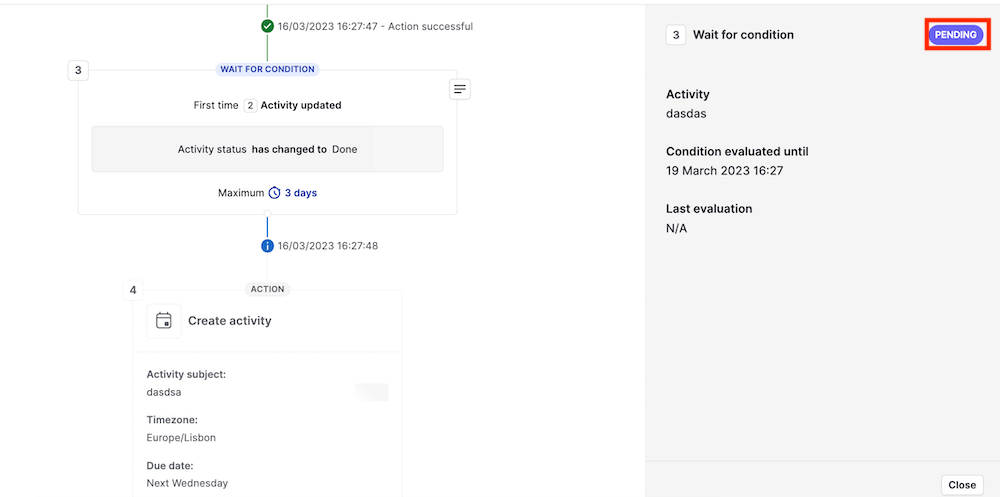
Pending
This status appears when the step is within the specified time limit but the conditions have not been met.
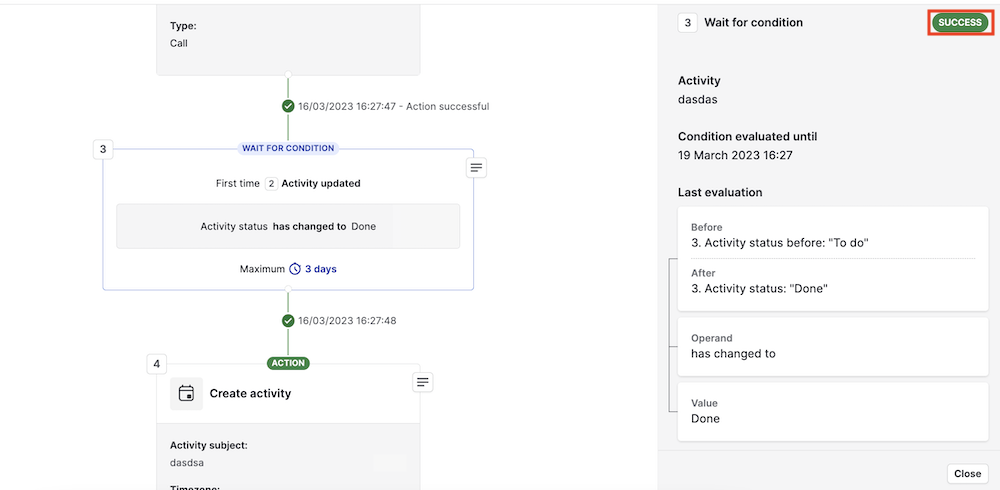
Success
This status appears when the wait for condition step is executed, as the conditions have been met within the specified time limit.
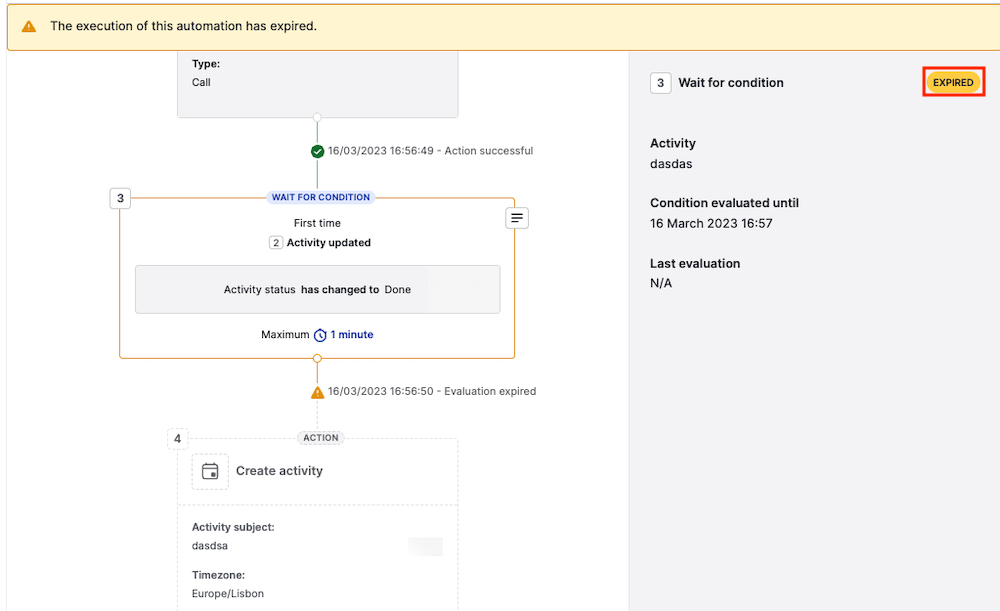
Expired
This status appears when the automation is stopped, as the time limit expired and the conditions didn’t match within the specified time limit.
Learn more about the automation history feature in this article.
Was this article helpful?
Yes
No