Pipedrive integration: Zendesk
Zendesk is a customer service solution designed to help support, sales and customer success teams engage with their customers better.
The app offers a variety of products depending on your company needs. Pipedrive’s integrates with Zendesk Support to help your salespeople determine who to contact and when. The integration also provides support agents with further information about their customers.
Looking for your next CRM? Pipedrive is here for you. Let’s have a chat and we’ll guide you through the move.
Set up the integration
In Pipedrive
- To set up the Zendesk integration with your Pipedrive account, follow this link (or go to the Pipedrive Marketplace, search for Zendesk) and click on “Install now”.

- Choose which Pipedrive account you wish to connect to. Then, click “Allow and install”.
- You’ll be directed to a new page. There, enter your Zendesk domain and click “Authenticate with Zendesk”. Then you’ll be directed to a new page to grant Pipedrive access to your Zendesk account. Click “Allow”.
- When the installation is successful, you’ll be directed to your Pipedrive account.
In Zendesk
- To finish the installation, open the Pipedrive app page on Zendesk or go to the Zendesk Marketplace and search for “Pipedrive”. Once you’re on the app listing, click “Install” in the upper-right corner.
- In the new window, select the Zendesk account to which you wish to connect the app and click “Install”.
- If you’re not logged in to your Zendesk account, you’ll be directed to a new page where you need to enter your credentials. Otherwise, you’ll be taken to the Zendesk Support apps page.
- Review the Pipedrive app details and click “Install”. Pipedrive and Zendesk have now connected and verified your account.
Sync Pipedrive and Zendesk
Pipedrive
Conversations are synced by the person’s email address and visible under all three linked entities: deals, people and organizations.
Upon installation, the Zendesk Support integration will be displayed as a section on the left side of your Detail View.
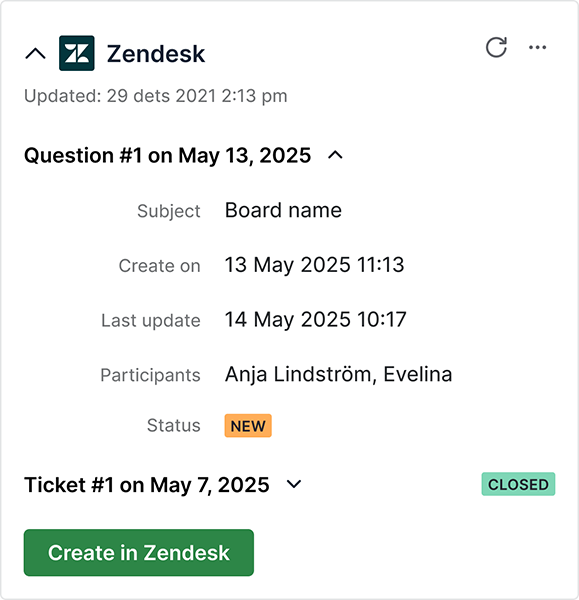
This section displays up to 20 Zendesk tickets. The status of each Pipedrive ticket is displayed as it is in Zendesk Support. To view the ticket itself, click on the “Subject” to be redirected to the ticket in Zendesk.
If there are no tickets linked to the contact, the integration will inform you about it.

Zendesk Support
The Pipedrive widget is available on the right-hand side within individual tickets.
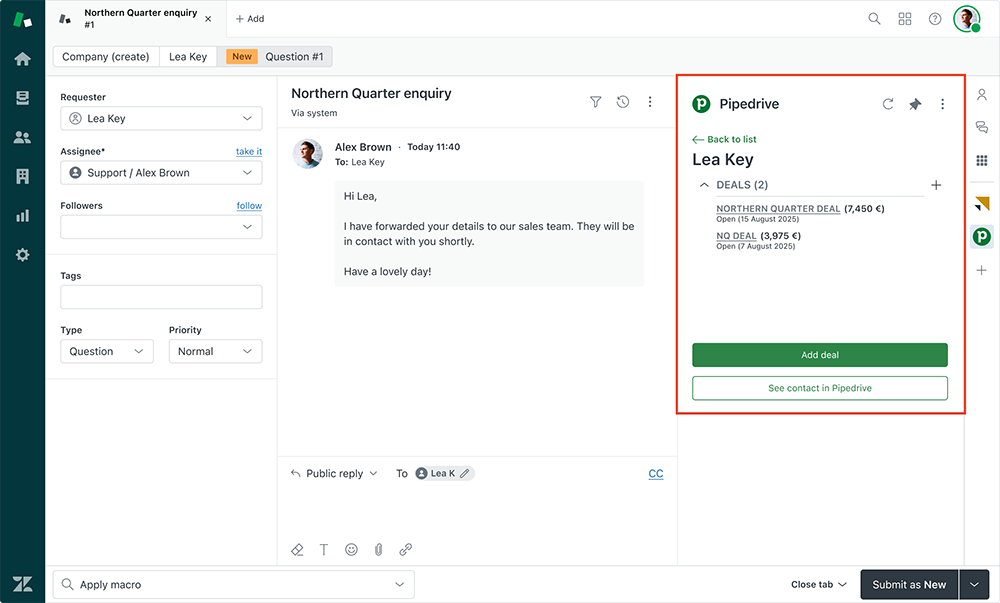
In this widget, Zendesk users will be able to see:
- Deal title and status
- Deal value and its currency
- Deal creation date
To view the deal in Pipedrive, click on the deal title and to see contact details, click on the button “See contact in Pipedrive”.
If there are no deals linked to the Zendesk contact, the widget will inform you about it.
New Zendesk ticket from Pipedrive
For a smoother workflow, you can create Zendesk tickets directly from the Pipedrive detail view. Simply click the “Create in Zendesk” button.
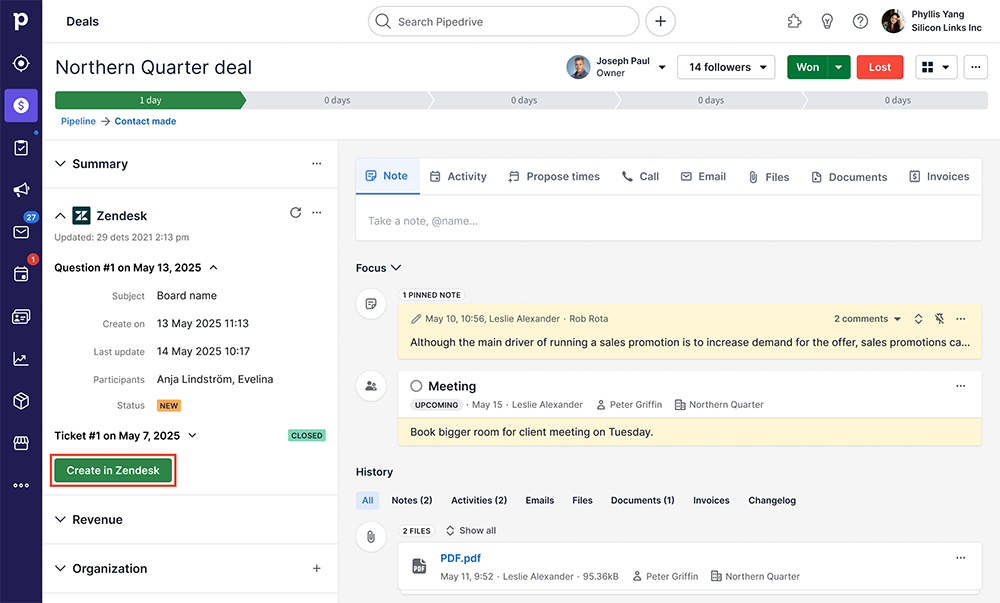
In the modal window, enter a required comment and, if needed, add an optional subject for the new ticket.
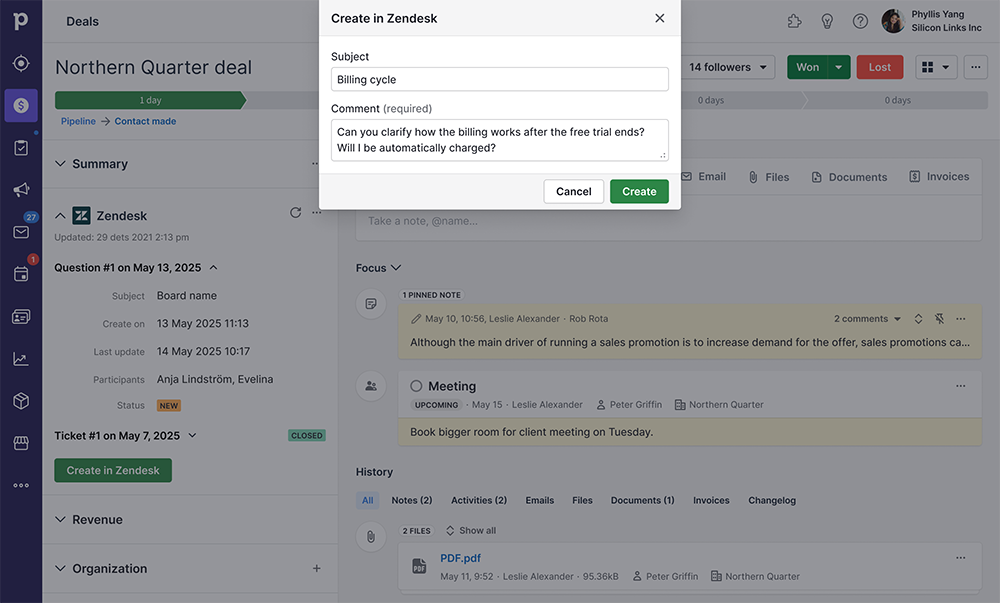
When you’re ready, click “Create” to finish. The new ticket will then appear in Zendesk.
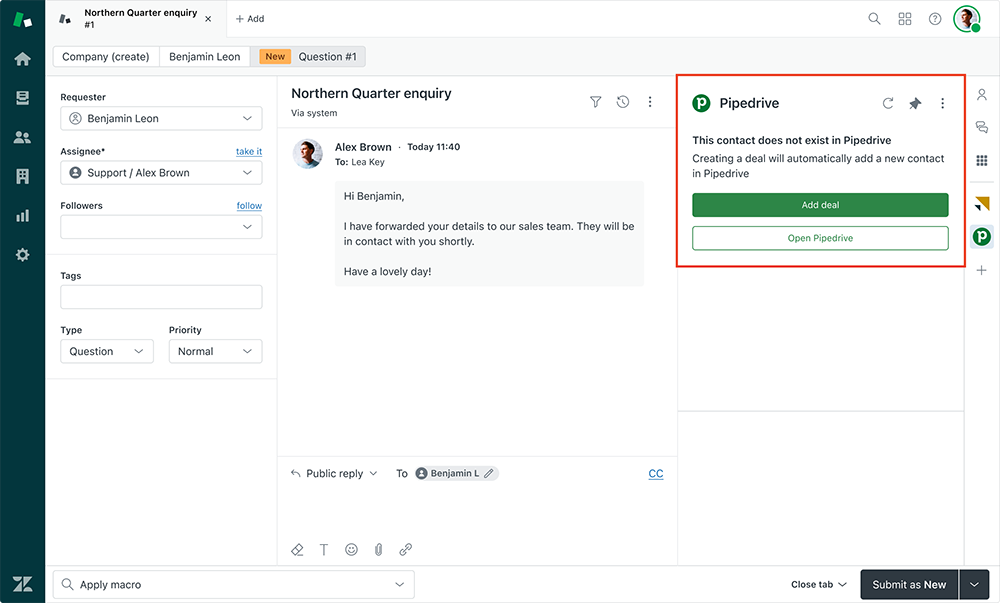
New Pipedrive deal from Zendesk
You don’t need to go to Pipedrive to create a new deal. Simply click “Add deal” in the right-hand panel in Zendesk.
In the modal window, enter the deal title, select a pipeline and its stage, then click “Create”.
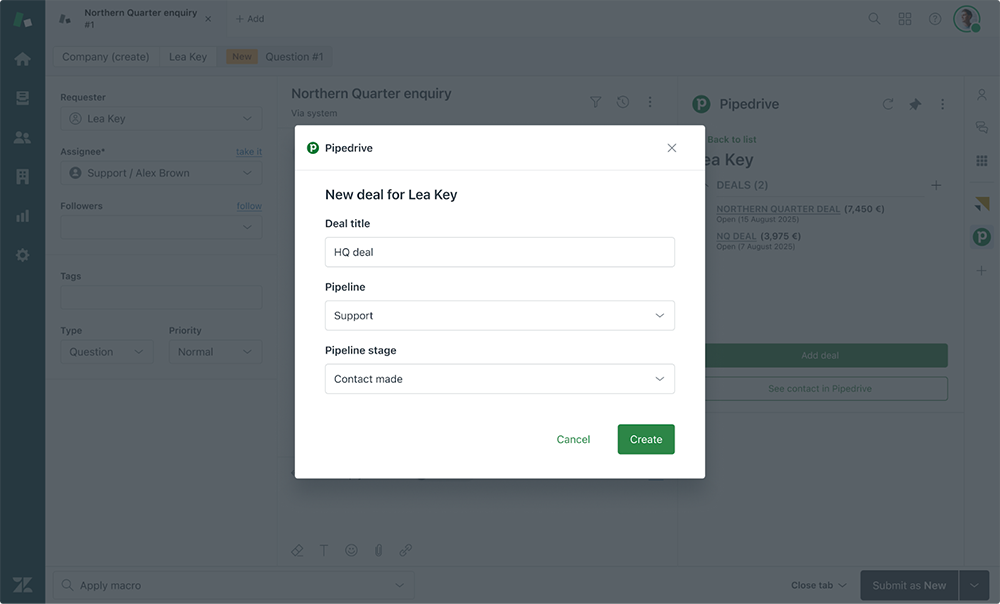
The new deal will appear in Pipedrive as soon as the steps are completed.
Was this article helpful?
Yes
No