Smart Docs
Smart Docs helps you create proposals, quotes and contracts directly from your deals and contacts. Your documents automatically fill with data from your Pipedrive account, so you don‘t have to manually copy and paste information.
With Smart Docs, you can:
- Create documents from templates
- Automatically insert deal, contact, product and project data
- Share documents using trackable links
- Be notified when recipients open the documents
- Request legally binding eSignatures
Connecting to a cloud storage provider
Before creating documents, you need to connect to your cloud storage provider.
Smart Docs supports:
- Google Drive
- Microsoft OneDrive
- SharePoint
Connecting from a deal or a contact
Open a deal or contact detail view, click the “Documents” tab, then “Connect cloud storage”.
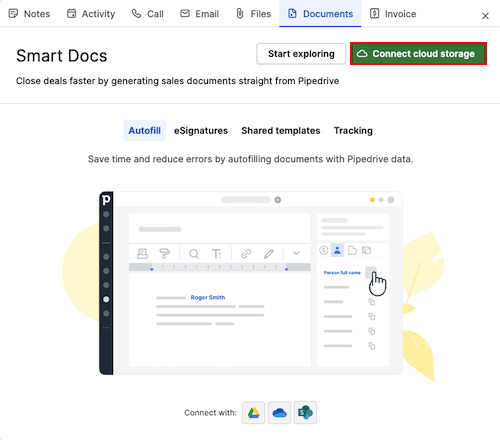
You‘ll be asked to grant Pipedrive access to your storage account.
Once connected:
- You can upload existing files
- New documents will automatically save to your selected drive
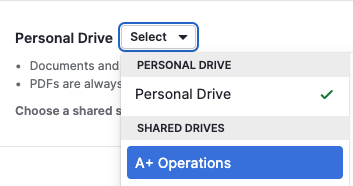
After connecting, you can choose a personal or shared drive as your storage location.
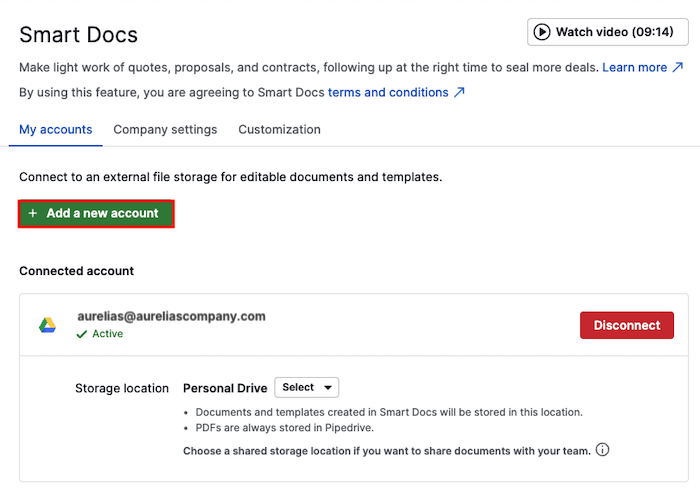
Connecting from settings
You can also manage your connection by going to Tools and apps > Documents and clicking “+ Add a new account” to connect another provider or “Disconnect” to remove access.
You can learn more about how files are stored in this article.
If you experience issues connecting or re-authenticating Google Drive:
- Go to your Google Permissions
- Remove Pipedrive access before trying to connect again
- If the issues continue, contact our support team for assistance
You can also set up a default shared drive for your account.
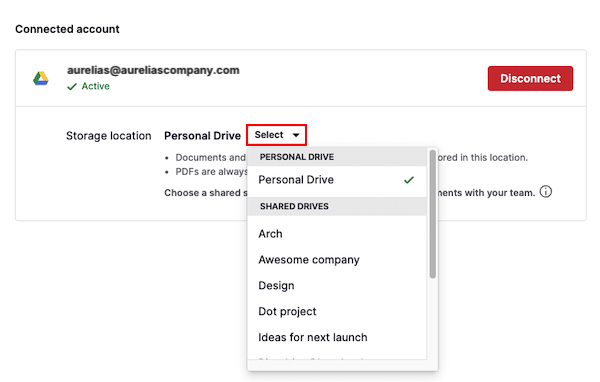
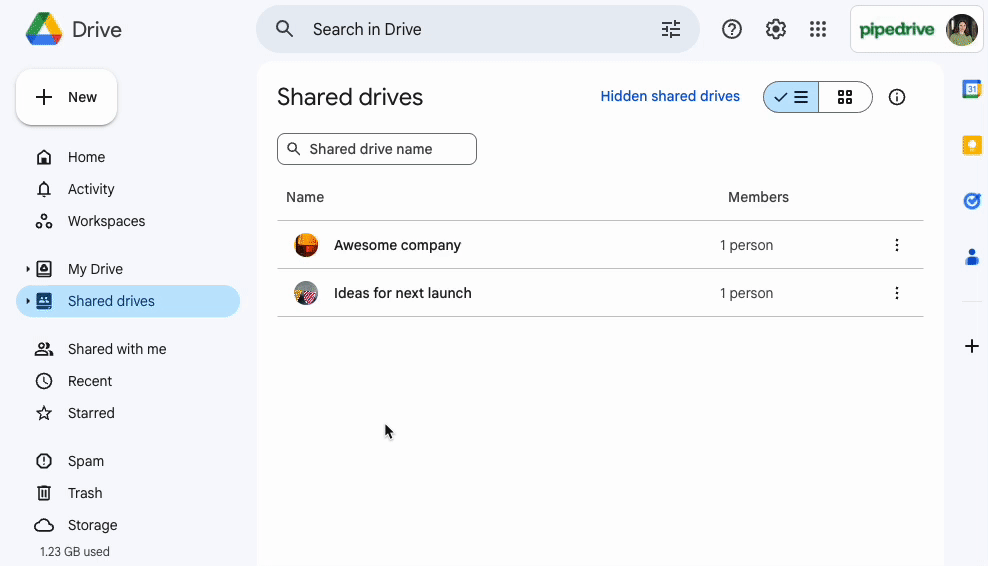
Using shared drives on Google Drive
When you connect Google Drive, Smart Docs automatically assigns a default shared drive folder for your company. You can also select another or create a new one.
To create a new shared drive, open your Google Drive account, go to the Shared drives tab, then click “+ New”:
Once you’ve created your new shared drive in Google Drive, navigate to Tools and Apps > Documents and select the new shared drive for use with your Smart Docs:
Working with templates
Templates help you save time by reusing the same structure across multiple documents.
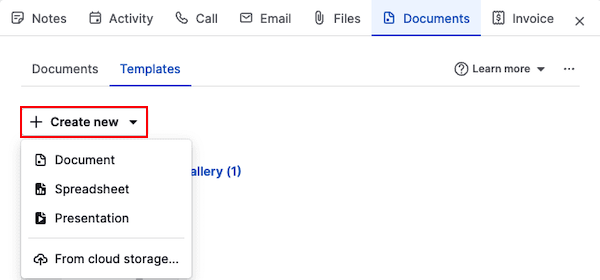
To create a template from scratch, open a deal or a contact detail view, then click “Documents” and go to the Templates tab. Click “+ Create new” and choose Document, Spreadsheet or Presentation.
You can also import a template from your provider if you already have one saved.
Editing templates and adding fields
When in the template editor, you can:
- Update the template’s name
- Assign a category
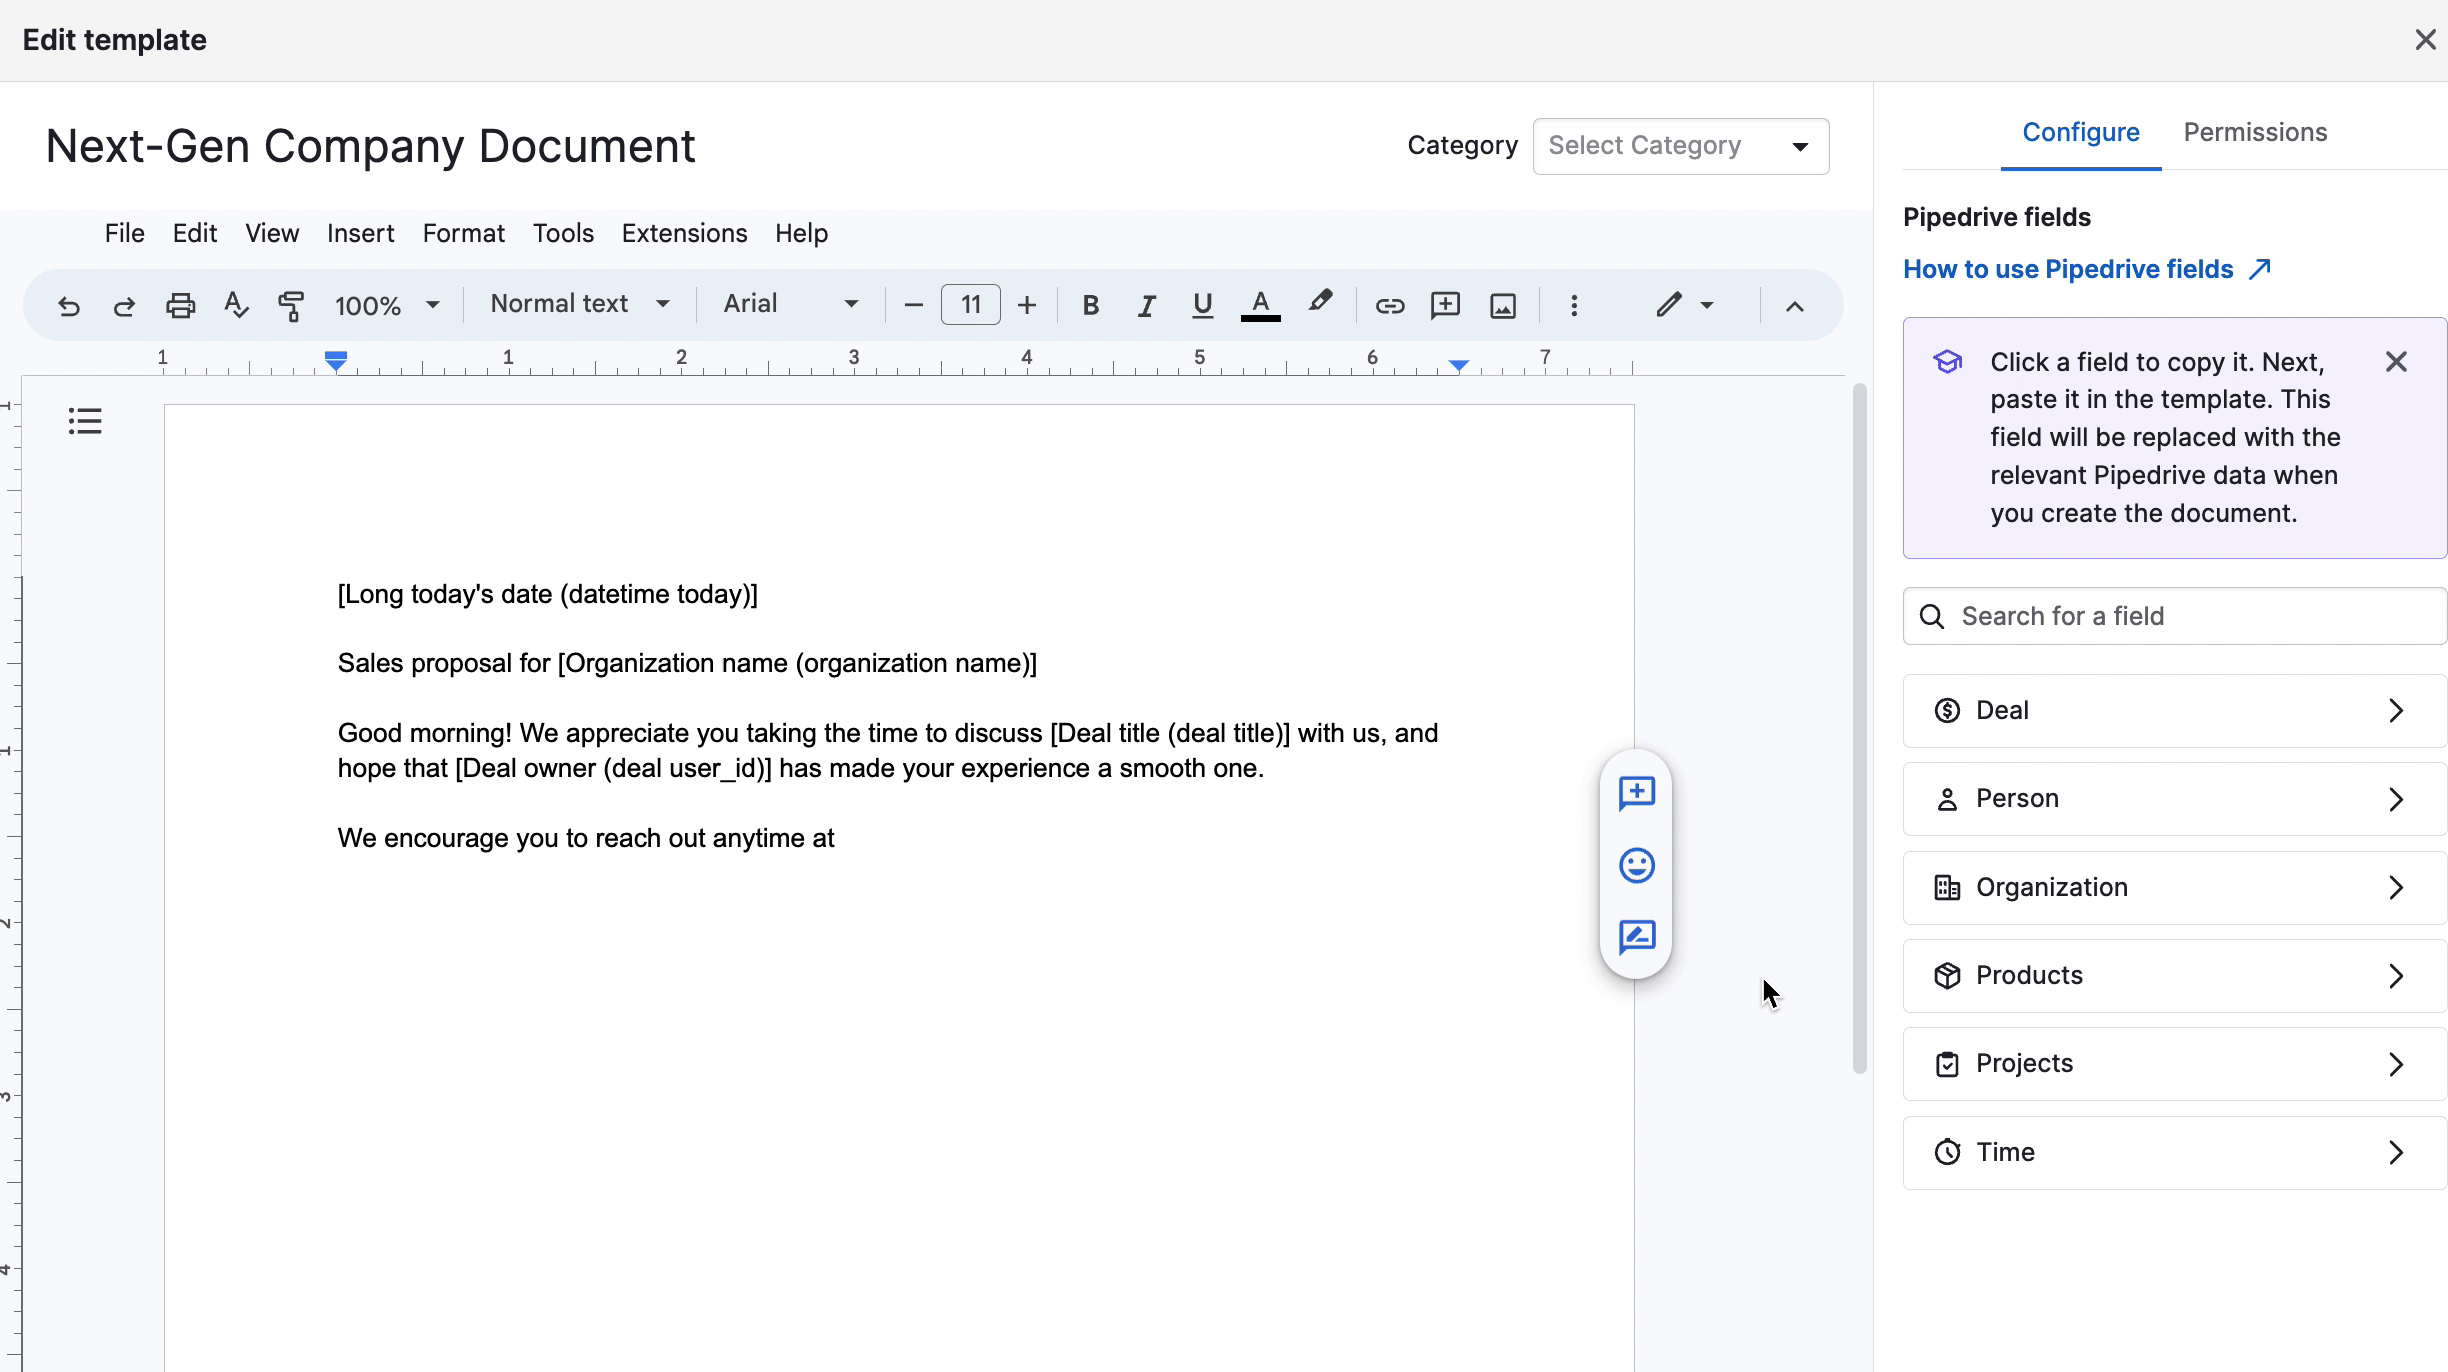
- Add any Pipedrive field (deal, contact, product, project, or time-based) to automatically fill in your template‘s content.
To insert a field into your template:
- Copy the field from the right-hand panel
- Paste the field into the template body
The field will show in brackets like this: [Deal title (deal title)]
When you create a document from the template, Smart Docs automatically replaces the brackets with real data.
Once you have finished editing your template, click “Close” to save it or click “Use to create document” to immediately generate a document with your newly created template.
Learn more about fields and templates in Smart Docs from this article.
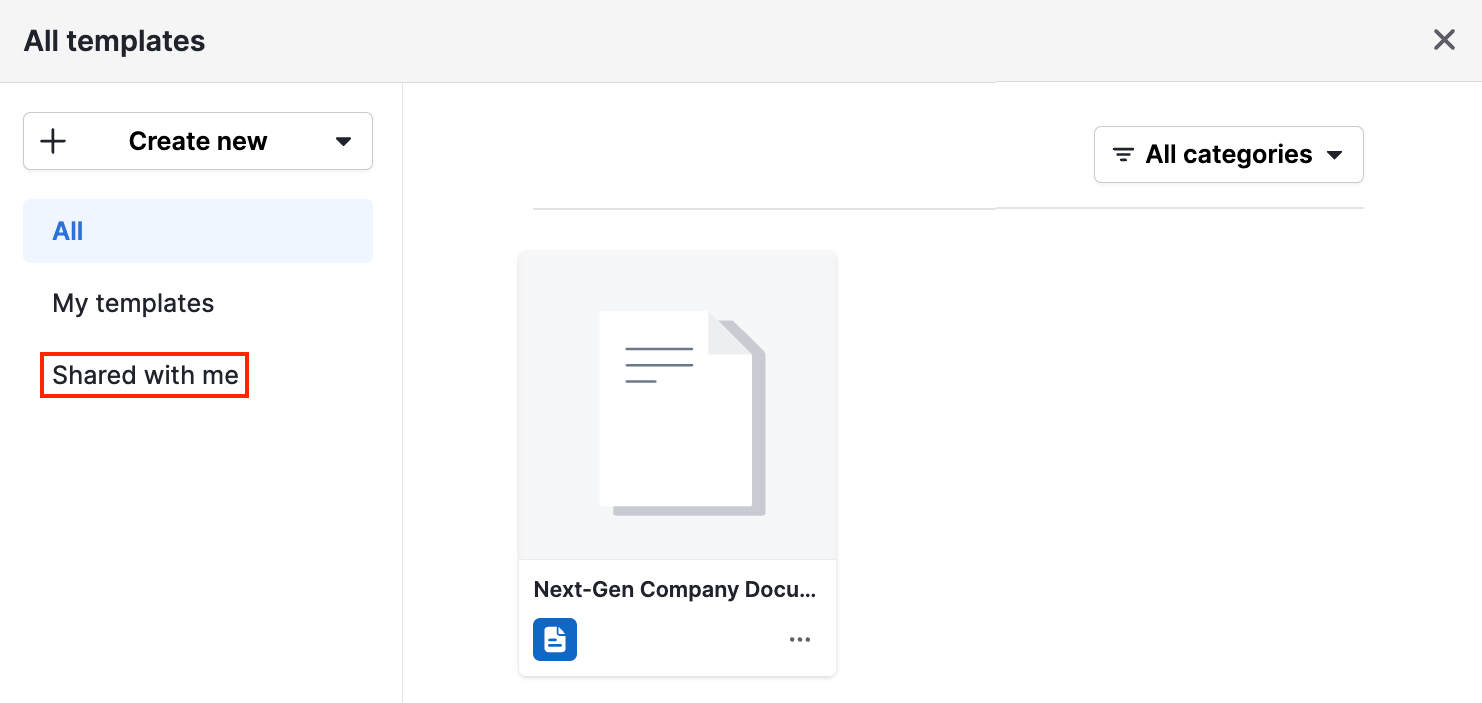
Sharing templates with your team
You can use advanced template sharing to automatically share the template with other users in Pipedrive. To share a template, open it up for editing and click on the “Permissions” tab. There are two different permission levels:
- Can use this template – Users can view and use the template to create new documents, but can’t edit or delete it.
- Can edit this template – Users can view, use, edit and delete the template.

Shared templates appear under the Shared with me section of the template gallery.
Creating a document
To create a document:
- Open a deal or contact in the detail view
- Click the Documents tab
- Choose one of the following:
- Create from a template
- Create a blank document, spreadsheet or presentation
- Upload a file from your device or from cloud storage
You can upload files from:
Your device
Google Drive
OneDrive
SharePoint
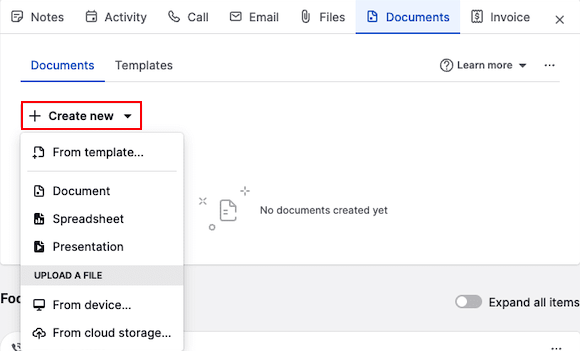
From a template
To create a document from an existing template, click “From template” and select the template you wish to use.
The document editor will appear, with all fields automatically filled in.

From there, you can:
- Rename the document
- Change its category
- Edit the content according to your preferences
Changes save automatically as you work on the document.
How field population works
If you want deal-specific data to populate automatically, create the document from the deal detail view.
If you want person-specific fields to populate automatically, create the document from the deal or contact detail view.
Viewing and sharing a document
Google Drive
If you click the “Share” button in the document editor, you can share it, request signatures, or download it as a PDF.
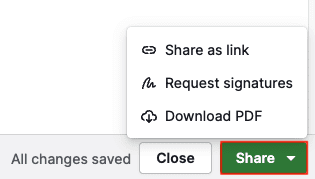
- Share as link – Generate a link to a read-only PDF version of this document.
- Request signatures – Request e-signatures from the document recipients.
- Download PDF – Save your document locally.
OneDrive and SharePoint
To share your document, you’ll first have to close your document editor and click the “...” button on the document created on the detail page.
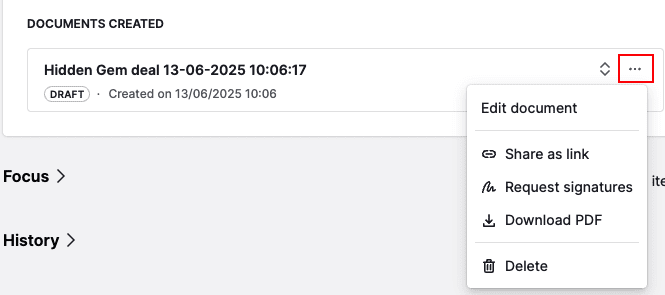
From there, you can create a shareable link.
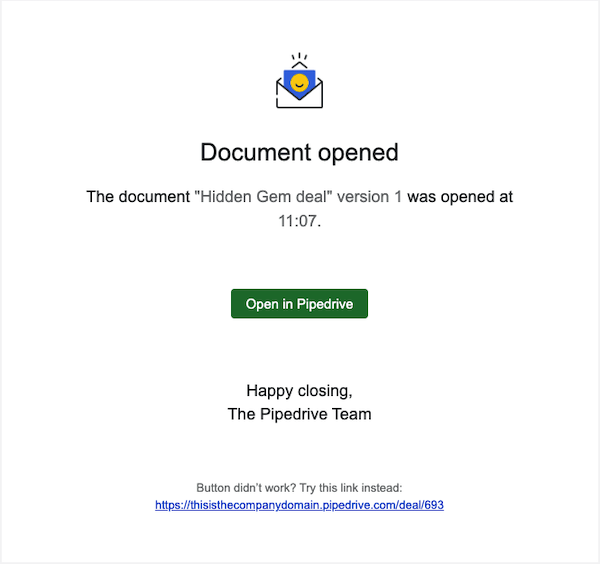
Tracking document views
When generating a link, you can enable view tracking and choose to receive email notifications when someone opens it.
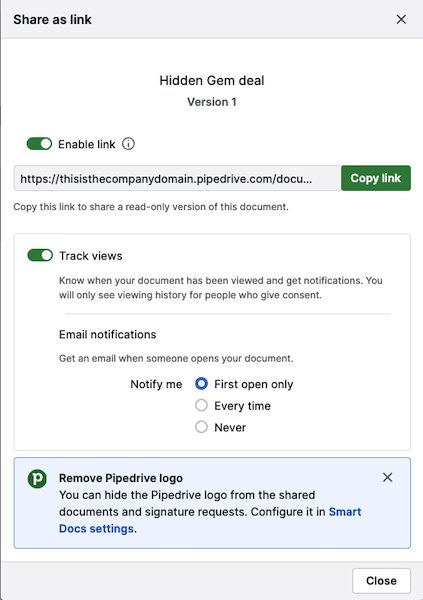
You can receive email notifications:
- The first time the document is opened
- Every time it‘s opened
- Never
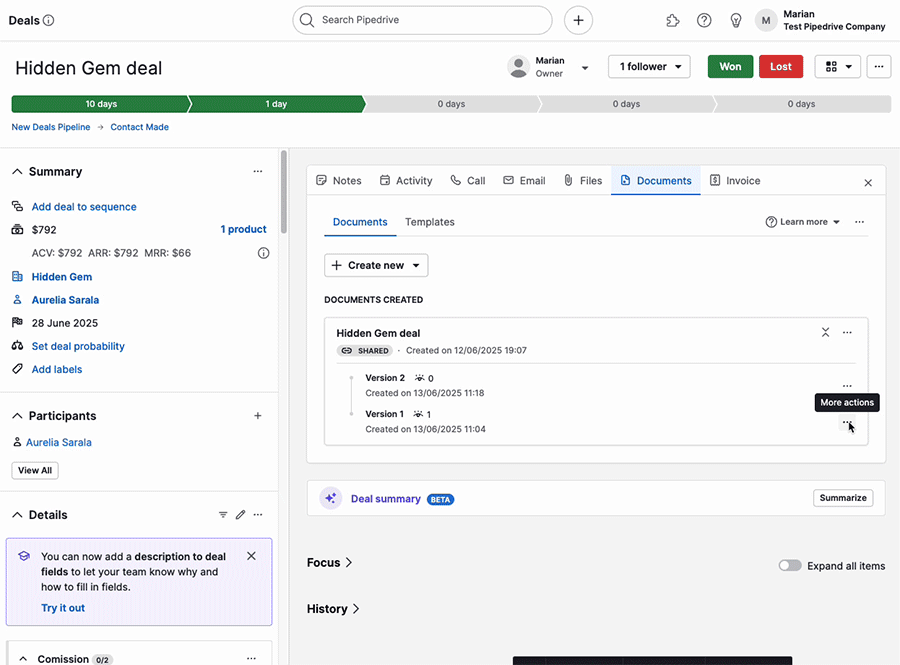
Understanding document versions
Each time you generate a shareable link, Smart Docs creates a new version of the original document, including the number of views and the creation time.
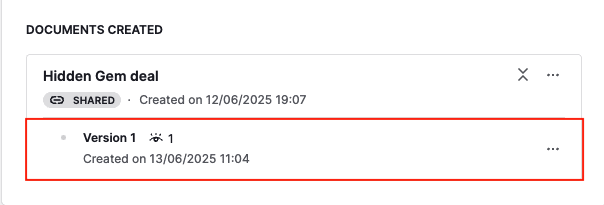
Once a version is shared:
That version becomes read-only
You can‘t edit it anymore
To update a document, click on the original document, make the necessary updates and generate a new link.
Once the new link is generated, you’ll see it as Version 2, Version 3 and so on, under the original document:
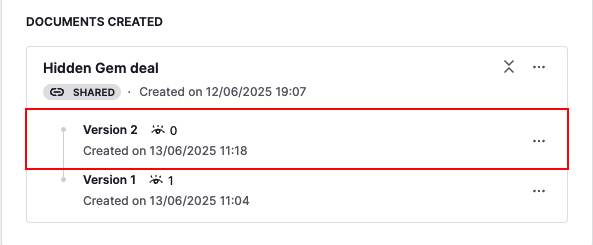
If you create multiple versions of a document, we recommend disabling older links to avoid confusion.
To disable a link:
- Click the “...” next to the older version
- Click “Share as link”
- Toggle off “Enable link”
Requesting eSignatures
With Smart Docs, you can request legally binding eSignatures directly from your document.
To request a signature:
Open the deal or contact detail view
Create, open or upload a document with the Smart Docs feature
Find the option to request signatures
Add recipients and send it.
Learn how to request signatures for your documents in this article.
Was this article helpful?
Yes
No