Sequences feature
Sequences is designed to help you build structured, repeatable workflows for deals and leads using manual emails and follow-up tasks.
It gives your team the power to engage consistently with prospects while keeping a personal touch.

What can I do with Sequences and when should I use them?
Sequences help you build personalized email and task workflows to nurture leads over time.
You can add two types of items into a sequence: deals (your ongoing negotiations with clients) or leads (new prospects that you want to turn into regular clients). When they reach key stages in your workflow, you can assign follow-up tasks (like calls, meetings or visits) at the right time.
Using a simple builder, you can create linear flows that include sending emails (both manually and automatically) and creating activities, ensuring a consistent approach and communication across your team.
Use Sequences when you want to follow up with cold or warm leads over time, maintain a consistent outreach approach across your sales team or create repeatable playbooks that guide your team through each step of the engagement process.
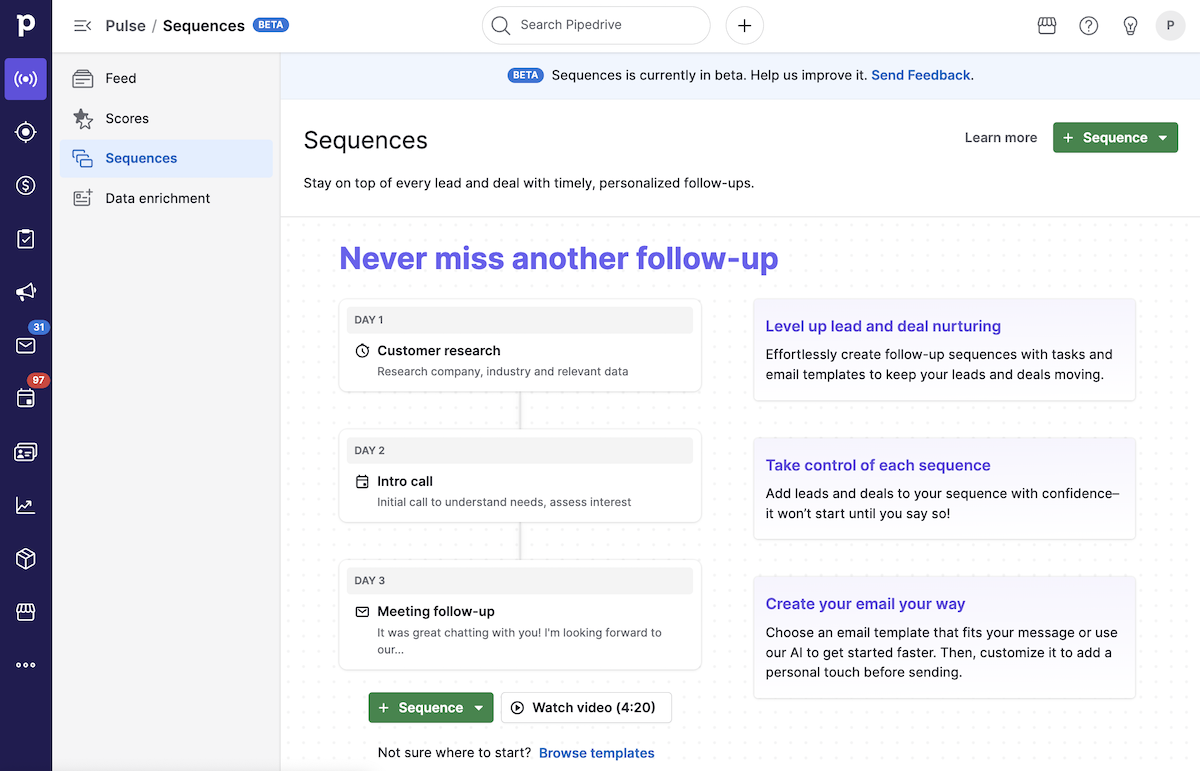
Where can I find Sequences?
On the sidebar on the left-hand side of your screen, click Pulse > Sequences.

How can I set up a sequence?
First, click on “+ Sequence.”
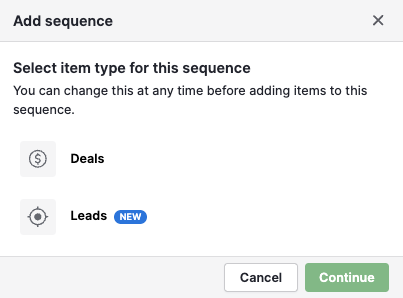
You can either start from scratch or use a template.

When creating a sequence from scratch, you’ll be asked to choose whether it’s for deals or leads. This setting determines what kind of records you‘ll be able to enroll in the sequence.
The sequence section provides a summary of its current status and available actions.
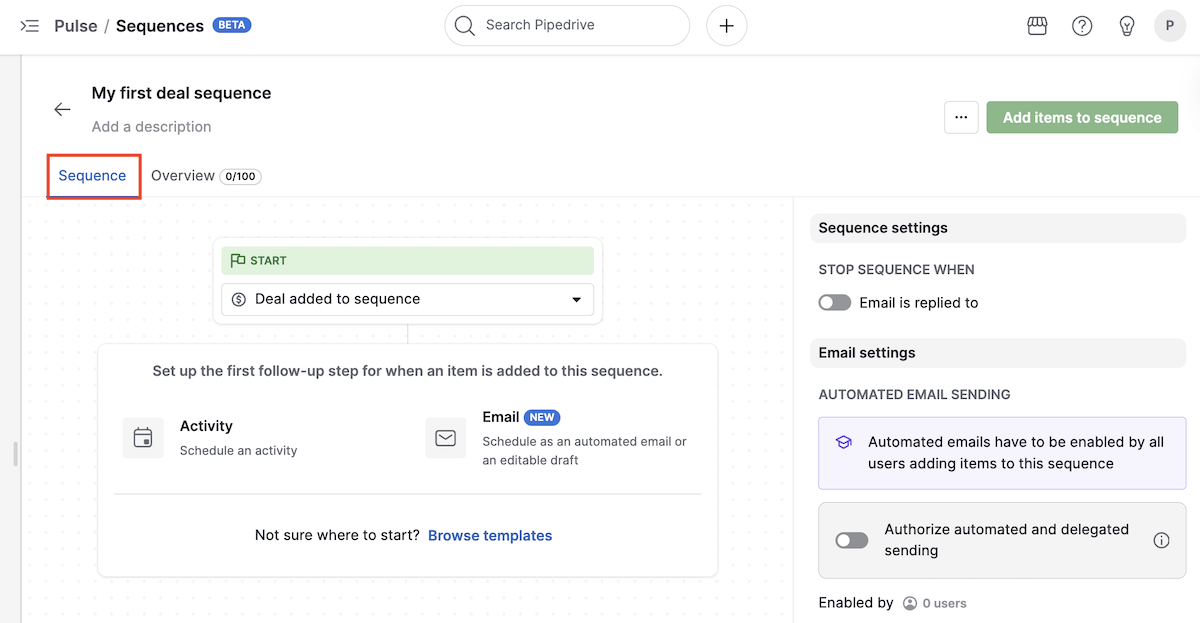
There, you can:
- Edit the sequence settings and steps
- Delete the sequence
- Add items (deals or leads) to the sequence
- Activate automated email sending
- Preview the sequence flow
- Browse templates
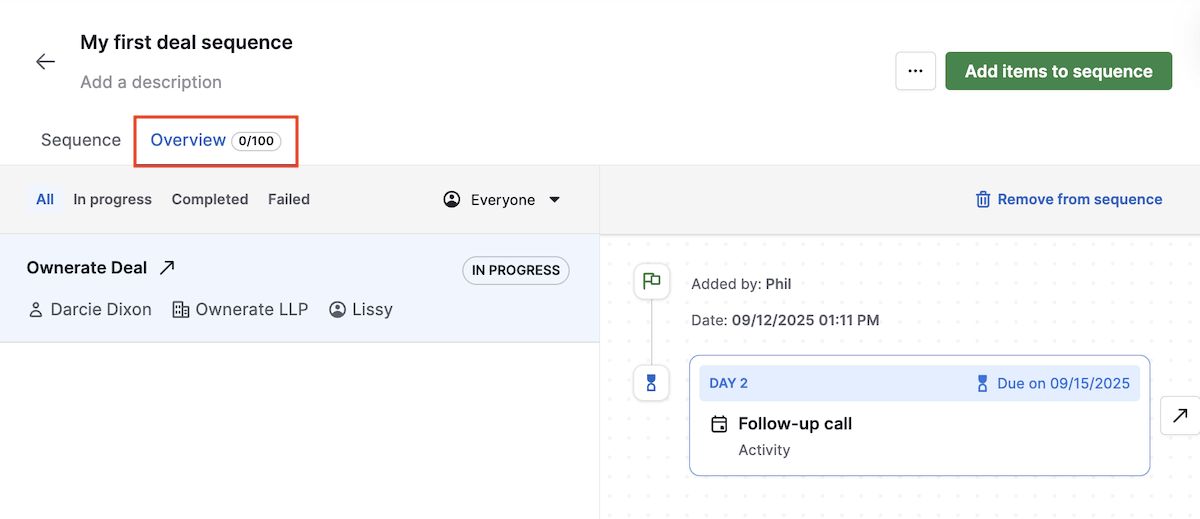
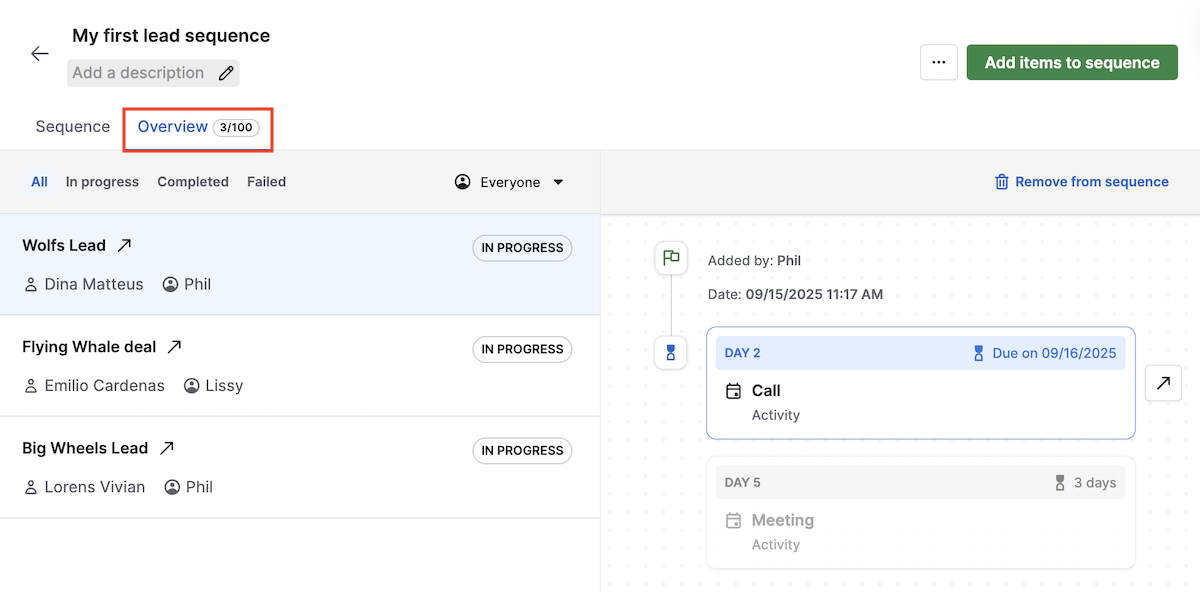
Clicking the overview tab will open a section where you can:
View the list of deals or leads added to the sequence
Check the number of In Progress, Completed or Failed deals or leads
Preview of the sequence flow
Remove deals from the sequence
Add items (deals or leads) to the sequence
To start the sequence, you must think whether your goal is to add an activity or draft an email.
Add an activity
When choosing to add an activity, you’ll see the activity composer, where you can select its due date and fill in details such as activity type, assignee, priority and any relevant notes.
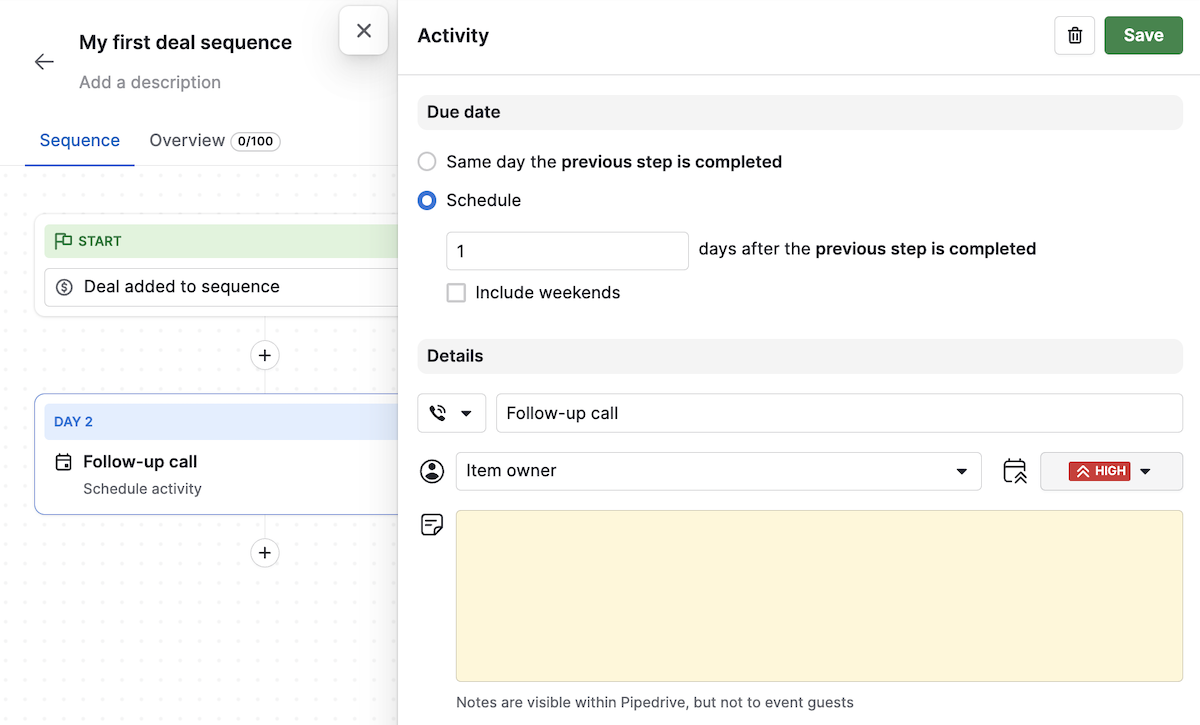
Once you save the changes, you’ll have the option to add more deals to the sequence and further steps, such as other activities or drafting emails.
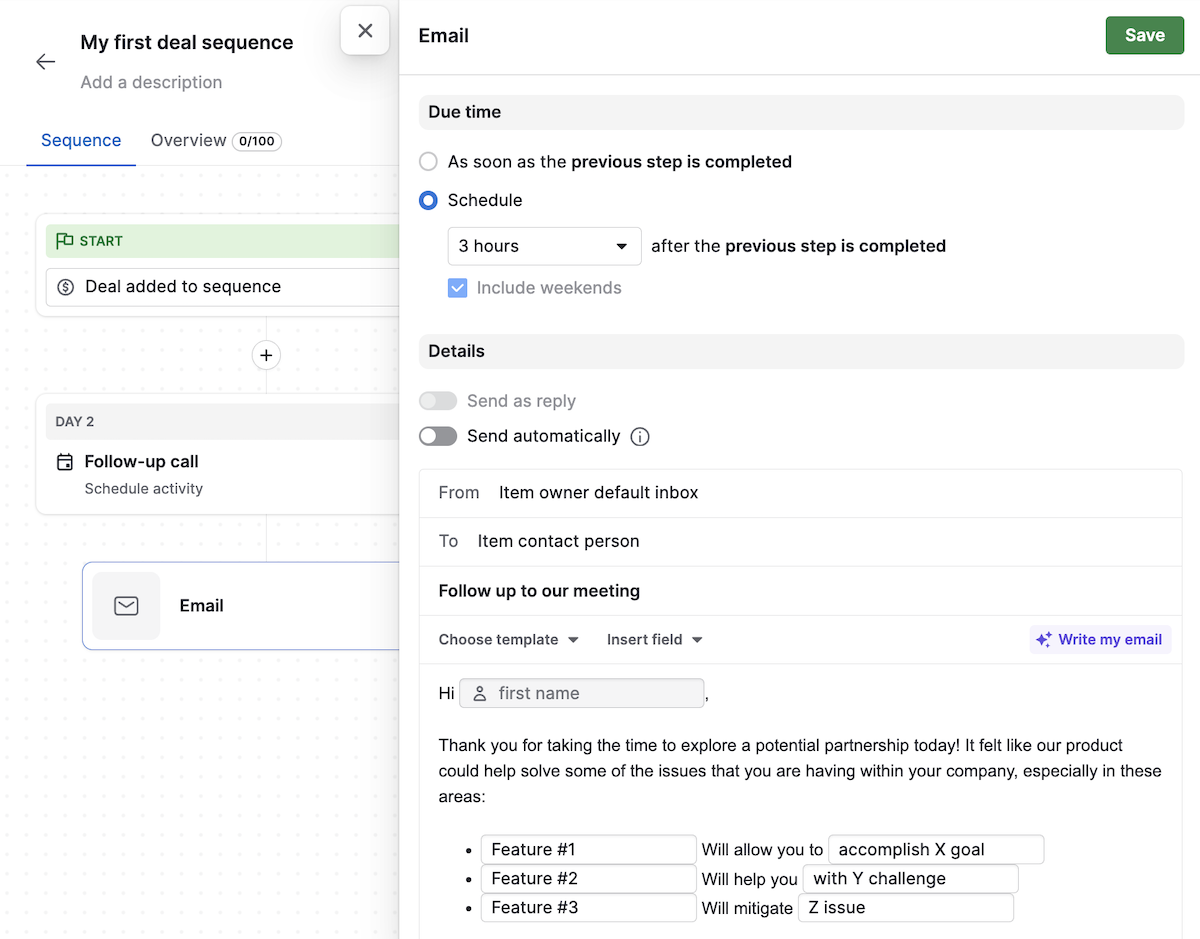
Draft an email
If you choose to draft an email, you’ll see the email composer, where you can set a reminder to send the email. You can also view details such as sender and recipient, the text composer and formatting.
You can even use any email templates already set up in your account.
At the bottom of the email composer, add the email signature of the sequence’s owner.
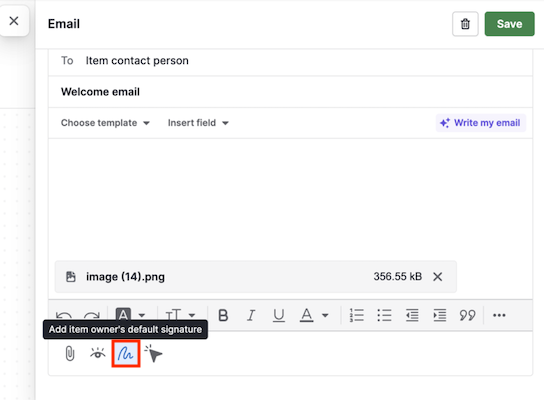
Once you save the changes, you’ll go back to the sequence overview.
Automate email sending
You can add automated emails to your sequence in addition to manually sending an email. These are emails that Pipedrive sends on your behalf without requiring manual action.
You can turn this option on in any email step added to your sequence by toggling the option “Send automatically” in the Details section.
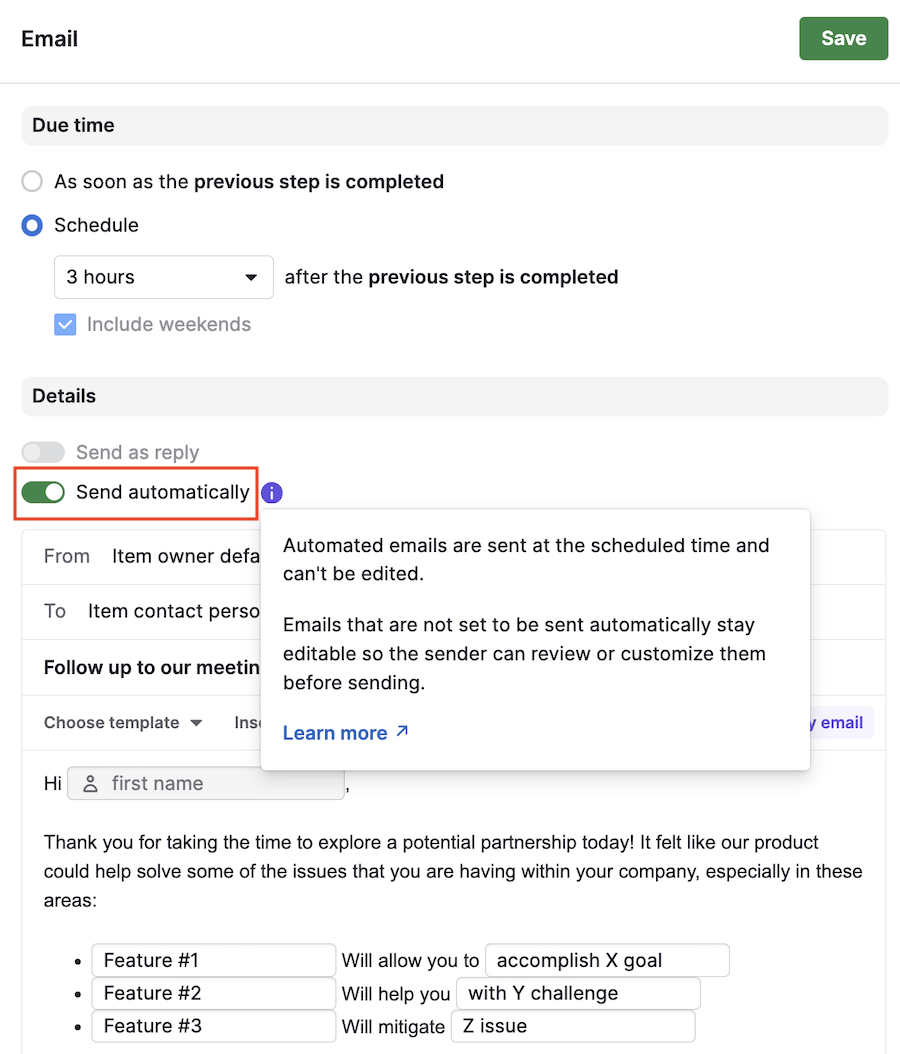
Once you choose to send an email automatically, you can edit the message in the email composer as you would for a draft email and:
Set the sender and recipient
Write your message using the text editor or the AI email composer
Use any email templates already set up in your account
Like with draft emails, this step will appear in the Pulse feed, but it‘s automatically executed at the scheduled time.
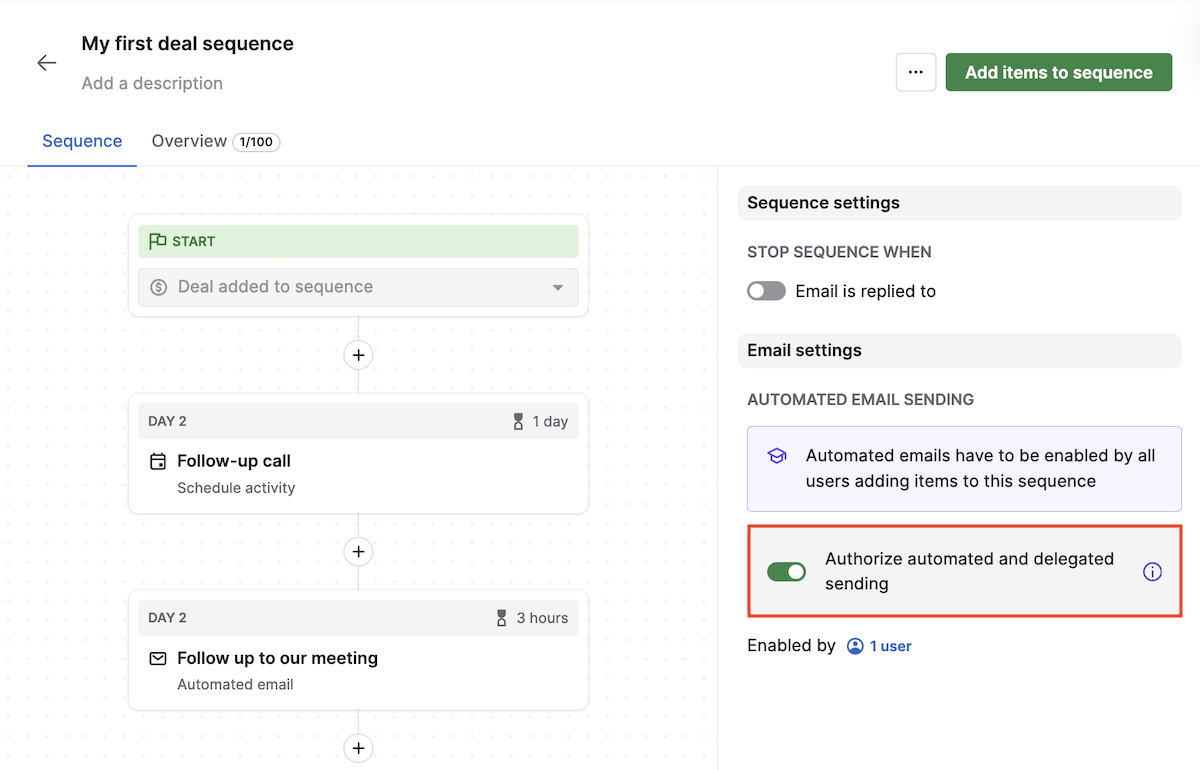
Consent requirement for automated emails
To meet legal requirements, each user must enable the “Authorize automated and delegated sending” toggle before using this feature. The auto email consent ensures that:
Consent is given per user, not company-wide
Consent applies per sequence, not globally across all sequences
You’ll find this toggle in the sequence builder when setting up or editing a sequence with an automated email step.
Add deals or leads to a sequence
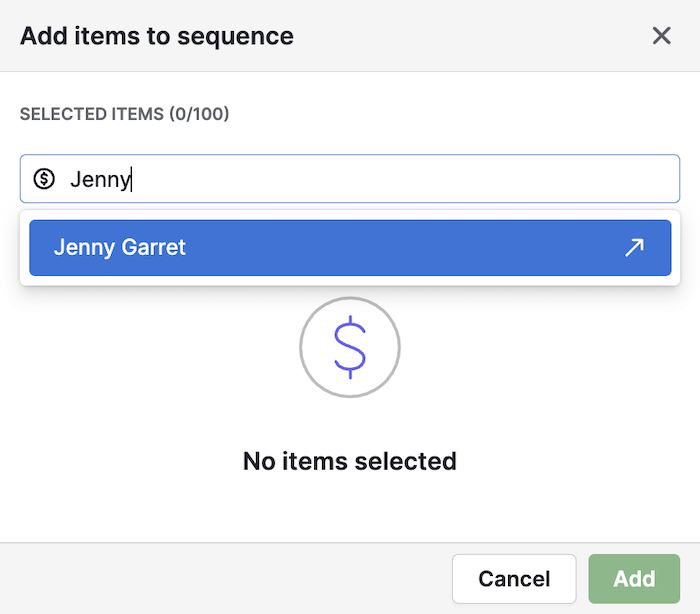
From the sequence builder
Depending on the entity you chose for your sequence, you‘ll want to add deals or leads to it. To do that, click the “Add items to sequence” button on the right-hand side of your screen.
Start typing to select the deal or leads you want to enter your sequence and click “Add.”
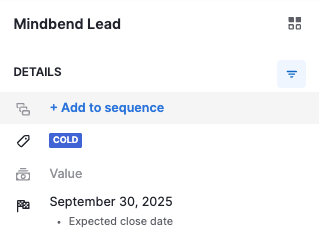
From the deal or lead detail view
To add a deal to a sequence directly from the deal detail view, click the ”Add deal to sequence” button.

To add a lead to a sequence directly from the lead detail view, click the “Add to sequence” button.
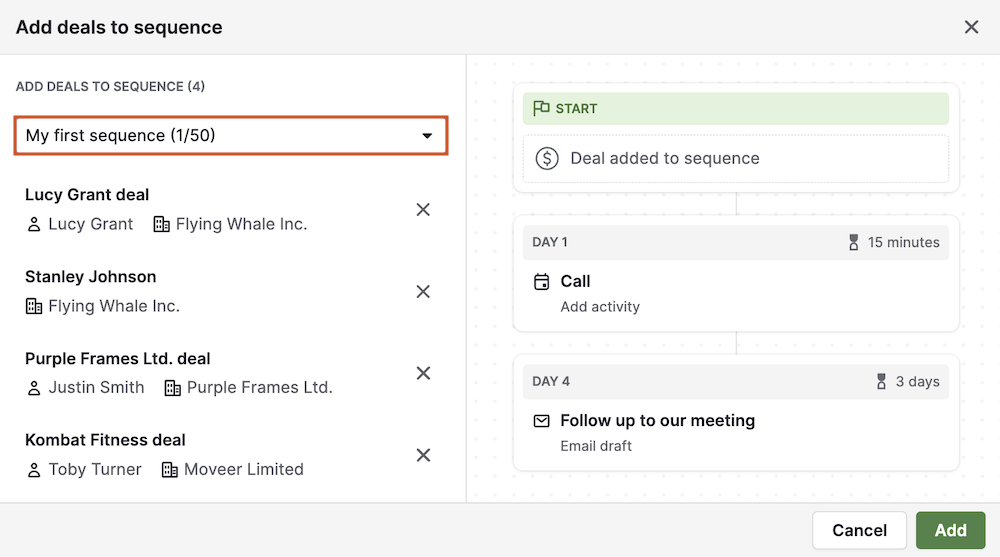
Bulk add in the list view
From the deal list view or from the Leads Inbox, select the deals or leads that you want to add to a sequence. Once selected, click the “Add to sequences” button at the top of the page.
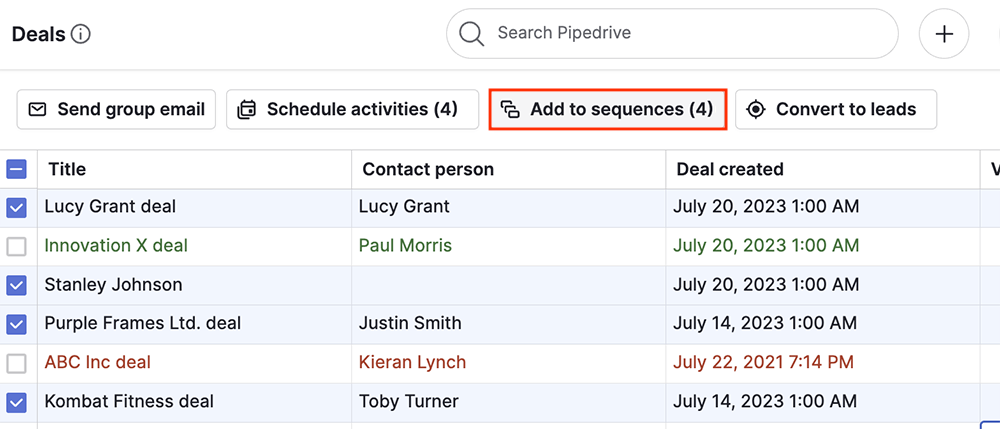
You’ll see the deals or leads you just selected. To add them to a sequence, select the desired sequence from the dropdown. If you don't have a sequence set up for the specific entity you‘re trying to add, you‘ll need to create one first by clicking “Add sequence,” which will open a new window. Then go back and select the newly created sequence.
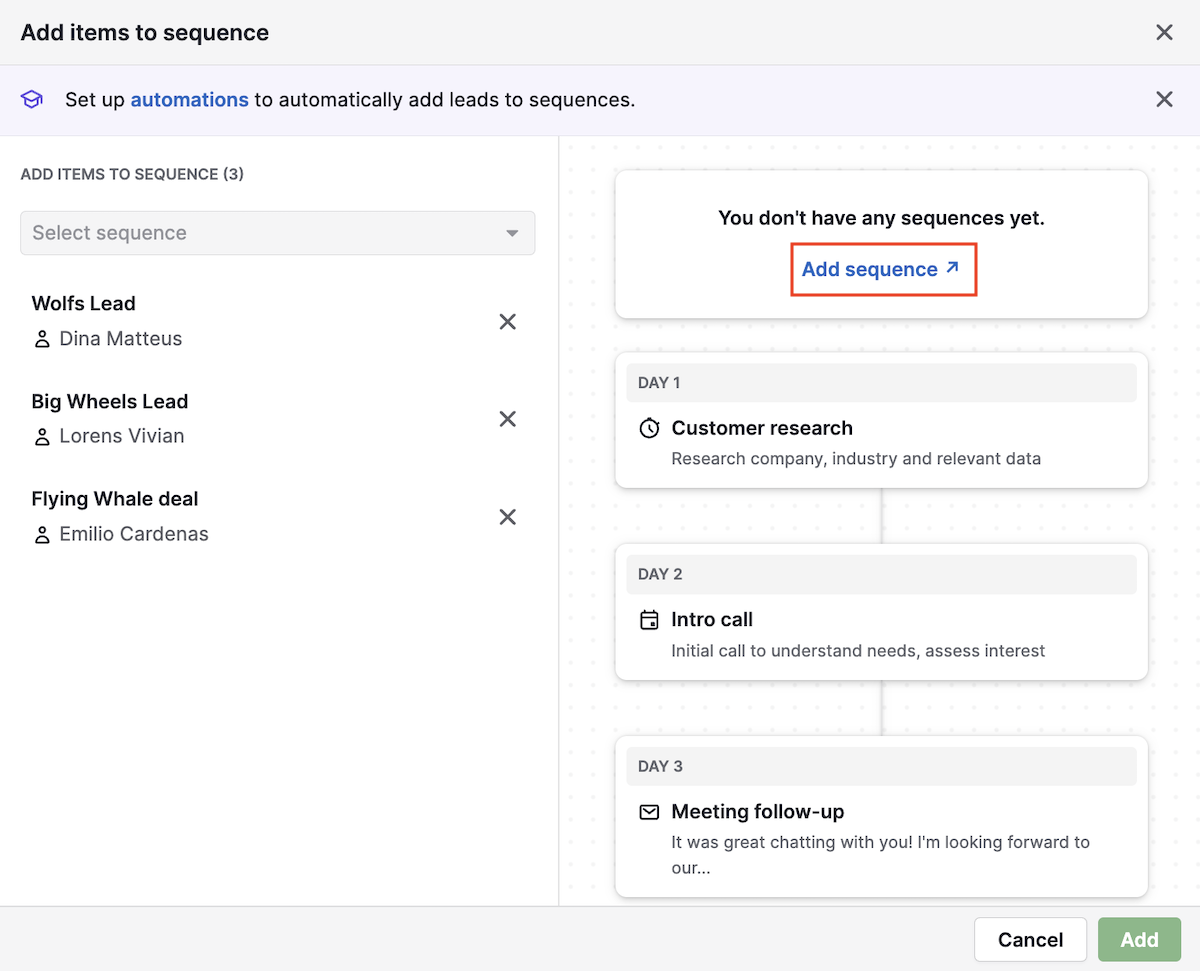
Once you select the sequence, you’ll see a preview of the sequence. Then, click “Add” to save the changes.
View deals or leads added to a sequence
You can see all the items added to a sequence by clicking the “Overview” tab, where you can also filter items by status and owner.
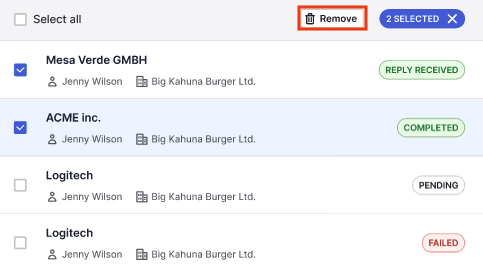
Bulk remove items from the execution list
To bulk remove items from the execution list, select them by clicking the checkboxes.
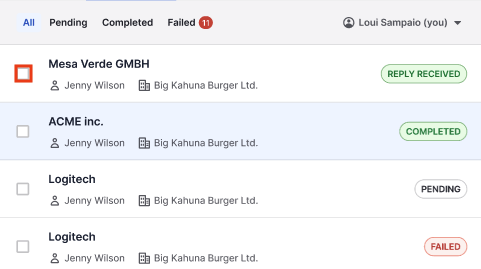
Once selected, click ”Remove”.
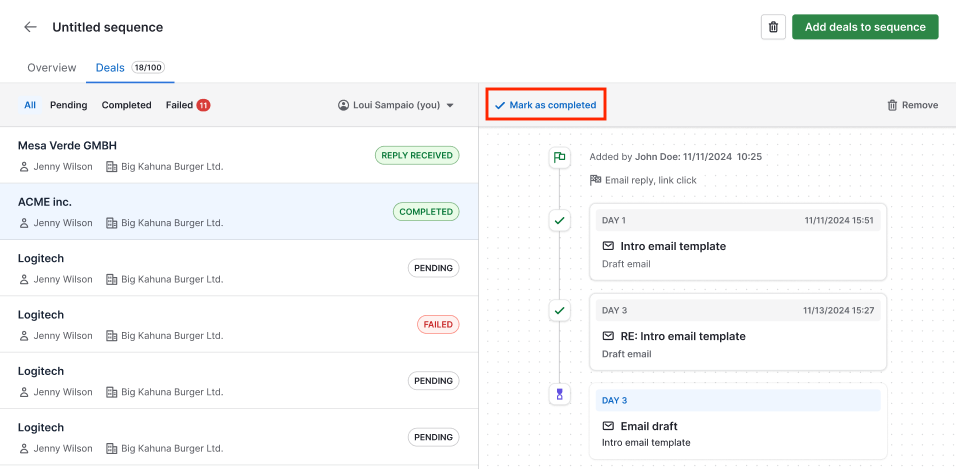
Complete sequences manually
Sometimes, you may want to stop or skip an individual sequence for a specific contact. For example, if they reply through another channel, convert outside the flow or ask to opt out. Being able to easily complete or skip automated sequences helps you stay in control while maintaining compliance and trustworthiness.
To complete an individual sequence manually, click ”Mark as completed”.
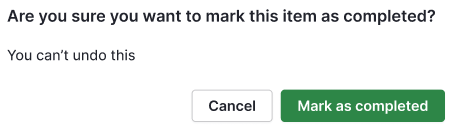
You’ll see a prompt asking to confirm the completion of the sequence.
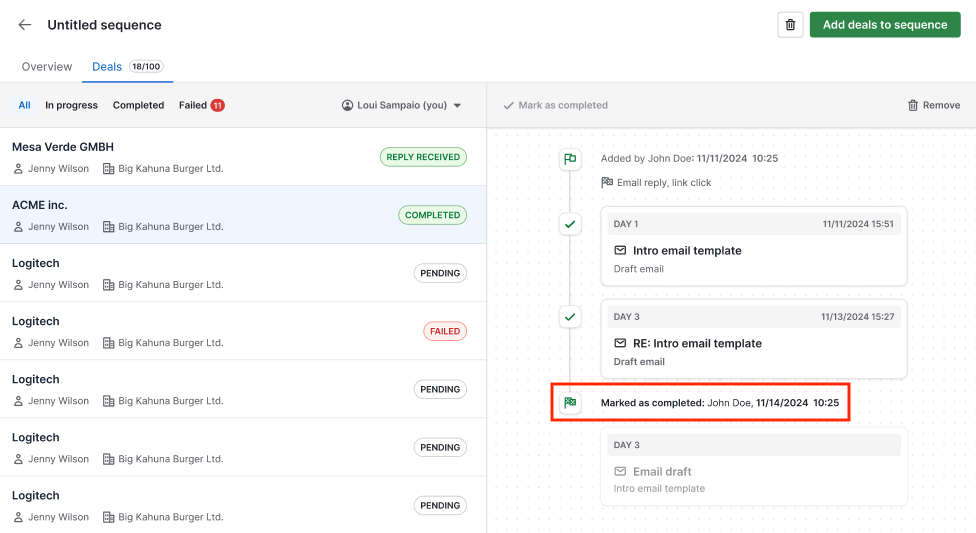
As soon as you mark the sequence as completed, the timestamp of this action will be visible in the sequence builder.
How do Sequences differ from Automations?
While Automations handle a wide variety of tasks automatically (like updating fields or assigning deals), Sequences focus specifically on structured communication. This is ideal for high-touch sales processes where timing and personalization matter.
You can combine Sequences with Automations to automatically enroll deals or leads into a sequence, allowing you to scale your pipeline while maintaining personal engagement. Learn more about automatic enrollment using automations in our dedicated article.
Learn more about the difference between Automations and Sequences in this article.
Was this article helpful?
Yes
No