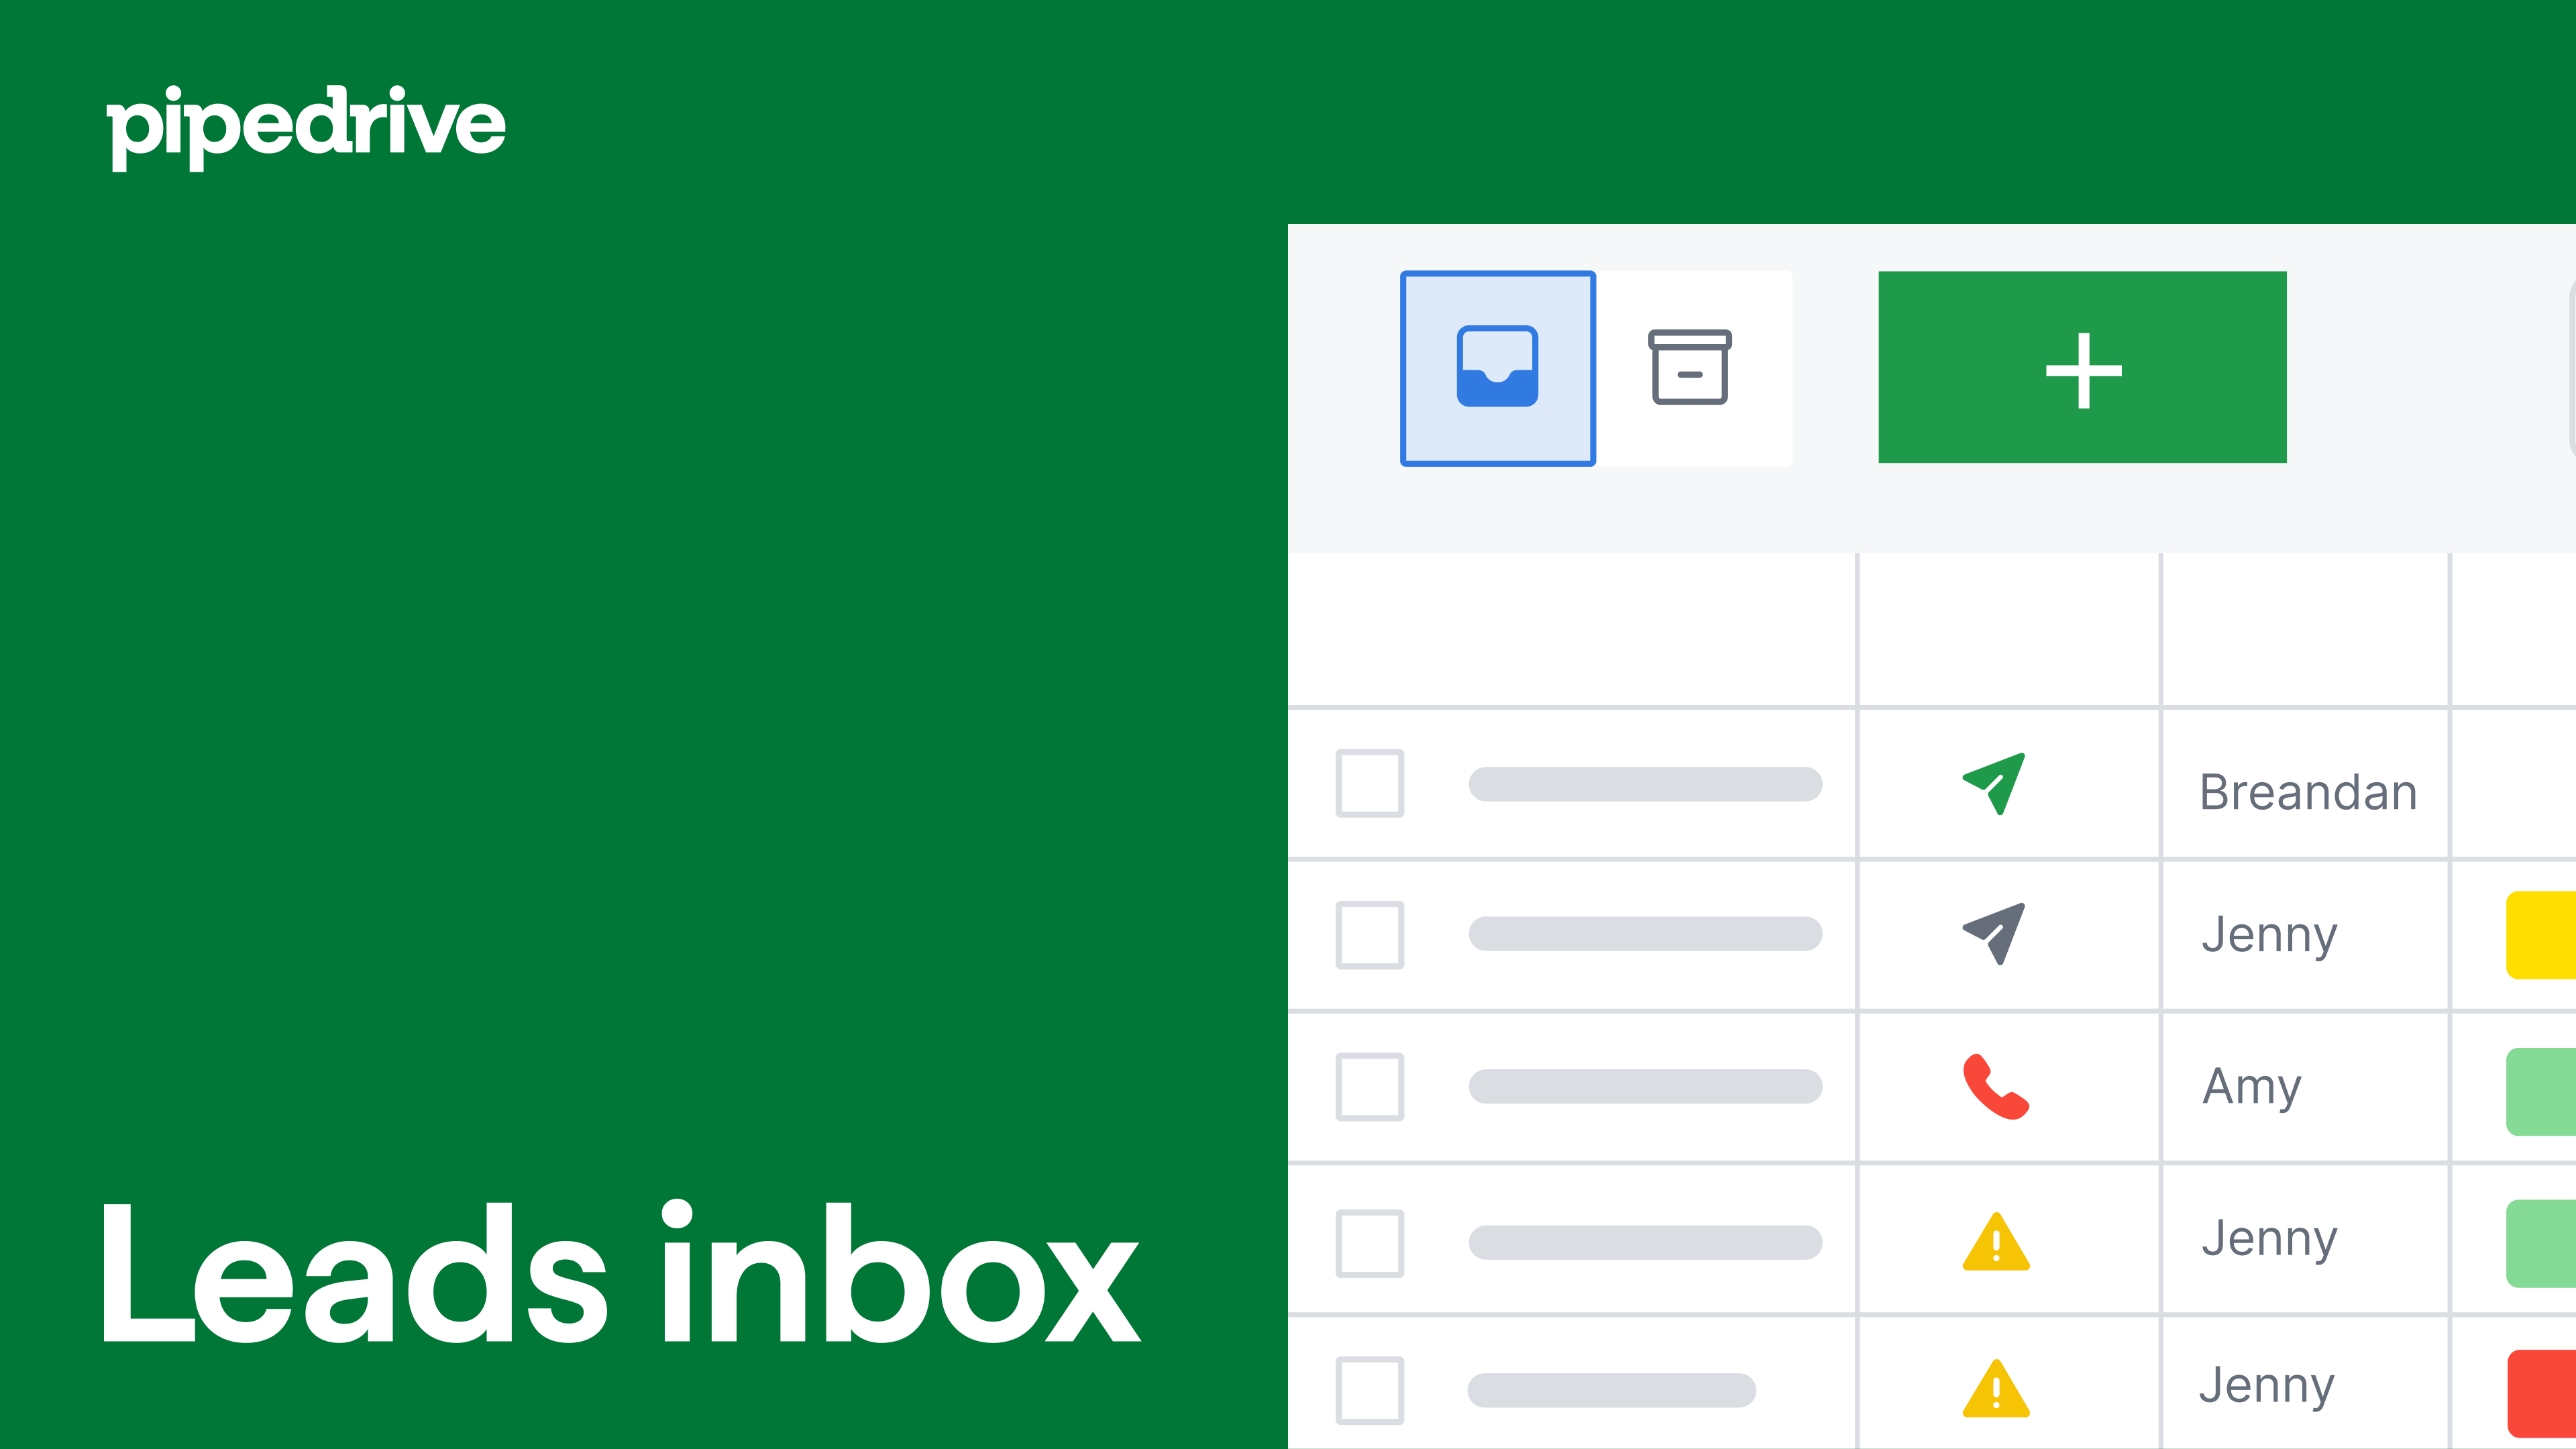
Leads Inbox
In the early stages of your lead generation process, it’s common to have potential opportunities that aren’t ready to move through your pipeline yet.
Keeping these leads in your pipeline can create clutter and make it harder to focus on active opportunities.
The Leads Inbox in Pipedrive offers a dedicated space to store and organize your unqualified leads. When a lead is ready to move forward, you can convert it into a deal and add it to your pipeline to begin your sales process.
Adding leads
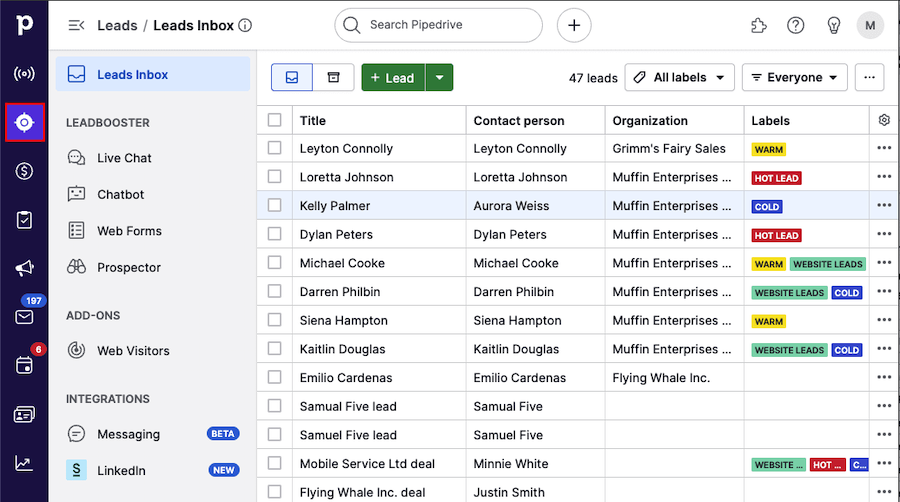
To begin adding leads, you’ll first need to open the leads tab from the left sidebar and select “Leads Inbox”.
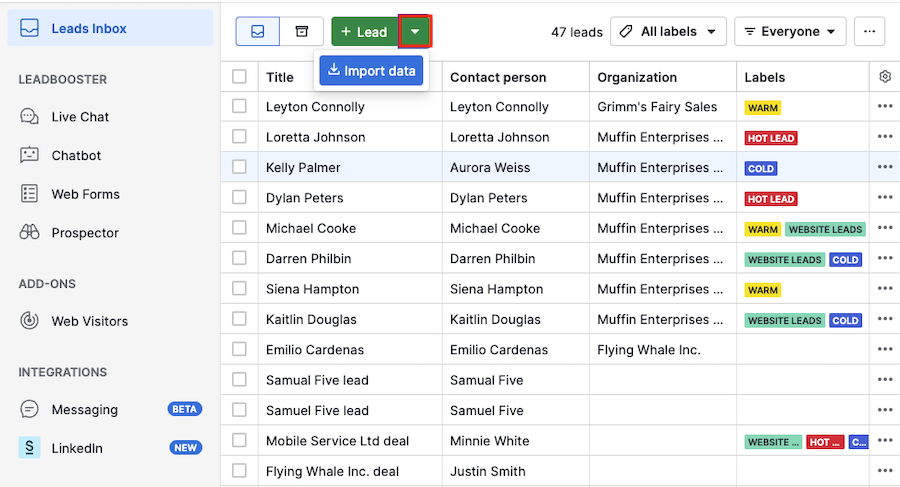
You can create a lead in Pipedrive by clicking the green “+ Lead” button. To add multiple leads at once from a spreadsheet, click on the green arrow and select “Import data”.
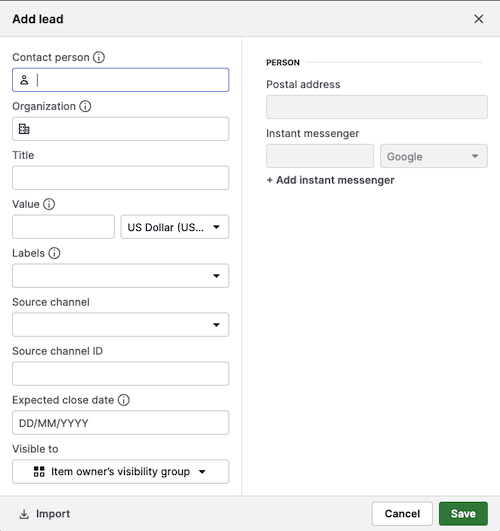
When you add the lead directly from Pipedrive, you’ll see the add lead view, where you can link your lead to an existing contact or create a new one.
A lead must always be linked to a person or organization in Pipedrive, but all other fields are optional.
Sorting and filtering your leads
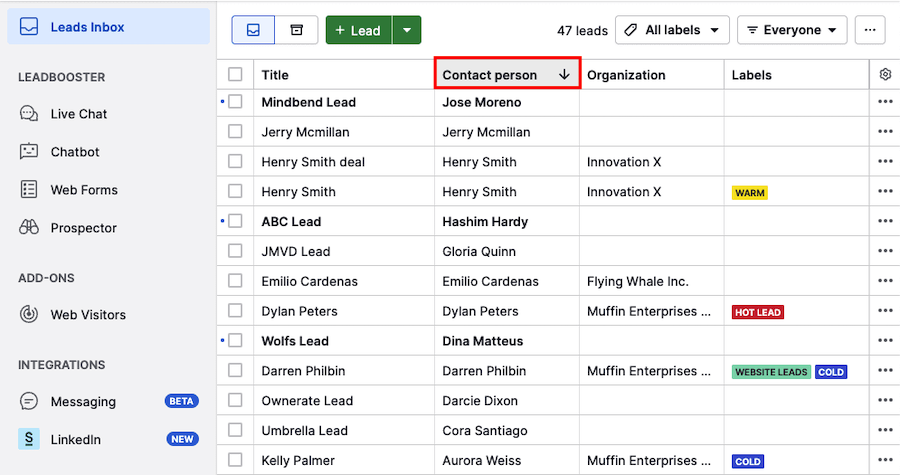
Like other list views in Pipedrive, you can customize and sort your visible columns.
Click on the top of any column to sort in either ascending or descending order.
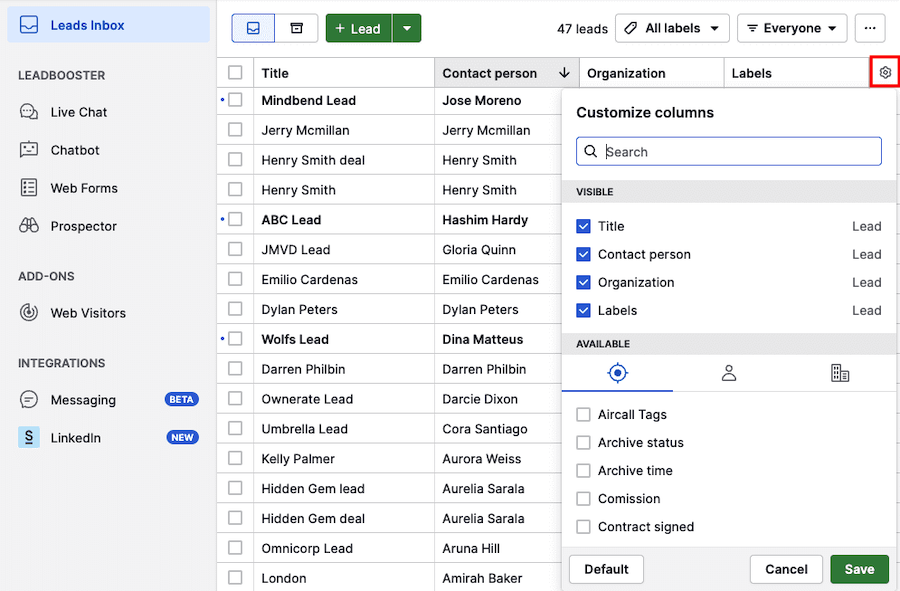
Click on the gear icon to customize the columns you see in your Leads Inbox. You can add columns related to leads, organizations and people.
In the top-right corner, you can filter your leads by label and predefined or custom filters.
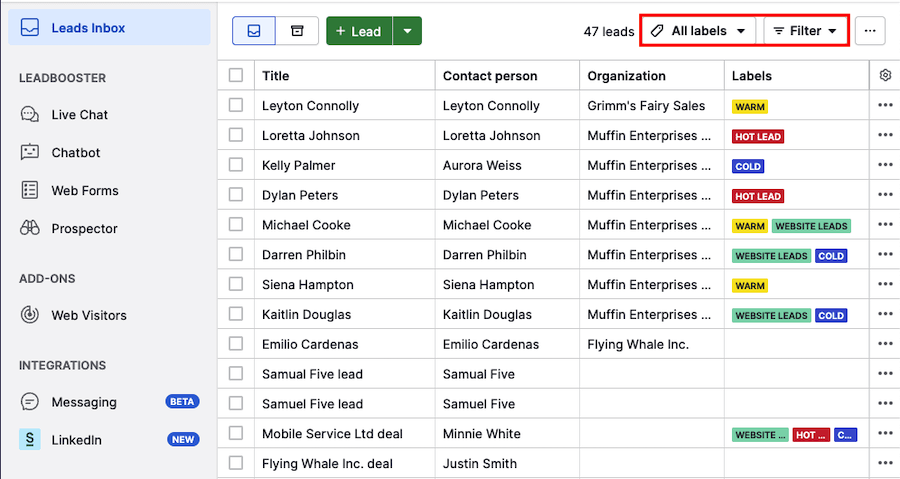
If no filter is selected, you’ll see all the leads visible to you. When you go to Filter > Filters, you’ll find some pre-set filters to help organize your leads.
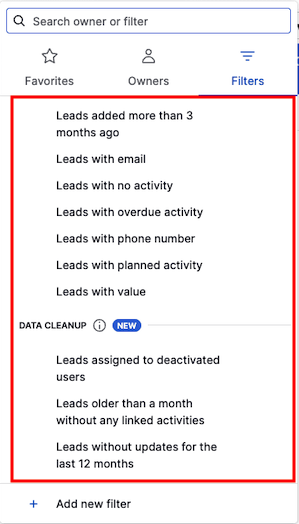
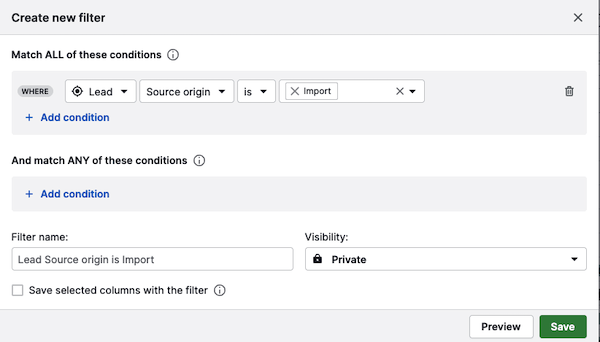
You can create custom filters by selecting Filters > + Add new filter. Creating custom filters improves your visibility of key information during your lead qualification process.
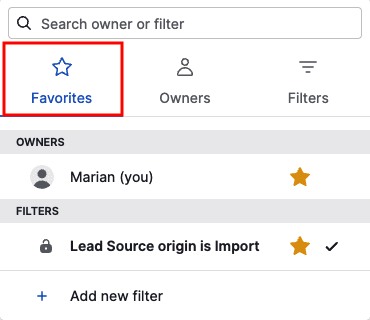
After creating a custom filter, you can add it to your favorites by clicking on the star icon in the filter list. You can then quickly access these filters by opening the favorites section.
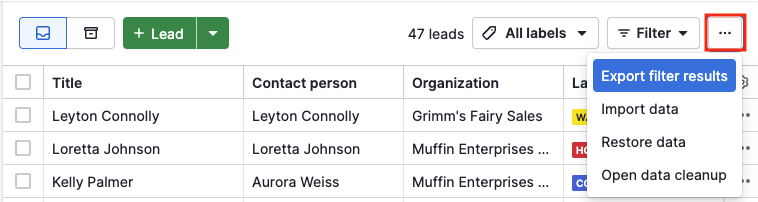
Filtered results can be exported to a spreadsheet by clicking on “...”> Export filter results.
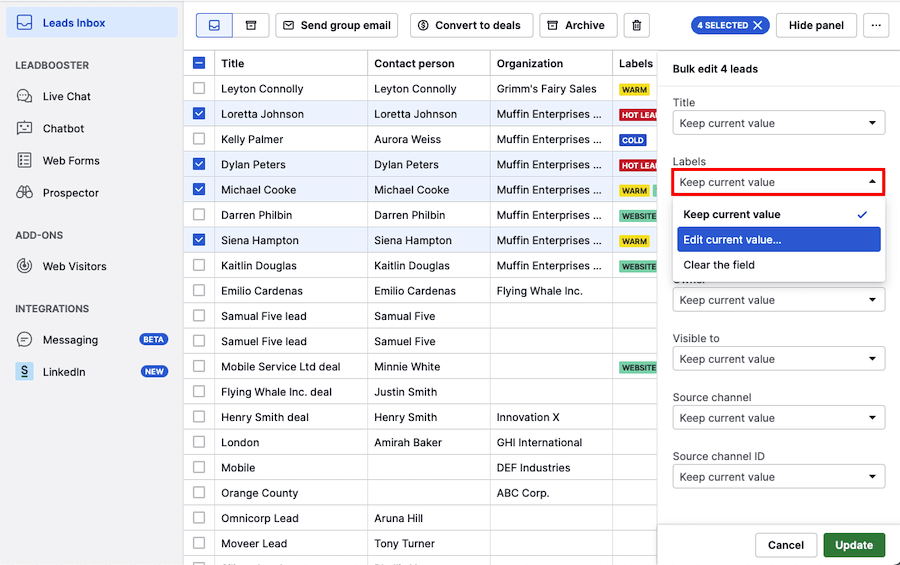
You can edit and delete your leads in bulk if you want to update multiple leads at once. Learn more about bulk editing in this article.
You can currently bulk edit only the following lead fields:
- Title
- Labels
- Value
- Owner
- Visible to
- Source channel
- Source channel ID
Viewing lead detail view
The lead detail view displays all relevant information for that lead. Click on any lead to open a panel where you can view its details or update it with the latest information.
You can see the following sections on the left in each lead detail view:
- Lead details – You can see lead-related fields, for example, labels, value, owner and source channel
- Person – You can see person-related fields, for example, person name, email and phone number
- Organization – You can see organization-related fields, such as the organization name and address. If the entered address is valid and exists on Google Maps, you can click it to see the business location marked on a map.
- Smart Bcc – You can copy-paste a lead-specific or universal address if you’re using Smart Bcc feature
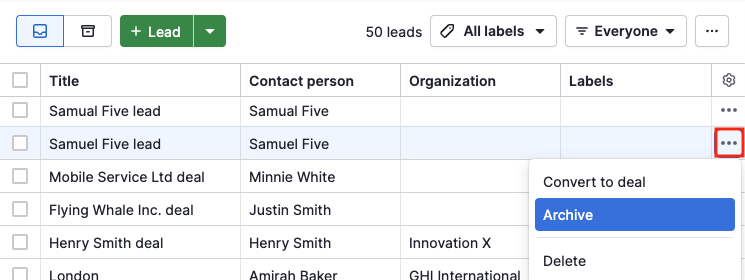
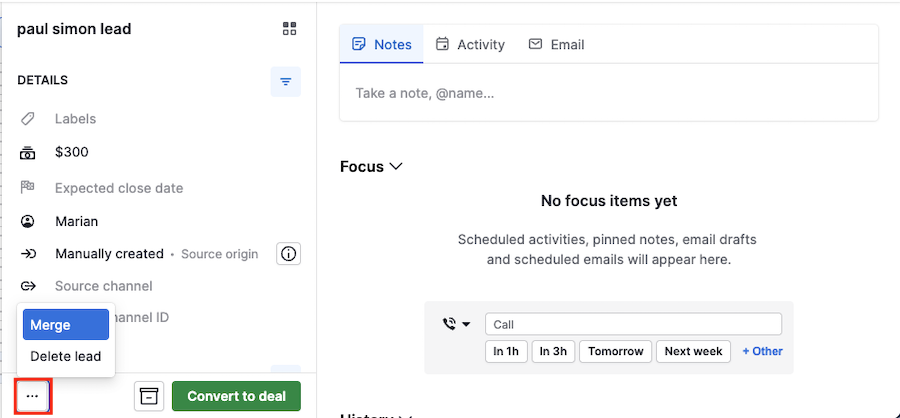
In the bottom-left corner of the panel, you can also archive the lead or convert it to a deal.

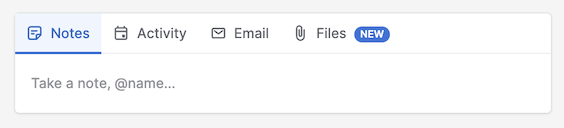
On the composer to the right, you can add notes, schedule activities, write an email, and upload files to the linked contact.
You’ll also notice that the right side has three sections:
- Composer – Here you can write notes, add activities, compose emails and upload files
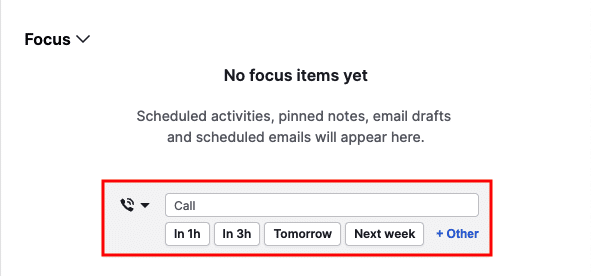
- Focus – Here you’ll find upcoming activities, pinned notes, email drafts and scheduled emails. You can also schedule an activity directly from the focus section
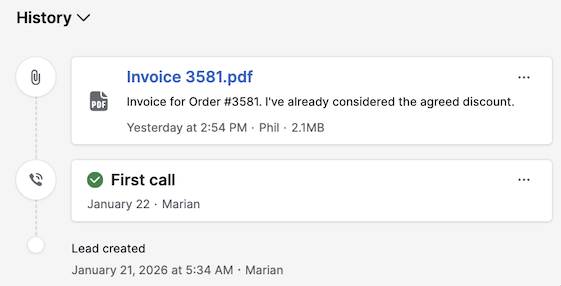
- History – This section displays notes, completed activities, sent emails and uploaded files
Archiving and deleting leads
To keep a lead in your account without showing it in your active Leads Inbox, you can archive it until you’re ready to use it. If the lead is no longer needed, you can delete it to free up space for new ones.
You can find the archive and delete options in the Leads Inbox by clicking on the “...” on the right side of any lead.
Archived leads
To view your archived leads, open the archive section.
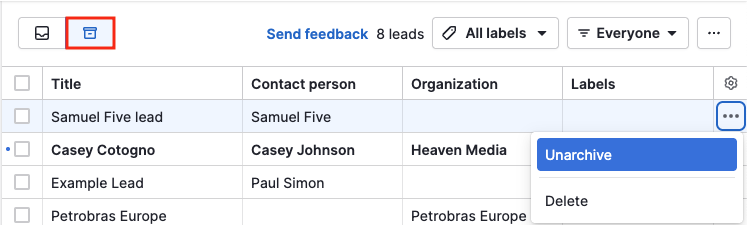
If you want to edit the details of an archived lead, you’ll first need to unarchive it. You can do that in the archive section by going to the lead “...”> Unarchive.
Deleted leads
You can view and restore your deleted leads for 30 days after deletion. To do that, open “...” > Restore data.
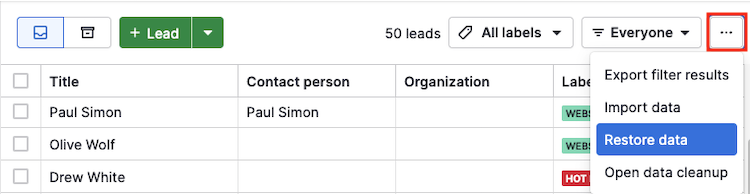
You can learn more about how to restore data in this article.
Converting leads to deals
When you’ve qualified a lead and are ready to pursue it as a deal in your pipeline, you can click “Convert to deal”.
This will bring you to a new dialog where you can define the pipeline, visibility and value of your new deal.

Once completed, hit “Save” to convert the lead into a deal. The lead will then be deleted from your Lead Inbox and you can track the deal progress further in the selected pipeline.
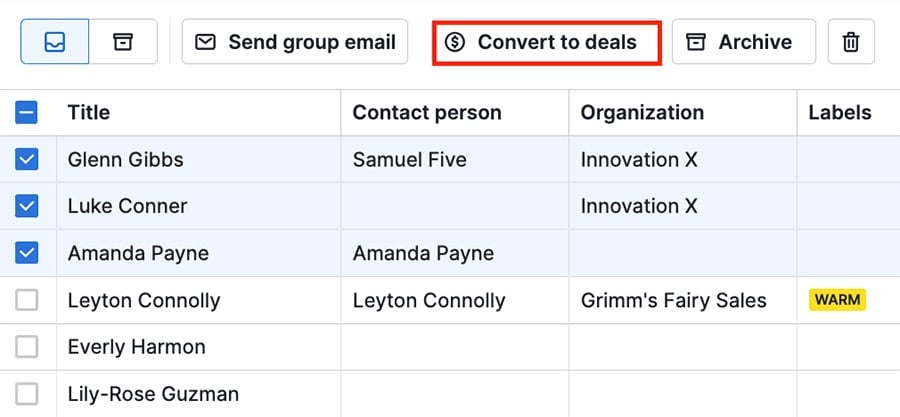
You can also convert multiple leads to deals at the same time by selecting the desired leads, then clicking “Convert to deals”.
Additional leads functions
Besides archiving and converting leads to deals, you can use the following functionalities:
Group emailing
Select the leads from your list and click “Send group email” to email multiple leads.

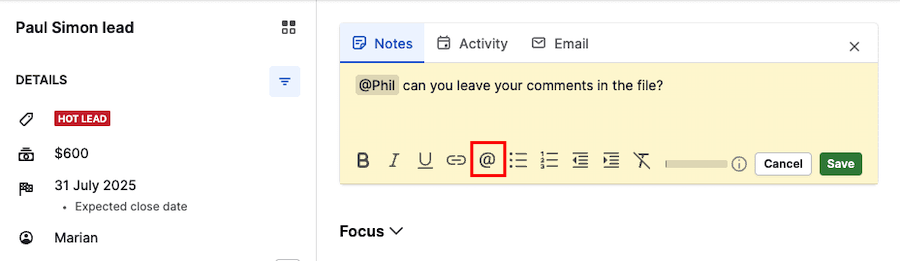
Mentions
To tag another user with the mentions feature, use the @ symbol in your detail view’s notes.
Merge duplicates
To merge two separate leads into one, click the “...” in the bottom left corner of your lead’s detail view, then select Merge.
Type the name of the lead you want to merge within the box.
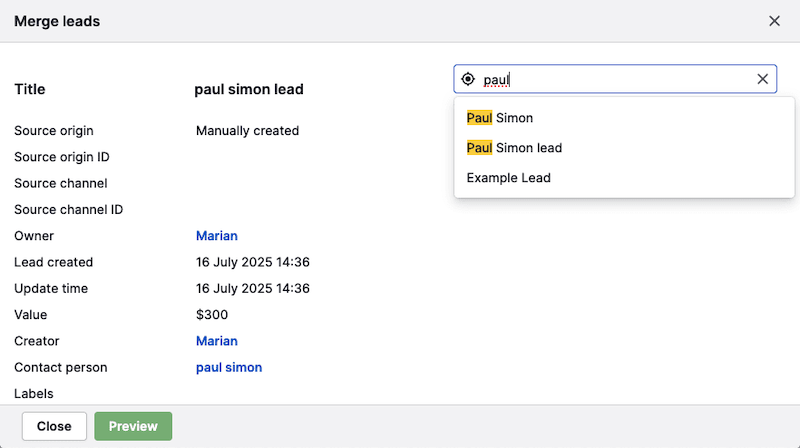
Then select which lead’s unique data you want to keep.
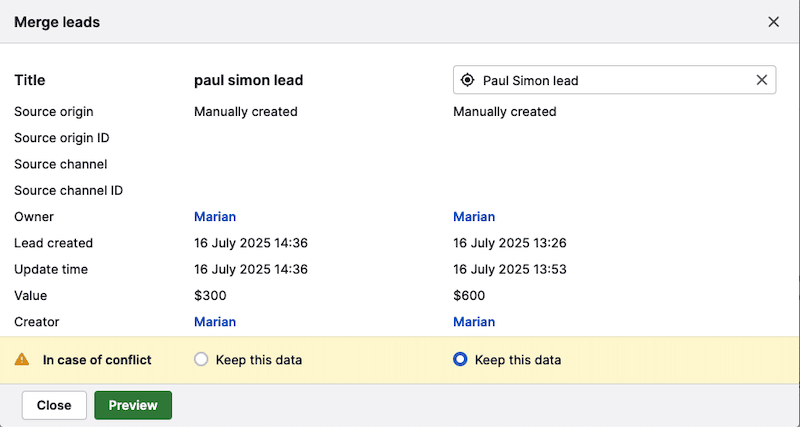
Afterward, you can preview your merged lead, then click “Merge” to confirm it.
Was this article helpful?
Yes
No