Pipedrive integration: Asana
Asana is a project management tool used to organize tasks and collaborate across teams.
If you need to forward data from Pipedrive to another team that uses Asana, this integration is available for that purpose.
Installing the integration
To enable the integration, go to the Asana page in our Marketplace and click “Install now.”
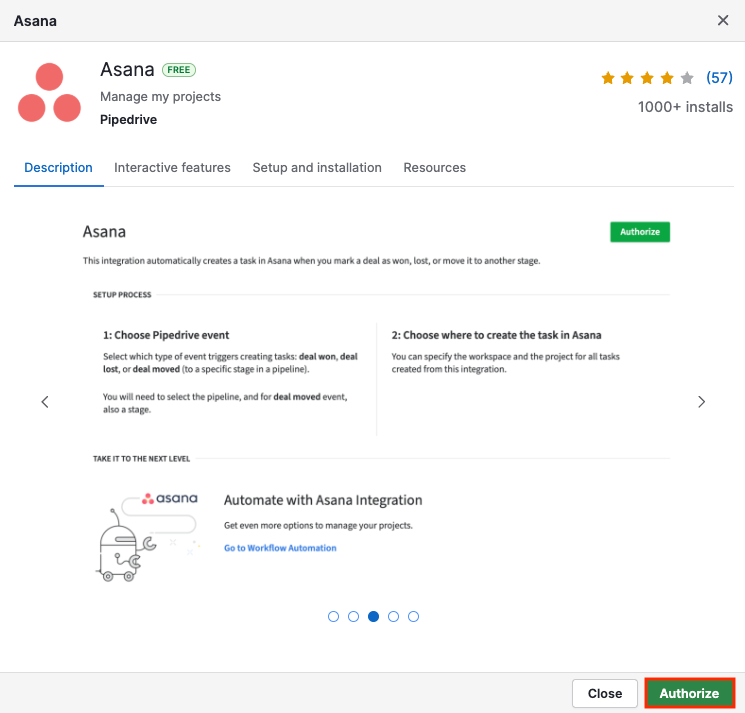
If you navigate to the Marketplace directly and select the Asana integration, click “Authorize.”
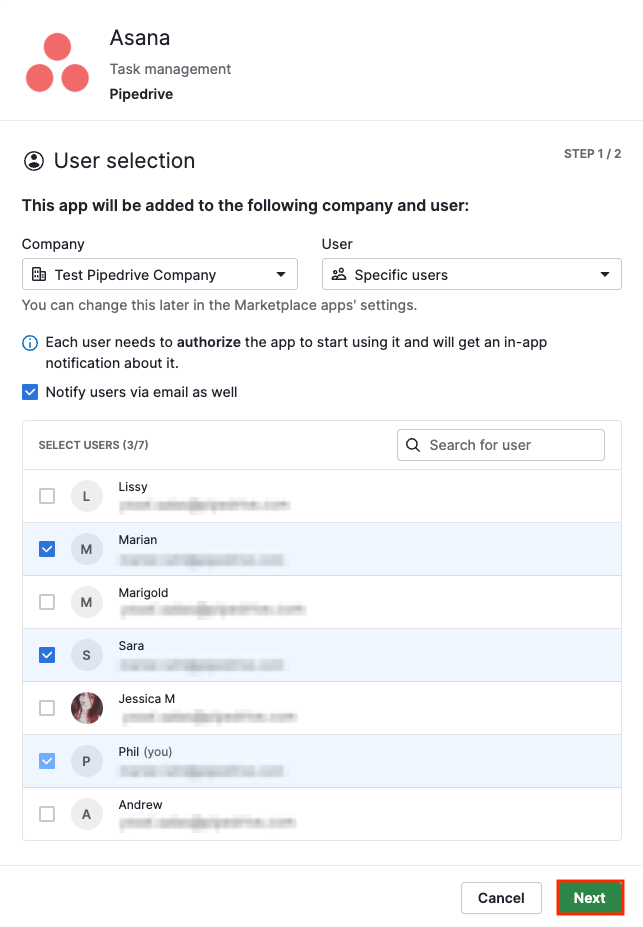
In step 1 of the authorization, select the company where you want to install the integration and choose who can use it: all users, only me, or specific users.
If you choose the specific users option, select the users who will use the integration and if you want to notify them via email, then click “Next.”
If you selected all users or only me, you‘ll only need to click “Next” to advance.
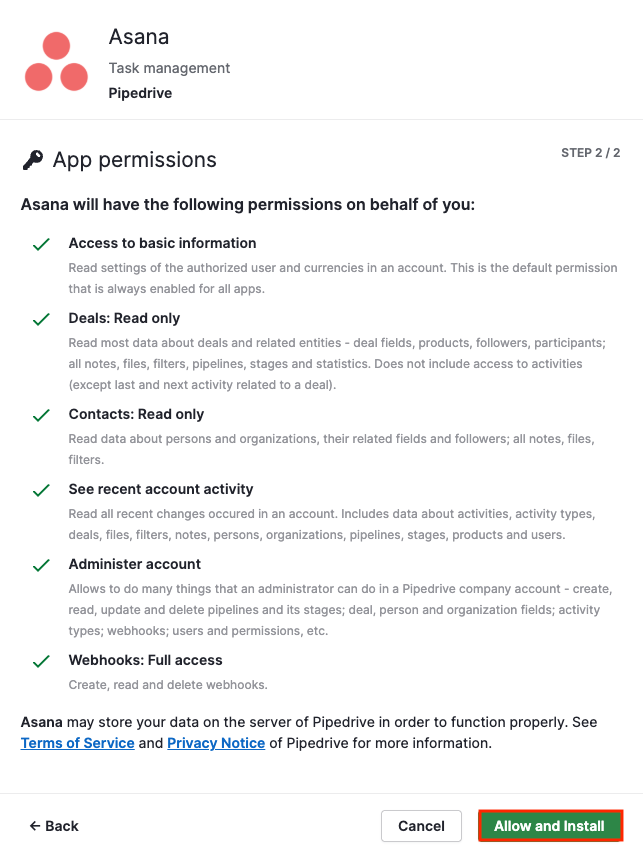
In step 2, you‘ll be prompted to read and grant permissions to the app. After reviewing them, click “Allow and install.”
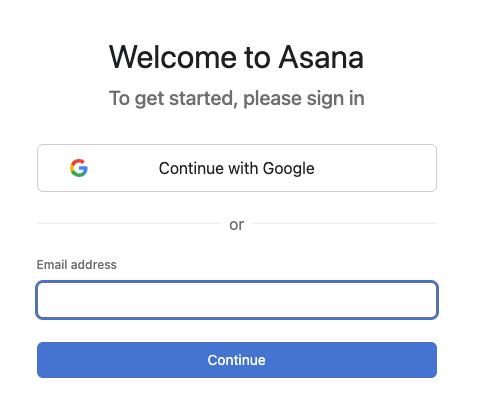
If you‘re not logged in, or if you still don‘t have an Asana account, you‘ll be prompted to sign in or create one.
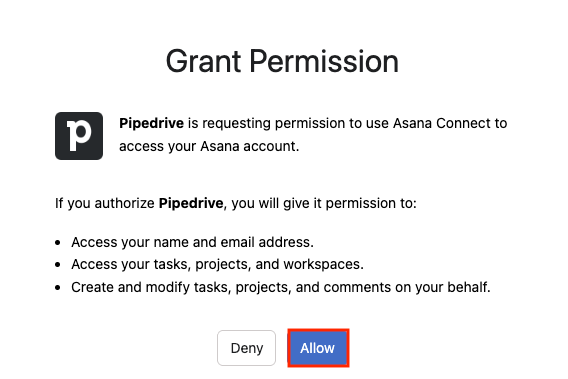
If you‘re already logged in, you‘ll be prompted to grant Pipedrive permission to access your Asana account. Click “Allow” and you can proceed to setting up your integration.
Setting up the integration
Once your Asana account is connected, open the Pipedrive Account menu > Tools and apps > Asana to set up the integration.
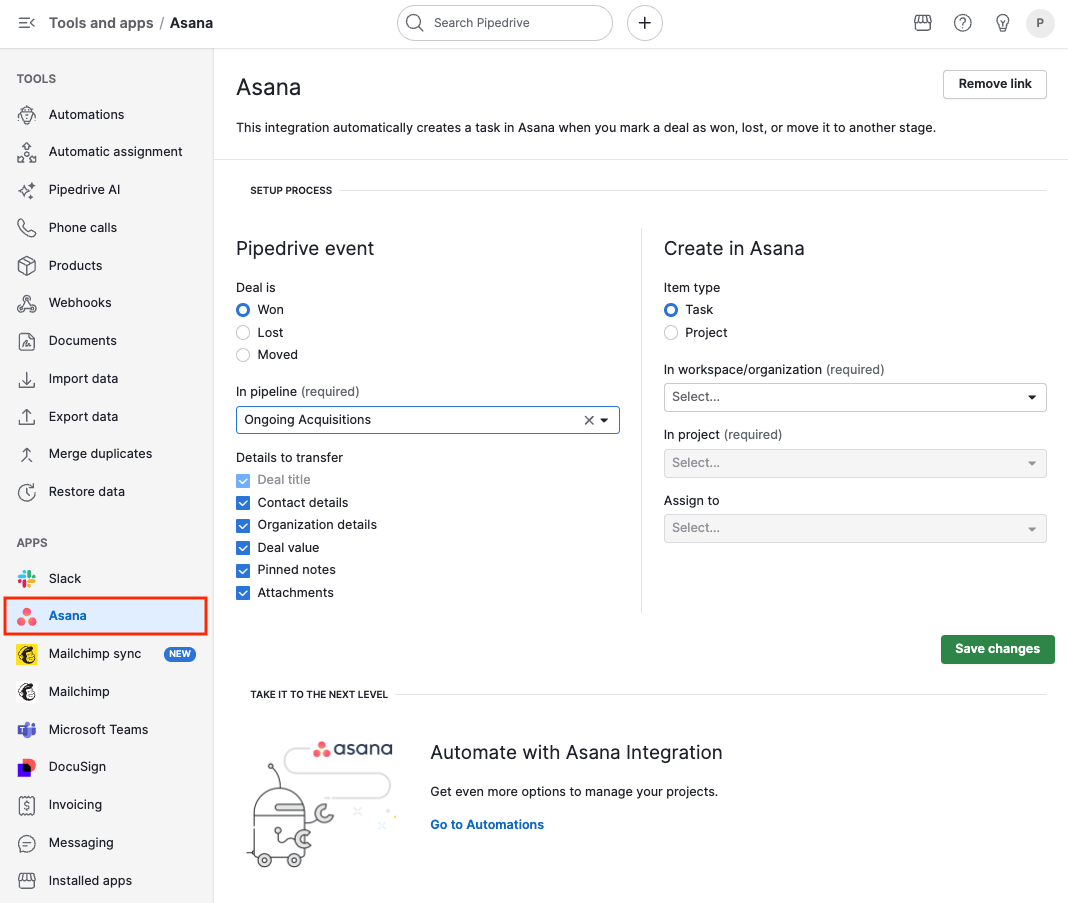
Choosing the trigger event and the information you‘ll transfer
To send data from Pipedrive to Asana, you’ll need to create a rule that will trigger the action of getting the information from Pipedrive and sending it to Asana.
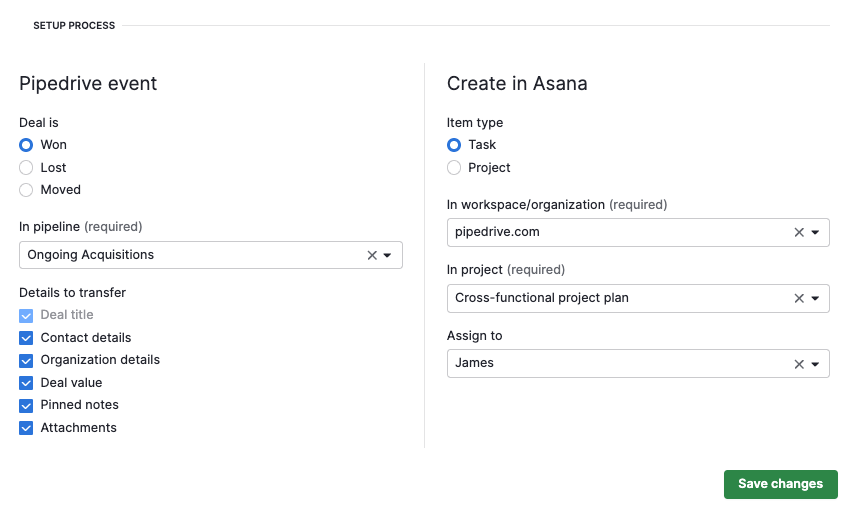
On the left, under Pipedrive event, you‘ll choose what will trigger the information transfer.
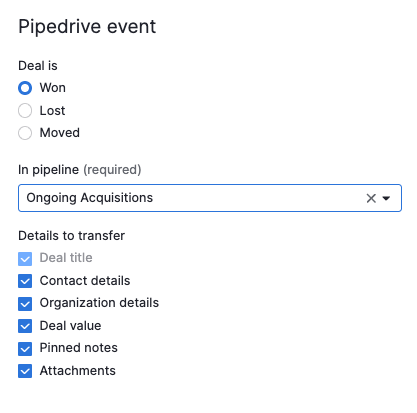
The available triggers are:
Deal is won
Deal is lost
Deal is moved (you‘ll need to specify to which stage)
Remember to specify the pipeline, as it‘s required.
If you chose deal is moved as the trigger, you‘ll also need to specify the stage. When you move a deal to the specified stage, it‘ll trigger the rule.

After defining the pipeline, you can select which data to transfer into the newly created Asana task/project. The details you can transfer are:
Deal title (can‘t be toggled off)
Deal value
Contact details of a person or organization
Pinned notes
Attachments
Because a title is required for a deal, except for the deal title, you can toggle off all the information you don’t want to transfer into Asana.
Choosing what will be created in Asana
When setting up a rule, you can create two types of items in Asana: tasks and projects.
Creating a task in Asana
If you choose to create a task in Asana, you‘ll have to go to the drop-down menus, select the workspace or organization that will receive the task, and then choose the name of the project.
Optionally, you can also assign it to an existing Asana user
Creating a project in Asana
If you want your rule to create a project in Asana, you‘ll notice that the attachments option under details to transfer will be automatically toggled off.
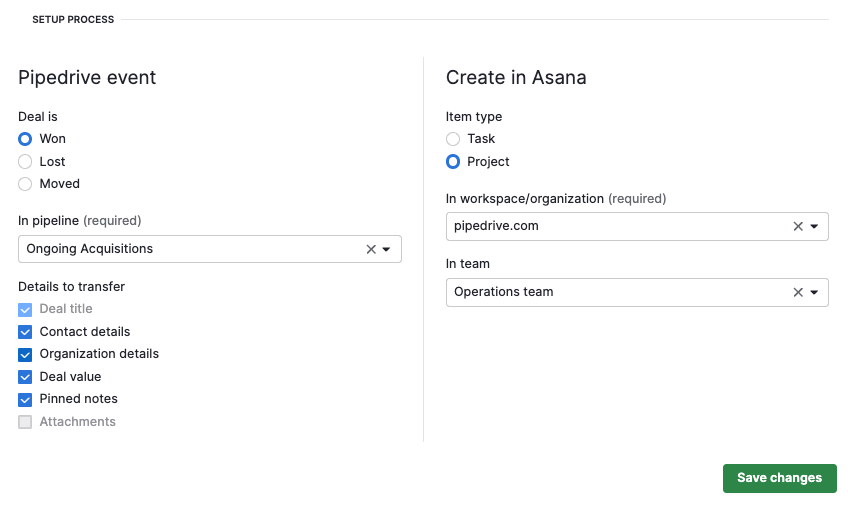
In the dropdowns to the right, select the workspace or organization where you‘ll create a project, and optionally, the team.
Once you‘re satisfied with your selections, click “Save changes.” After that, every deal that meets your rule criteria will create a task or project within Asana with the specified information, allowing your teams to follow up on your deals effectively.
Automating tasks with the Asana integration
You can use the Asana integration to automate billing or admin tasks based on your sales pipeline. For example, when a deal reaches a billing stage, you can trigger a task in Asana to generate an invoice or notify your legal team without manual handoff.
To get started, go to Automations in Pipedrive, open the Templates tab, and select the Asana category to choose from four ready-made templates:
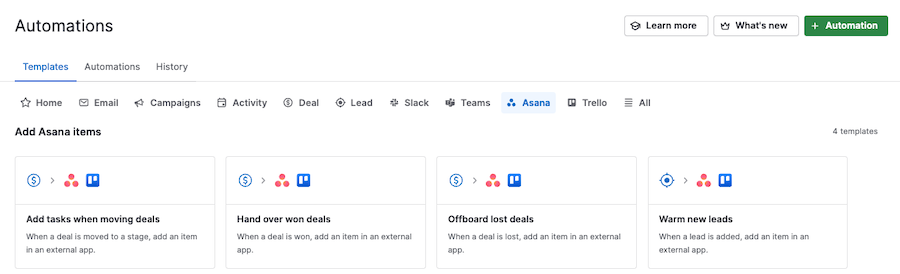
- Add tasks when moving deals: When a deal is moved to a stage, create a task or a project in Asana
Can be used for internal handoffs like billing, onboarding, or implementation
- Hand over won deals: When a deal is marked as won, create a task or a project in Asana
Can be used to start project work as soon as a deal is closed
- Offboard lost deals: When a deal is marked as lost, create a task or a project in Asana
Can be used to create follow-up tasks or trigger feedback loops
- Warm new leads: When a new lead is added, create a task or a project in Asana.
Can be used to route lead nurturing tasks to marketing or sales development teams
Let’s walk through an example of how to use the “Add tasks when moving deals” template to automate billing-related actions.
Set up a billing automation using a template
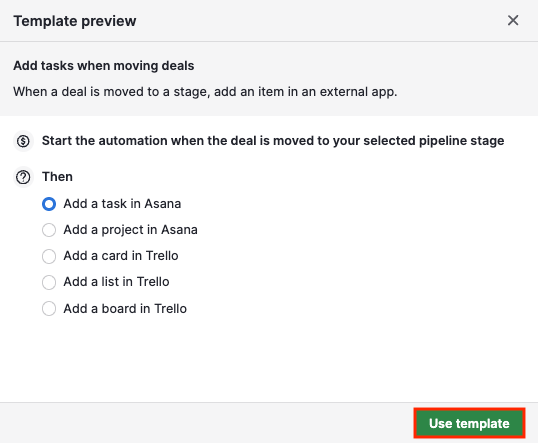
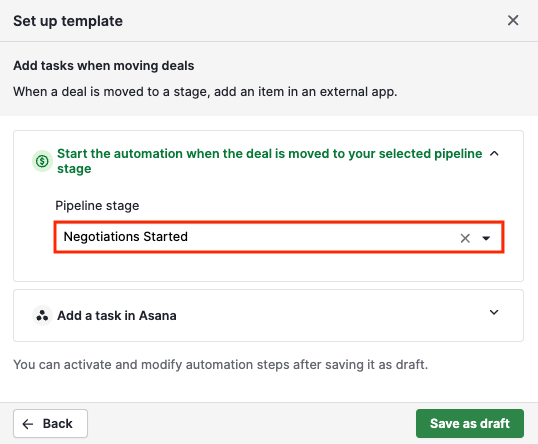
Select Add tasks when moving deals and, in the first screen, define what will happen after the deal is moved to your selected pipeline stage, in this case, “Add a task in Asana” and click “Use template.”
In the second screen, select the specific pipeline and stage you use for billing or contract prep. Let’s say this happens in the final stage; therefore, we’ll select “Negotiations started,” which is the final stage in our pipeline.
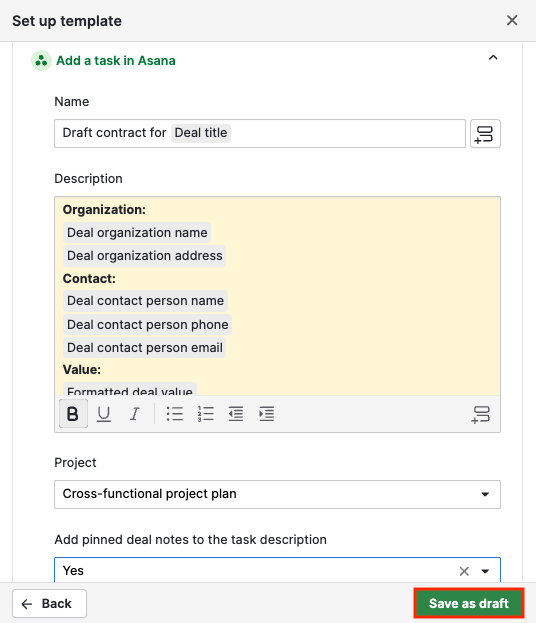
Under the “Add a task in Asana” section, fill out the task’s name and description. The grey fields will be automatically filled out based on Pipedrive data. You can toggle off any information your team doesn’t need, so tasks are created with just the right context.
Select the project where you‘ll create the task, if you want to add pinned notes to the description for added context, and finally, click “Save as draft.”
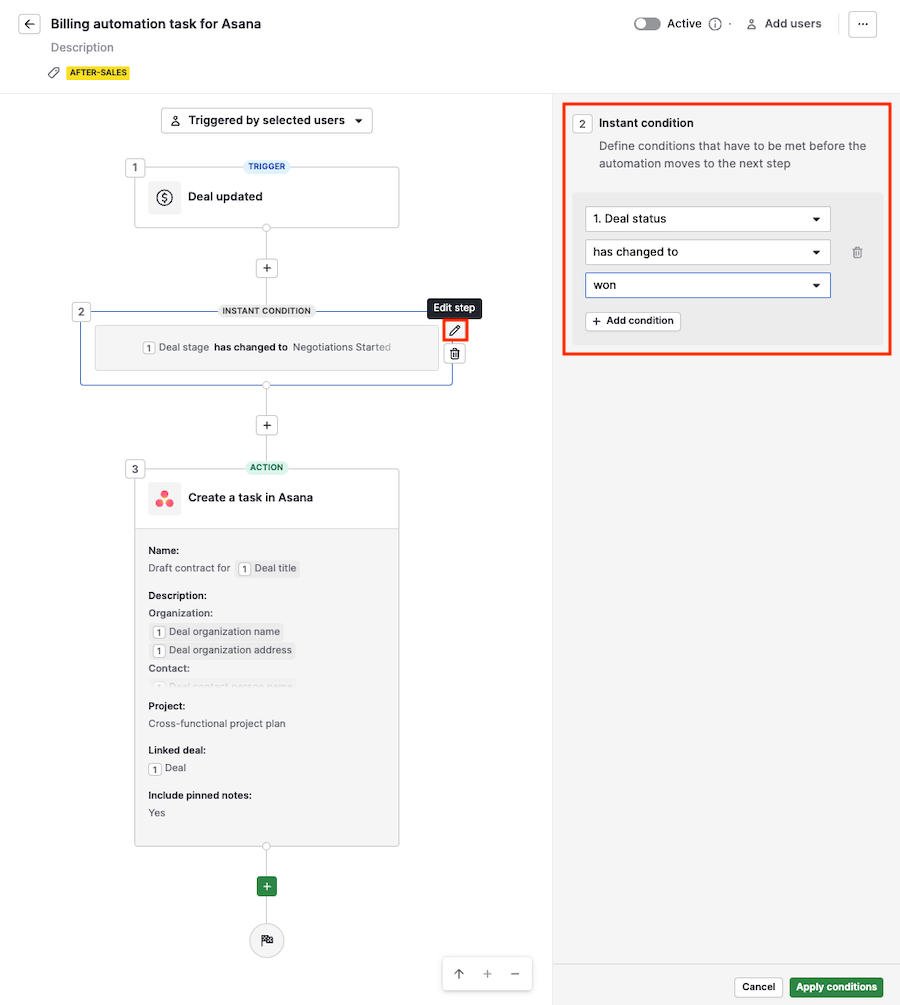
The following screen will show all the details of your automation, and you can still edit it before activation.
Let’s say you prefer the automation to trigger whenever a deal is won. Click the pencil icon next to the instant condition and change the dropdowns to Deal status has changed to won and click “Apply conditions.”
When you’re ready, toggle the automation to active at the top.
After activating it, every time a deal moves to the selected stage (or if it's won if you changed the condition), a task will automatically be created in Asana with the info you’ve configured.
Expand your workflows
This billing use case is just one example. You can use these templates as a starting point to streamline handoffs across many teams:
Sales to implementation: Automatically start onboarding tasks when a deal is won
Sales to support: Create tasks for follow-up when a deal is lost
Sales to marketing: Add tasks for nurturing leads added manually or through imports
Each template can be customized to match your internal process, providing flexibility without requiring you to start from scratch.
For more on customizing automations, see our Automations: first steps guide.
Was this article helpful?
Yes
No