Importing data into Pipedrive with spreadsheets
You can import data into Pipedrive using XLS, XLSX and CSV files. This lets you add or update records such as people, organizations, leads, deals, projects, activities, notes and products in bulk.
Before importing, make sure your data matches how Pipedrive organizes information. For example, companies should be imported as organizations.

For a hands-on example, you can download a sample spreadsheet, take the “Get started with the basics” Pipedrive Academy course or join our weekly webinar for a guided walkthrough.
You can also read more about CRM data import and export in this post.
Before you start
Preparing your file correctly helps you avoid errors during import.
Decide what you want to import
Start by defining what items you want to create or update in Pipedrive. This determines how your spreadsheet should be structured.
For example, you might want to import contacts only, contacts with deals or new deals for existing contacts.
Structure your spreadsheet
Your spreadsheet should follow a simple format:
- Each column represents a field in Pipedrive (e.g., name, deal value)
- Each row represents one record
All data in a row is linked. For example, if one row contains a person name, organization name and deal value, Pipedrive will create and link all three.

Include mandatory fields
Each item must include its mandatory fields. If these are missing, these items won’t be imported.
For example:
- People require a name (or first name and last name)
- Organizations require a name
- Deals and leads require a linked person or organization
To reduce duplicates, include additional identifiers, such as email or phone number, whenever possible.
Match fields in Pipedrive
Make sure each column in your spreadsheet matches to a field in Pipedrive.
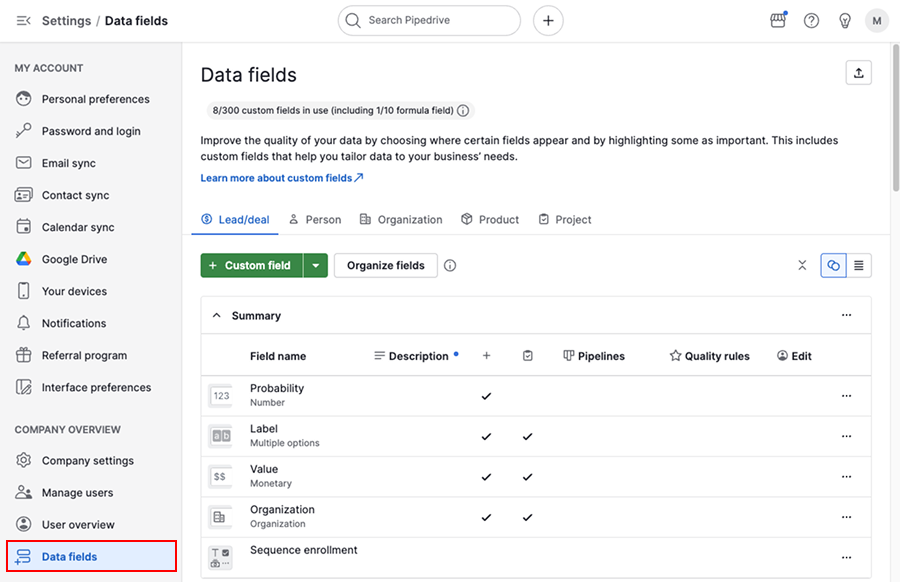
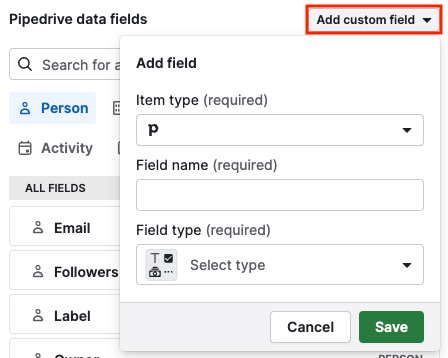
If your data doesn’t match default fields, create custom fields before importing. You can do this in account menu > Personal preferences > Data fields.
For a list of supported fields and how they map during import, see this article.
Check file requirements
Before uploading your file, confirm that it meets these requirements:
- XLS, XLSX or CSV format
- One tab per import
- A header row with column names
- No more than 50,000 rows
- File size under 50 MB
How the import process works
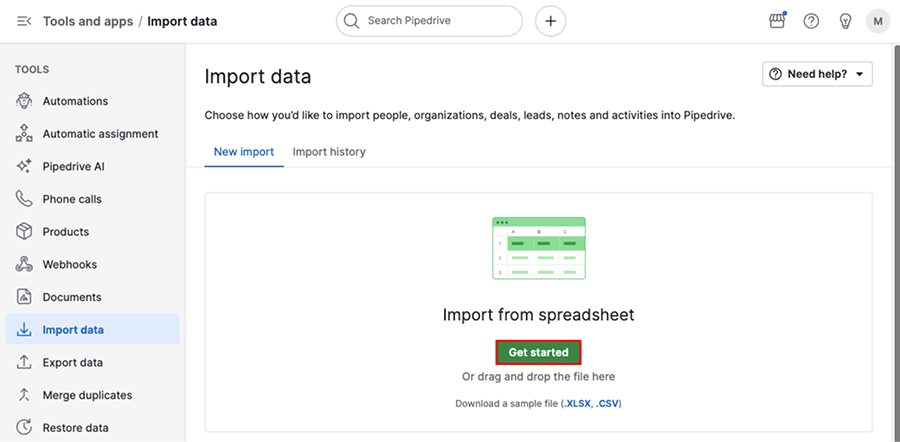
Go to account menu > Tools and apps > Import data > Import from spreadsheet, then click “Get started”.
Click “Next” to continue.
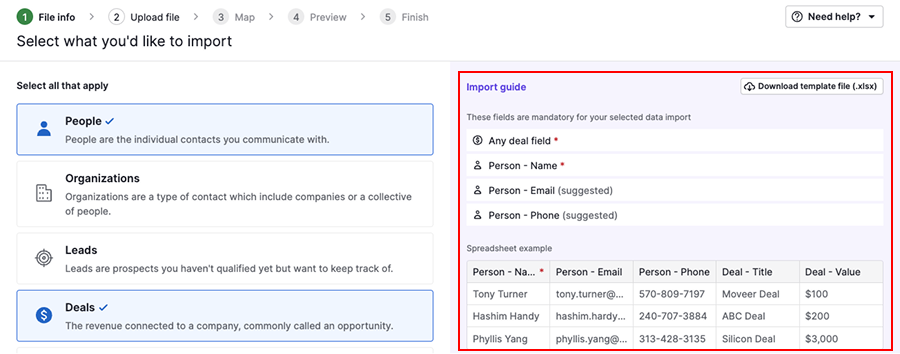
Step 1: File info
Select the data types included in your file. Pipedrive highlights mandatory fields and expected structure.
Click “Next” to continue.
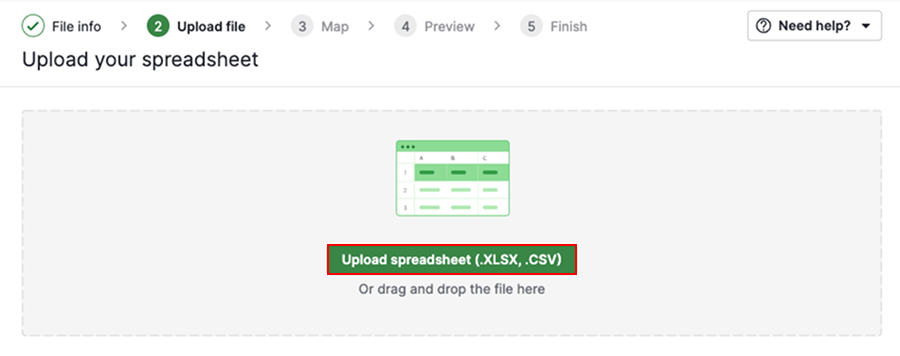
Step 2: Upload file
Click “Upload spreadsheet” and select your file.
Once uploaded, Pipedrive automatically checks your file for common issues, such as:
- unsupported file format
- exceeding row limits
- missing headers
- empty or misaligned columns
If there’s a problem, you’ll see an error message with guidance on what to fix. If everything looks correct, you can continue to the next step.
Step 3: Map fields
Pipedrive automatically maps your spreadsheet columns to fields based on column names.
Review mapped fields carefully. If a column isn’t matched, drag and assign it manually.
If a field doesn’t exist, add a custom field.
Once you’re finished mapping, click “Next.”
Step 4: Preview
The preview shows how your data will appear after import.
Check that:
- Data is assigned to the correct fields
- Items are linked correctly
- No information is missing

This is your last chance to catch issues before the import is completed.
Step 5: Finish
Choose how to handle duplicates. If duplicates are detected, you can merge them instead of creating new records.
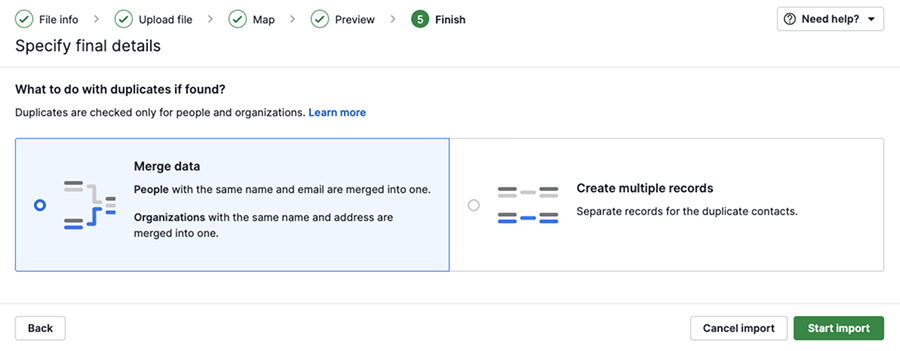
Click “Start import” to complete the process.
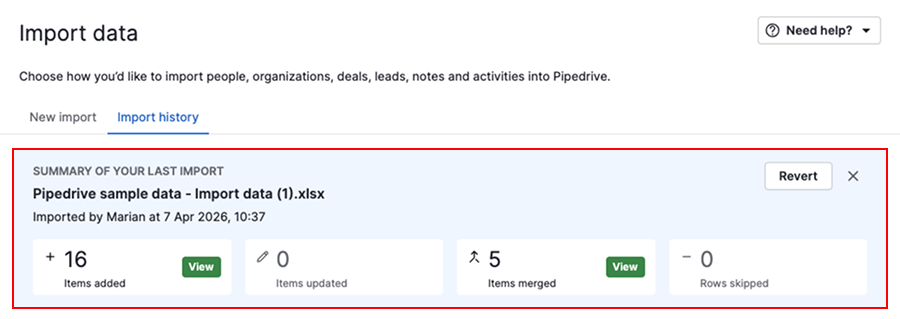
After your import
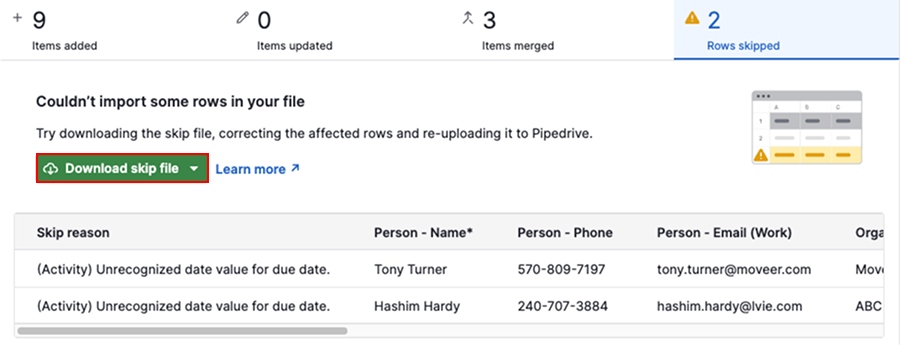
Once the import is complete, you’ll see a summary in the import history tab.
This includes how many records were added, updated, merged or skipped. Click “View” to see details.
Fix skipped entries
If some rows weren’t imported, they’ll appear in a skip file with the reason for each failure.
For example, rows may be skipped due to an invalid date format.
To fix this:
- Download the skip file
- Correct the issues
- Re-import the file
Revert an import
If needed, you can revert an import from the import history tab within 48 hours.
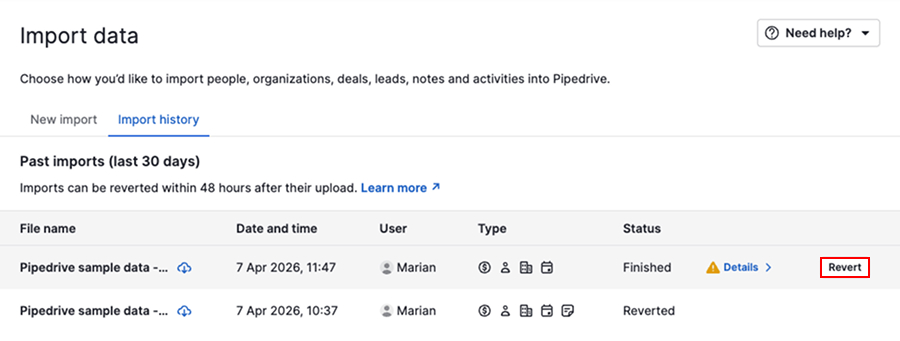
If the revert button is unavailable, contact our support team for help.
Was this article helpful?
Yes
No