本文章以機器翻譯產生。
安裝您的網站訪客追蹤腳本
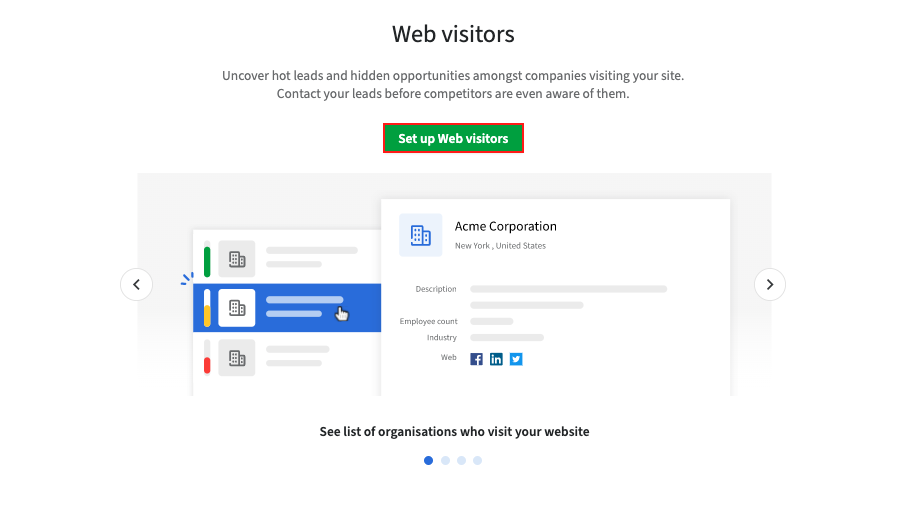
要設置您的網站訪客追蹤器,請前往潛在客戶 > 網站訪客然後點擊"設置網站訪客"。系統將提示您嵌入一個追蹤器腳本到您的網站來設置網站訪客功能。
一旦您複製了追蹤器到剪貼簿,您可以根據您用來託管網站的方式,按照以下方向將腳本安裝到您的網站。
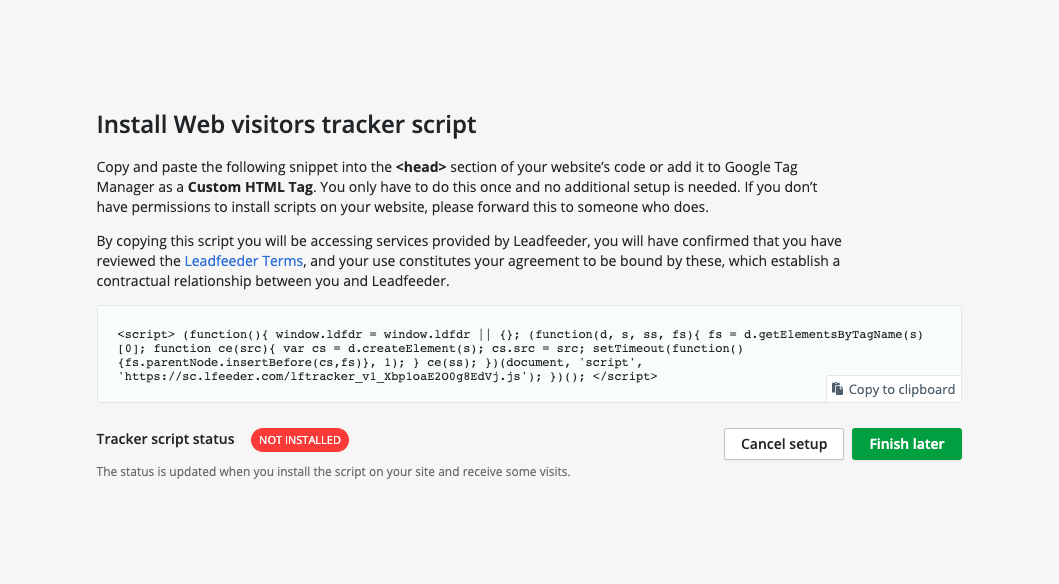
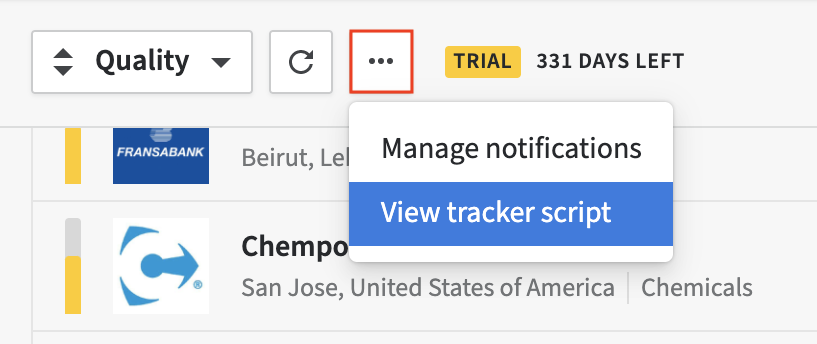
您仍可以通過點擊左上角的「...」按鈕 > 查看追蹤器腳本來訪問您的追蹤器腳本,前提是您有有效的Web訪客帳戶。
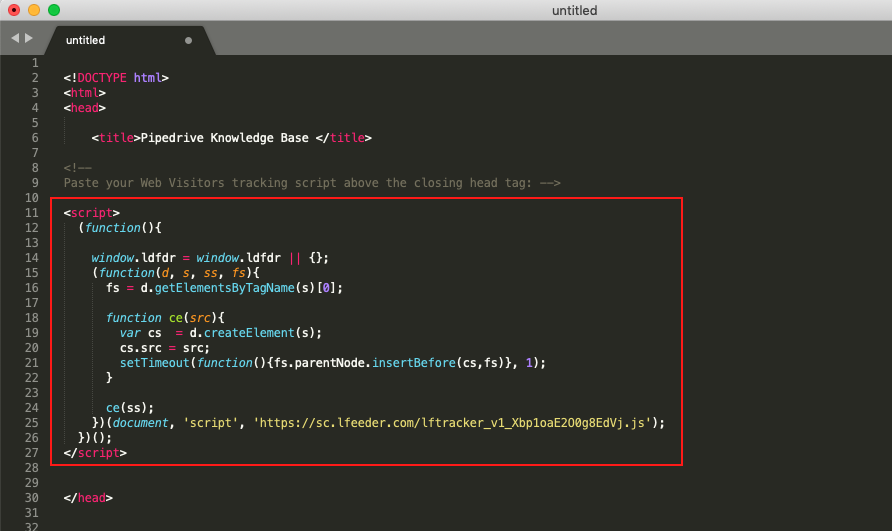
將追蹤器腳本直接添加到您的網站模板
要將追蹤器腳本添加到您的網站模板中,請進入您的 HTML 文件的 <head> 標簽,並將腳本粘貼到結束</head> 標簽之前。
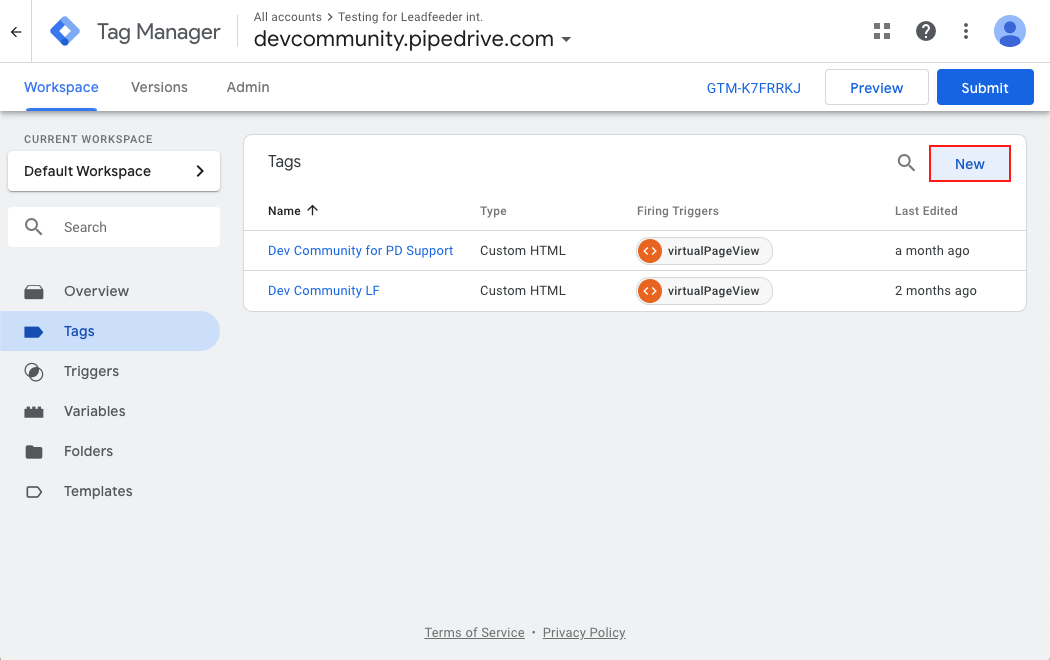
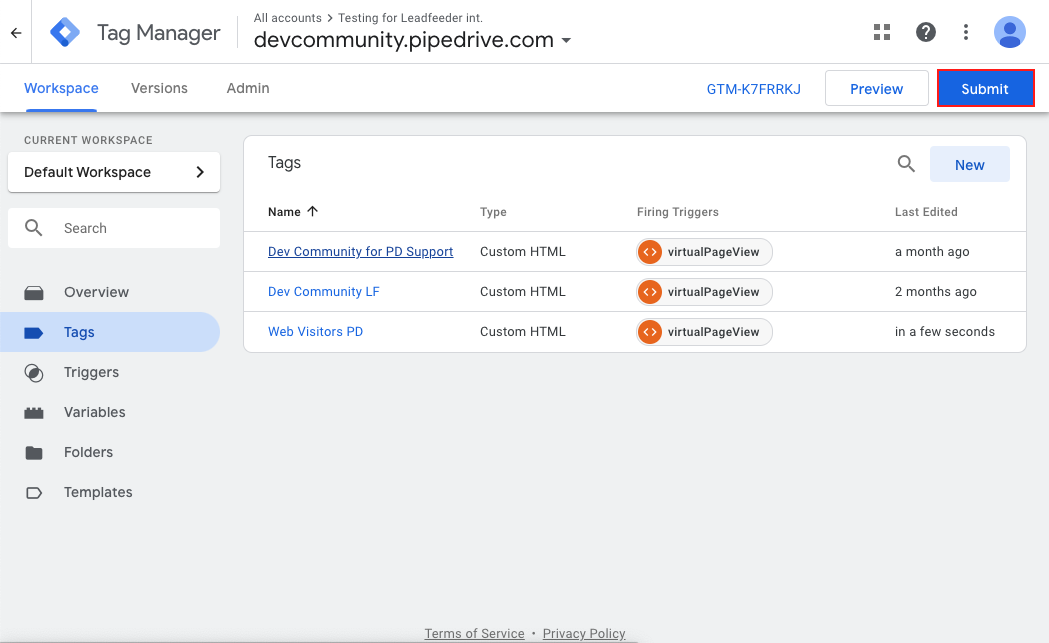
使用Google標籤管理員添加跟踪器腳本
您也可以使用Google標籤管理員安裝跟踪器腳本。要做到這一點,請轉到您的Google 標籤管理員控制台,並點擊標籤 > 新增添加新標籤。
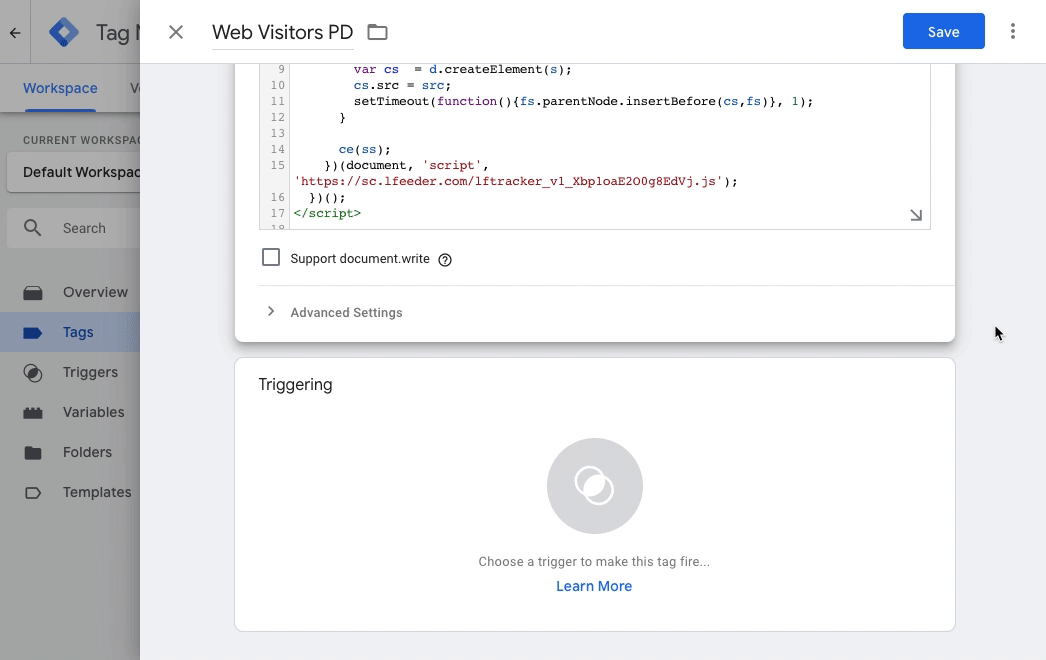
從那裡,您可以為您的Web訪客標籤命名、配置和設置觸發器。
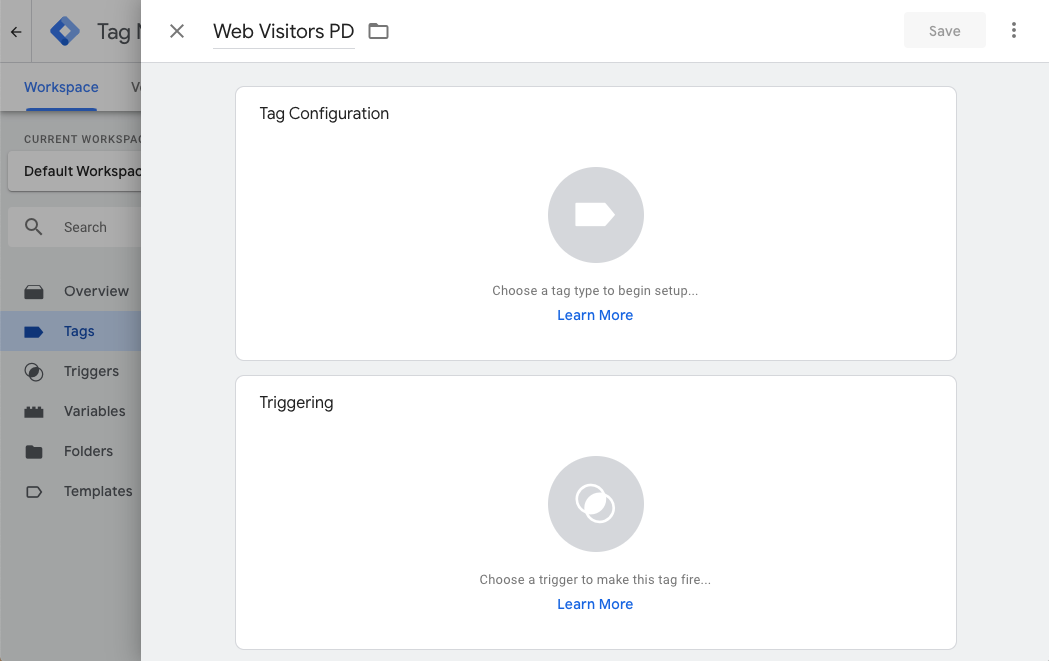
標籤配置
觸發
將追踪器腳本添加到您的WordPress網站使用插件
要將追踪器腳本添加到您的WordPress網站,您將需要一個插件,該插件將允許您將代碼添加到您的網站中。
要找到並安裝插件,請前往插件 > 添加新項目,並搜索一個允許您向WordPress網站的標頭、正文和頁腳添加自定義代碼的插件。
如果您有以.zip格式的插件,也可以上傳您自己的插件。
找到插件後,您可以點擊"安裝"。有很多可供選擇的插件,但在這個示例中,我們使用的是標頭、頁腳和文章插入這個插件。
安裝完插件後,必須啟用它。
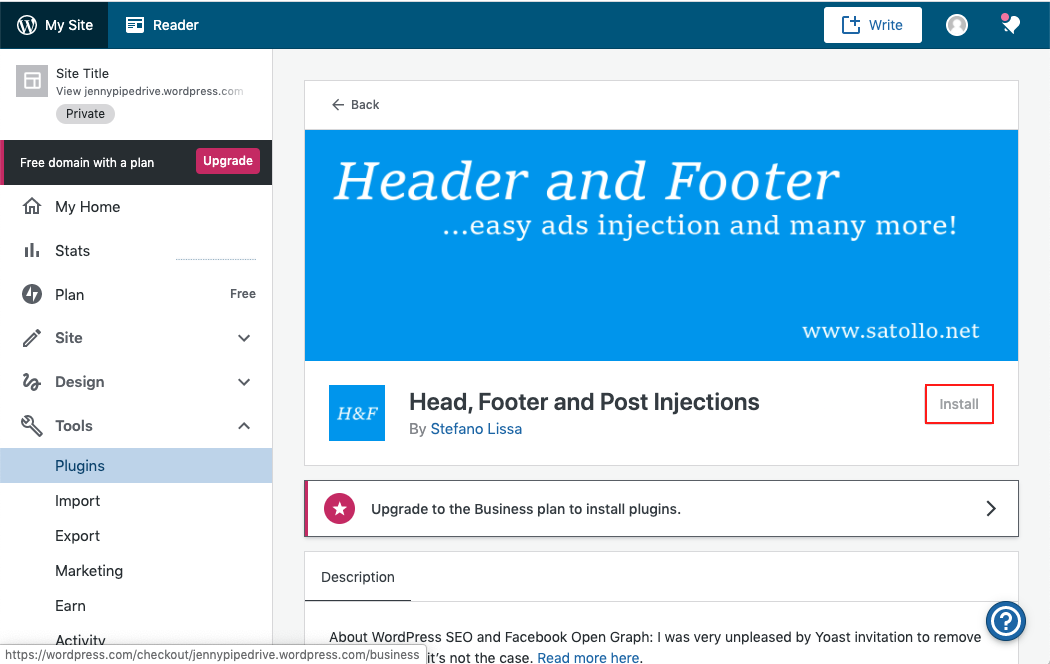
插件激活後,您可以訪問插件設置並將您的Web Visitors追踪器腳本粘貼到每個頁面的標頭部分,然後保存。
將跟踪器腳本添加到您的Wix網站
您可以閱讀這篇文章來學習如何將跟踪器腳本添加到您的Wix網站。
將追踪腳本添加到您的Squarespace網站
您可以閱讀此文章來了解如何將追踪腳本添加到您的Squarespace網站。
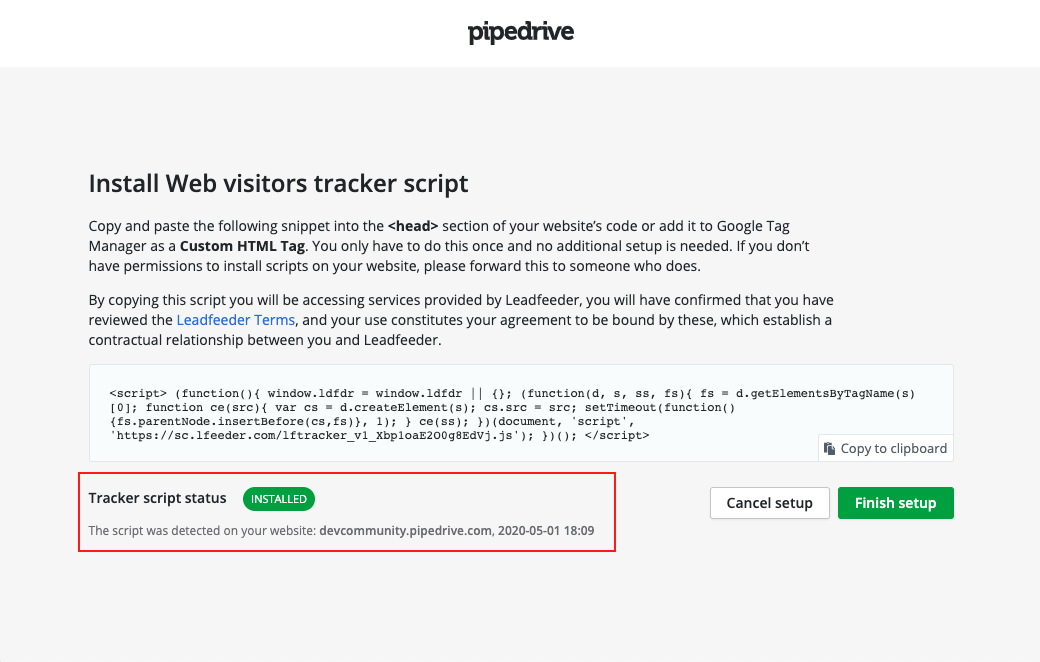
啟用追踪腳本
回到Pipedrive後,只有在安裝追踪腳本後網站接收一些訪問後,追踪腳本狀態才會顯示為已安裝。
一旦追踪腳本已啟用,您可以通過Pipedrive分類您的訪客並將它們添加為潛在客戶、交易和組織。您可以閱讀有關如何查看和管理您的網站訪客的更多信息在這篇文章中。
這篇文章有幫助嗎?
是
否