Automated campaigns
Campaign set up
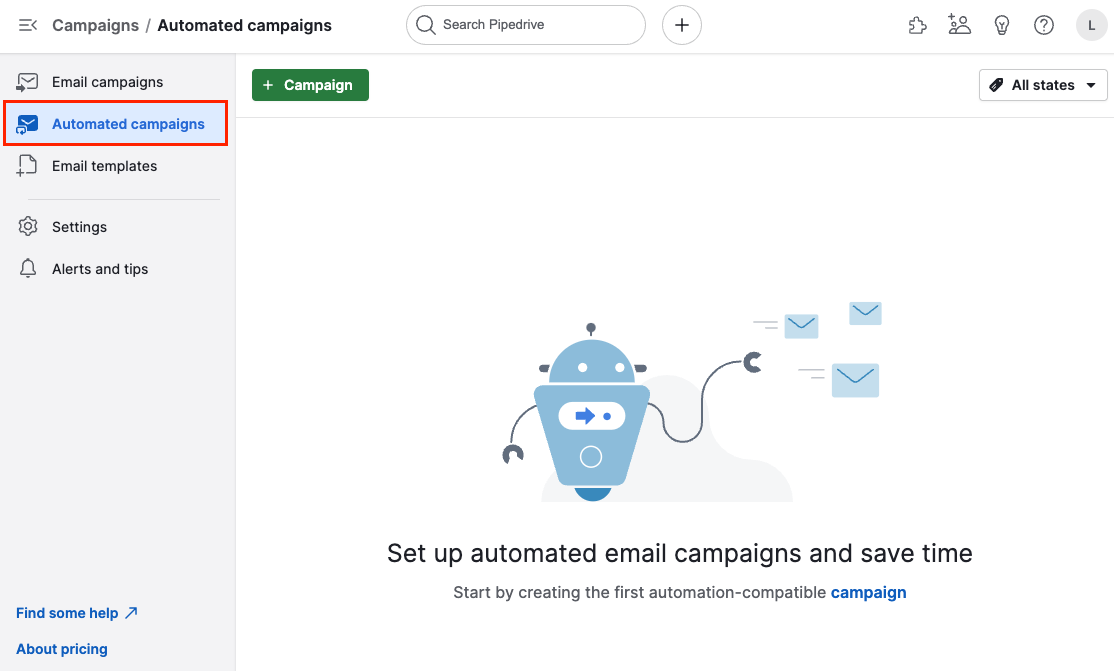
You can start creating your first automated campaign by going to Campaigns > Automated campaigns > + Campaign.
The process of creating an automated campaign is very similar to the process of creating a regular email campaign. You can learn more about creating campaigns in this article.
The main difference is that you don't need to define your audience at this stage – it will be defined while building the automation.
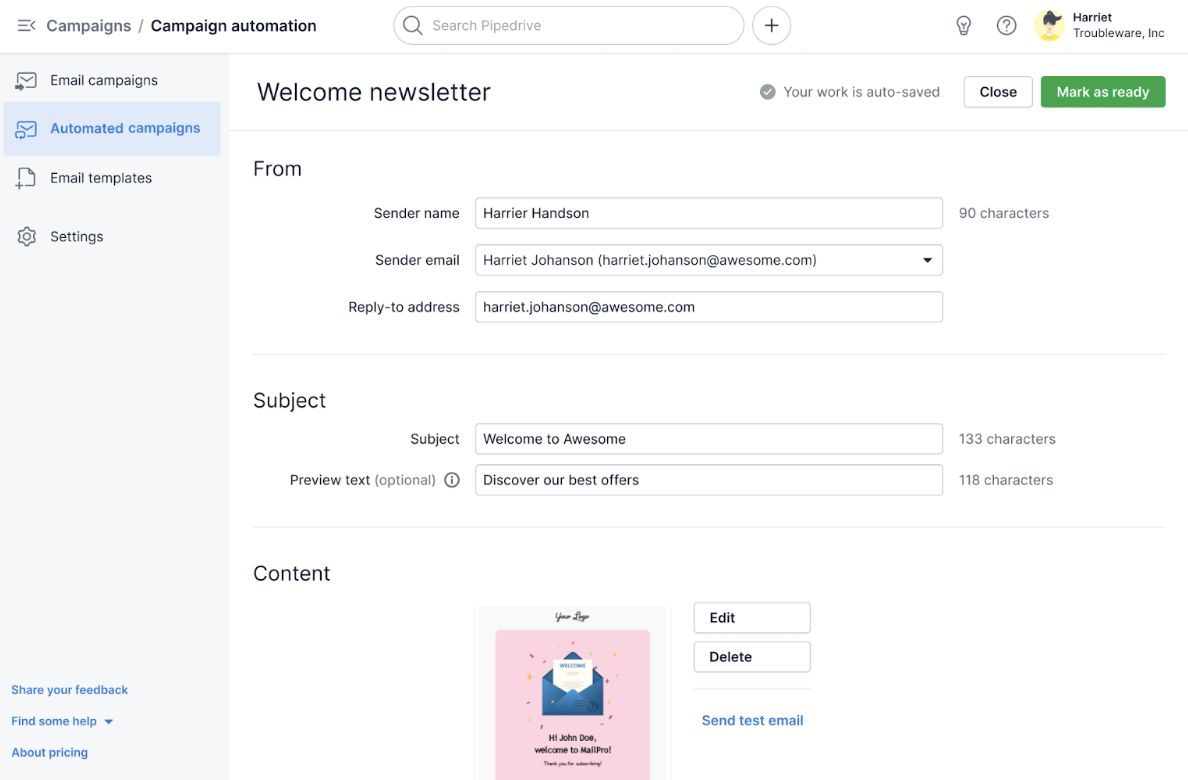
We highly recommend you give specific titles to your automated campaigns, as this will help you identify the right one within the automation setup and other features. Hover over the default title and click on it to edit.

Once your campaign is set up, click on Mark as ready at the top of the page and then Continue to automations to start setting up the automation.
Automation set up
When clicking on Continue to automations, you will see two options: Create automation and Add to existing automation.
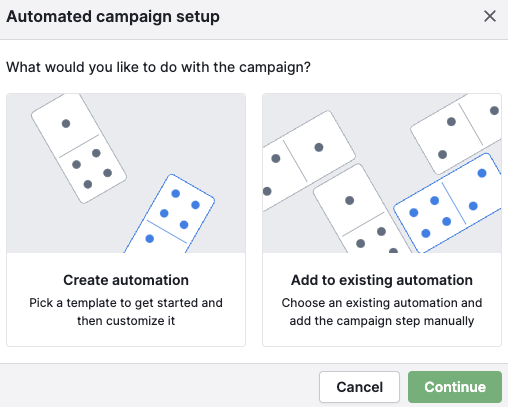
Create automation
You can create an automation from scratch or pick one of the templates we have available for you.
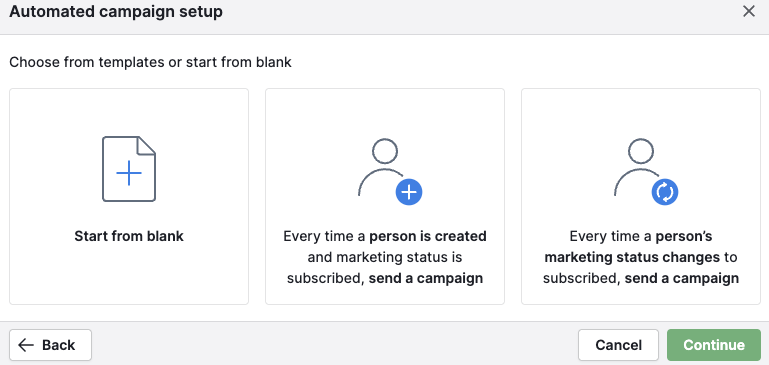
Start from blank
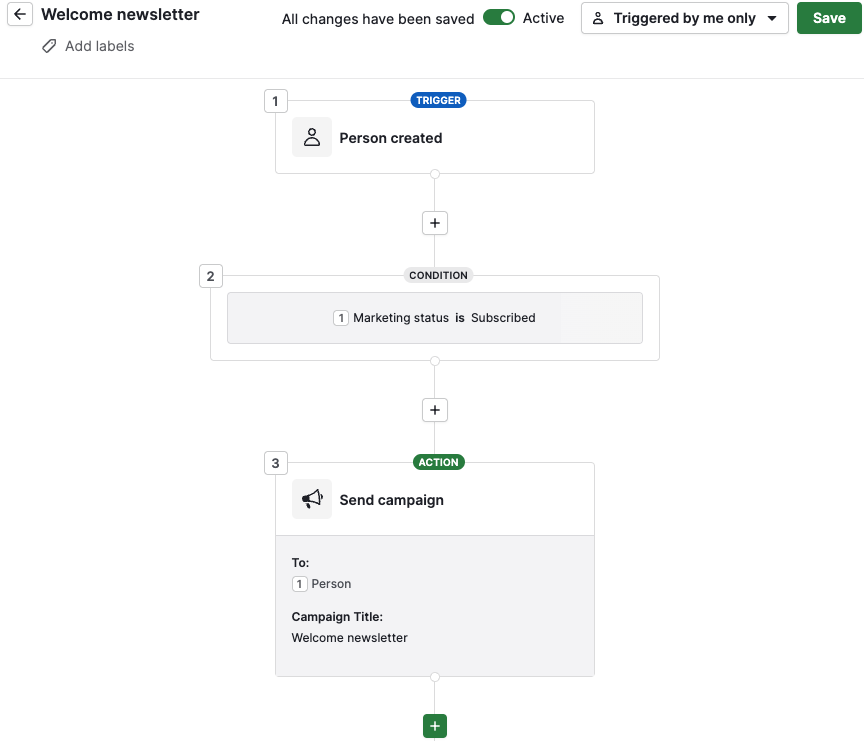
If you select Start from blank, you will need to give a name to your automation and will be redirected to the automation builder. Here, you can add the trigger and start creating your automation.
You can learn more about creating automations and their conditions in this article, but there are three basic steps that you need to add to your automations:
- Trigger
- Condition
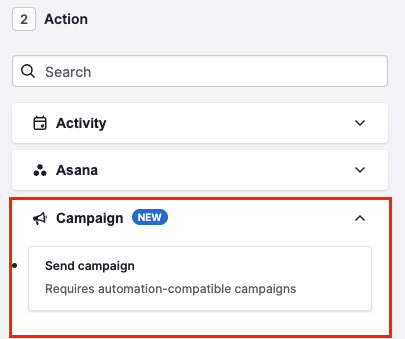
- Action
Automated campaign is a type of action available within the Campaign item.
Pick an automation template
If you choose any of the pre-existing templates, you'll only need to add a name to your automation – the automation with the marketing status and campaign will be created automatically afterwards. You can add or edit steps like other conditions or action events here.
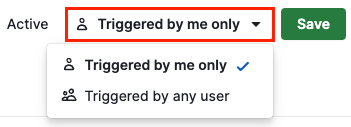
To specify which users are allowed to trigger this automation, check the options list at the top-right of the automation and select the option you prefer.
Add to existing automation
By clicking on this option, you will see a list of available automations to choose from.

The automations displayed can be the ones you used for other automated campaigns or any other automations you created beforehand.
If you use automations created beforehand that don't have the marketing status condition and the campaign action steps, you will need to add them to the existing automation.
If you want to use existing automations without modifying their structure, we recommend duplicating the existing automation and using the new duplicate. You can then modify it freely without affecting the existing automation.
Automated campaign status
After creating your automated campaigns, they will all be displayed as a list with their corresponding statuses and rates.
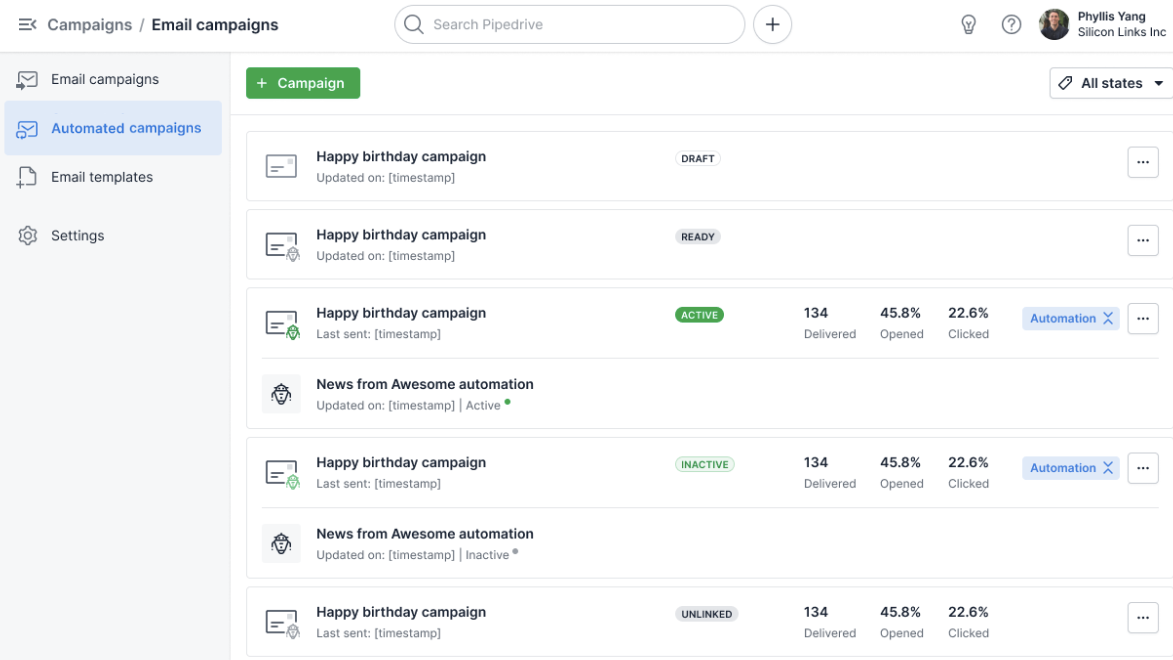
 | The campaign is attached to one or multiple active automations. |
 | The campaign is being worked on. After validation, the status will change to Ready. |
 | The campaign is finished and ready to be automated. It can no longer be edited. |
 | The campaign is paused due to a need for account review or account suspension. |
 | The campaign was attached to one or multiple automations, but is no longer attached to any. |
 | The campaign is attached to one or multiple inactive automations. |
 | The campaign was blocked either manually by the compliance team, or automatically by detecting phishing links. |
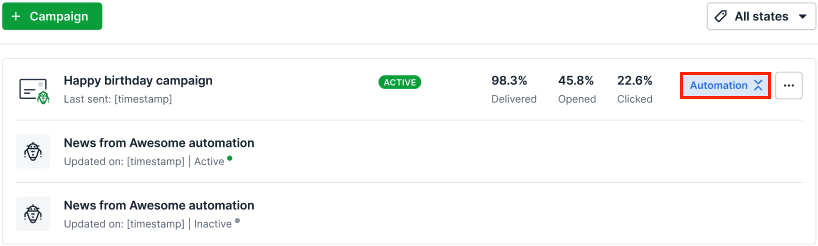
You can click on the "Automation" expander button to see all the automations connected to your campaigns.
Analytics
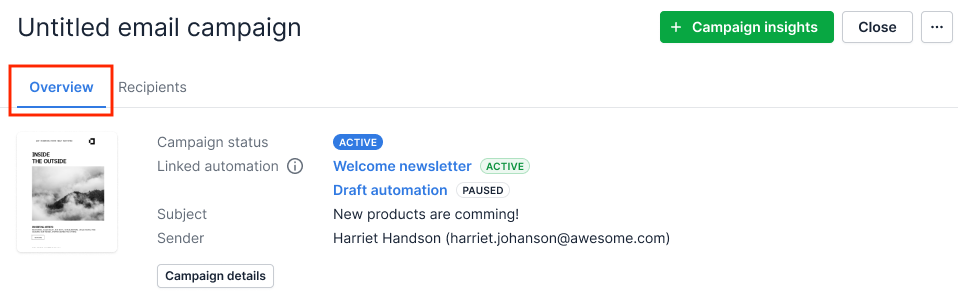
Within the campaign Overview, you will find a summary of your campaign with the campaign and automation status, the subject, the sender and a small visual preview. And you can see more campaign details such as number of recipients, reply-to email, and preview text by clicking on the Campaign details button.
If you scroll down, you will find more data about your campaign's engagement, delivery and performance rates.
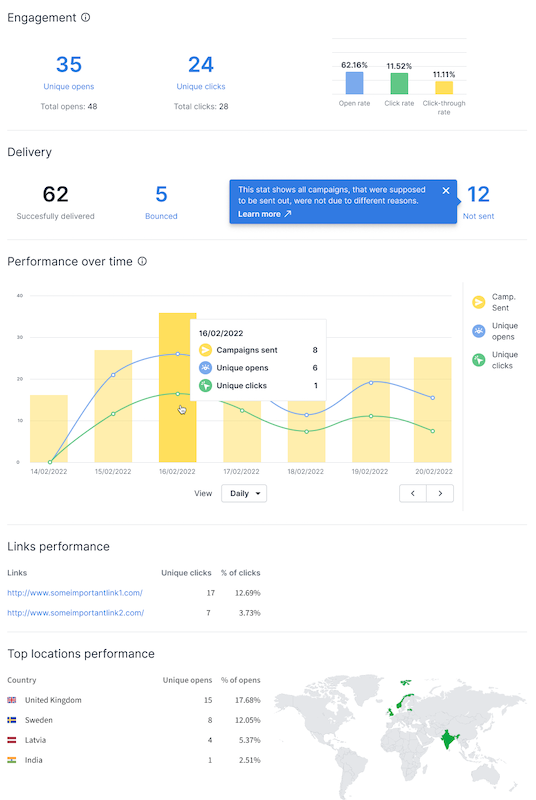
You can learn more about campaign performance and analytics in this article and about email tracking reports here.
Recipients
Within the Recipients tab, you will see the contacts your automated campaign was sent to.
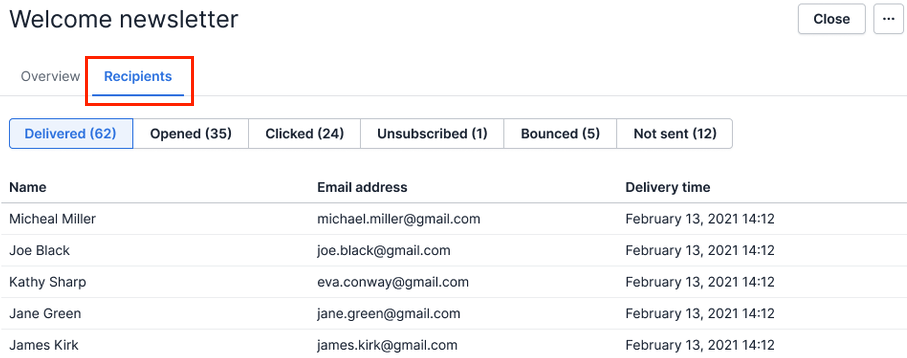
The campaign recipients list is classified depending on the different delivery statuses. You can click on every sub-tab to see the list of contacts and you can click on the contact itself to open the details.
Not sent recipients
There are several reasons why your recipients could be skipped from your campaigns:
- Contact not subscribed
To send out automated campaigns, you must add the condition "Marketing status is Subscribed" to the automation. The contacts that don't have the Subscribed marketing status added will be skipped and will not receive the automated campaign.
- Account issues
If your company is under account review or suspension, the automated campaigns you've scheduled to be sent out will be paused. They will restart only when the account review ends or the suspension is canceled. You'll see banners within the Campaigns features indicating that these processes are ongoing.
If any of your automated campaigns are blocked due to their content, you need to remove them from "Automation" in the campaigns list and add a new campaign with different content. The automation will then continue to work.
You can see the number of contacts that will not receive the blocked automated campaigns within the Delivery report under Not sent.
- Double opt-in missing
If your account has the double opt-in requirement enabled, only contacts with this status will receive automated campaigns. You can see the number of contacts that don't have double opt-in status within the Delivery report under Not sent.
- Permissions missing
To send out automated campaigns, you need permissions for the Campaigns app. If you create an automation and your company admin revokes your permissions, the automated campaigns will be stopped. You can learn more about the permissions that are needed in the next section.
Learn more about regular campaign reports in this article.
Permissions and visibility
Given that Campaigns and automations are two separate features, the following permissions are required to have the full automated campaigns functionalities:
Campaigns
- [Send campaigns]
- [Edit campaigns and email templates]
- [View campaign reports]
Automation
- [Add automations]
Visibility permission
- [See other users' data] – Enable this if you want to see full recipient lists in automated campaign reports
Visibility groups
- Ensure that you have access to all contact persons by being part of the right visibility group
You can learn more about permissions in this article and about visibility groups here.
Was this article helpful?
Yes
No