Campaigns by Pipedrive
Campaigns by Pipedrive lets you create beautiful email communication, engage your customers and manage all of your data directly in your Pipedrive account. Say goodbye to tedious imports and exports, integrations with other tools and work with your sales and marketing data all in one place.
Before you get started
Before you can start sending emails, it’s important to follow email delivery compliance laws and Pipedrive‘s Terms of Service. Your customers will need to first opt in or subscribe to receive your email communications.
Subscribe your customers
Using our Campaigns tool means you can send campaigns to your Pipedrive customers and keep all of your sales and marketing information under your contacts‘ detail view.
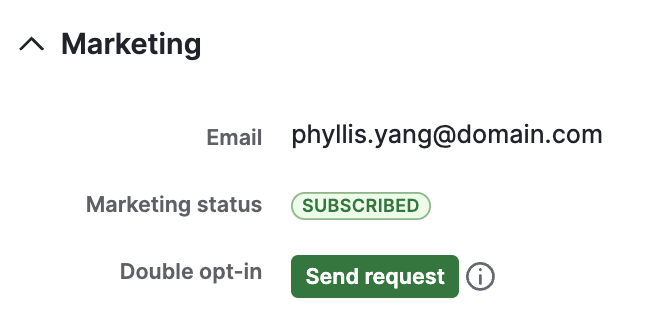
To receive campaigns successfully, your contacts must have the subscribed status in the Marketing status field. This means that the customer has opted in to receiving your email communications. Without this status, you can’t start sending them emails.
The marketing status can be viewed and updated in the contact’s detail view or list view.
You can include the marketing status when adding contacts manually in Pipedrive or importing contacts from a spreadsheet.
If you use our Web Forms, you’ll also be able to subscribe your contacts directly from the web form editor. You can add an opt-in checkbox to your form that automatically fills in the consent statement for the “Marketing status” of your contacts.
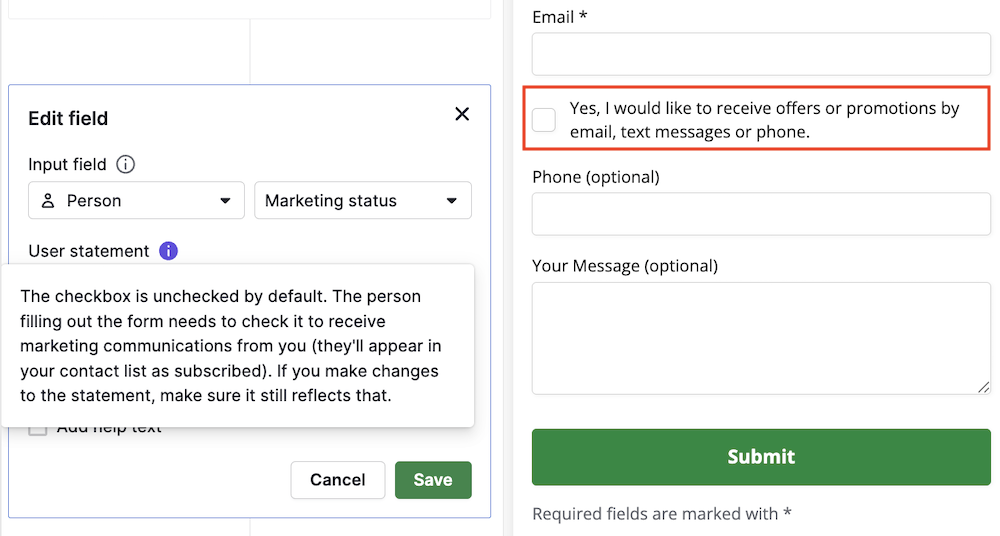
This allows users to directly consent to the use of their information for marketing purposes in your web form, and the marketing status in Pipedrive will be automatically updated.
You can learn more about managing your marketing contacts in this article.
Setting up your account
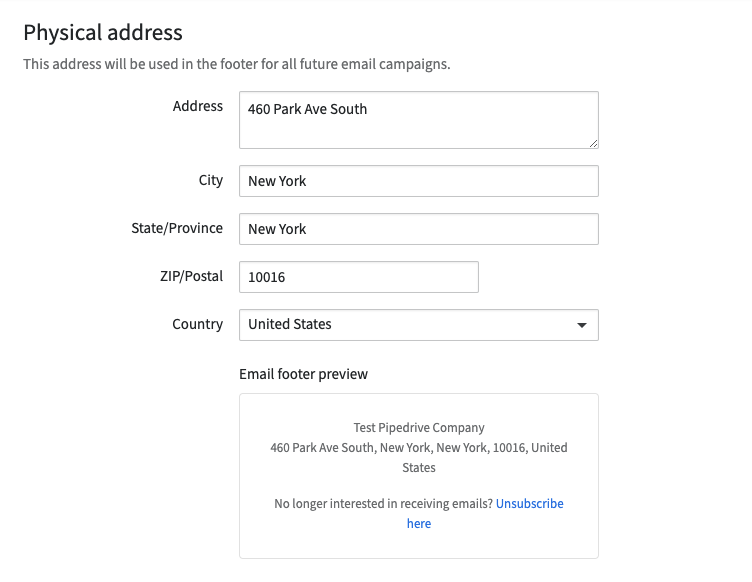
To follow email delivery laws, you need to confirm your company’s physical address. It‘ll be automatically filled with the address listed under your billing information, but you can always change it later.
To comply with applicable privacy and anti-spam laws, such as the ePrivacy Directive in the EU, PECR in the UK, CAN-SPAM in the USA, and CASL in Canada, every email marketing campaign must include an unsubscribe footer at the bottom, where viewers can opt out of your email communications.
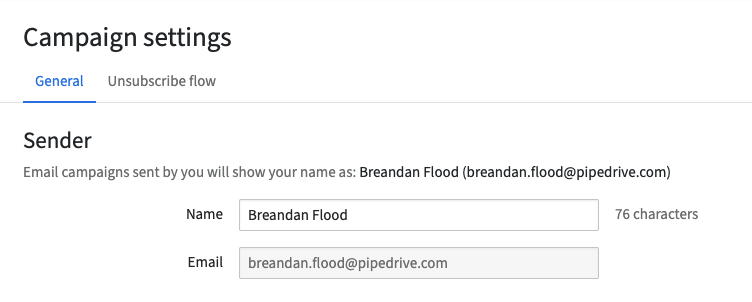
Set up your account by going to Campaigns > Settings.
You’ll also need to confirm your sender name and email address so your customers know who the emails are from.
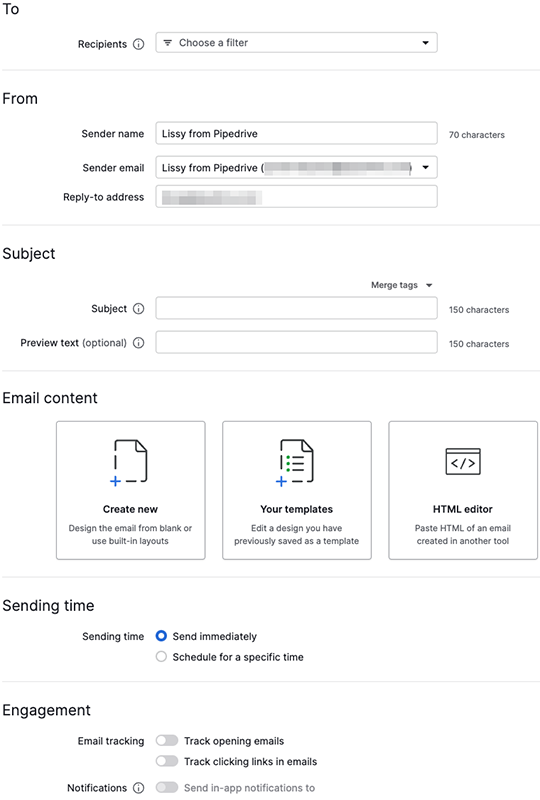
Sending campaigns
Once your customers are subscribed and your account is set up, you can start sending out campaigns. We’ve built an easy-to-use drag-and-drop editor in our campaigns tool, so you can design your own professional emails. You can also create templates to reuse for future campaigns.
Learn more about CRM design.
You can start creating your first campaign by going to Campaigns > Email Campaigns > + Campaign.
Learn how to create and edit campaign layouts in this article.
Monitoring your campaigns
After sending a campaign, you can easily monitor the performance on that campaign‘s Overview and Recipients tabs after selecting the sent campaign. Here you can track:
- Engagement – Opens, clicks and open, click and click-through rates
- Delivery – Delivery success (successfully delivered, bounced, unsubscribed, reported as spam)
- Performance over time – Performance over time by hour or day,
- Links performance – How well the links embedded in your email performed
- Top location performance – How your emails performed by country
- Recipients – Which contacts have engaged with your campaign and how
With this data, you can improve your segmentation and campaigns, as well as help you keep track of which contacts have bounced or unsubscribed from your email communications. Read more about campaign reporting here.
Was this article helpful?
Yes
No