Campaigns by Pipedrive
Campaigns by Pipedrive lets you create beautiful email communication, engage your customers and manage all of your data directly in your Pipedrive account. Say goodbye to tedious imports and exports or integrations with other tools and work with your sales and marketing data all in one place.
So – ready to get started?
Not so fast. Before you get started, it’s important to keep email delivery compliance laws in mind. Your customers will need to first opt-in or subscribe to receive your email communications. You can read more about email marketing regulations in our blog here.
Subscribe your customers
Using our Campaigns tool means you can send campaigns to your Pipedrive customers and keep all of your sales and marketing information under the detail view of your contacts.
To receive campaigns successfully, your contacts will need the Subscribed status under the Marketing status field. This means that the customer has opted into receiving your email communications. Without this status, you can’t legally start sending them emails.
The marketing status can be viewed and updated in the contact’s detail view or the list view.

You can include marketing statuses when adding contacts directly to Pipedrive or importing contacts through a spreadsheet.
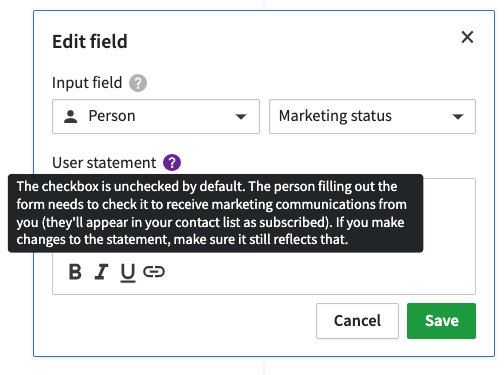
If you use our Web Forms, you’ll also be able to subscribe your contacts directly from the web form editor. In the Edit field block, you’ll see a dropdown with different fields. If you select “Marketing status” the consent statement is automatically filled in.

This allows the users to consent to the use of their information for marketing purposes in your web form directly and the marketing status in Pipedrive will be automatically updated.
You can learn more about managing your marketing contacts in this article.
Set up your account
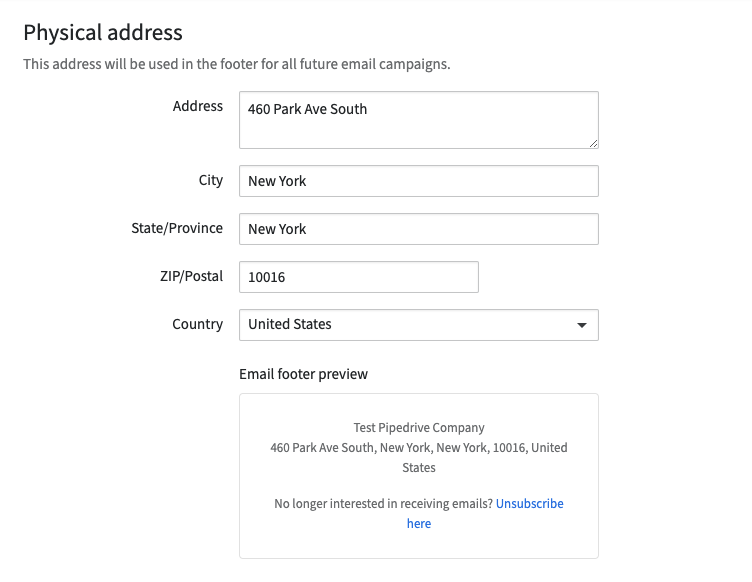
To be compliant with email delivery rule laws, you need to confirm your company’s physical address. It will be automatically filled with the address listed under your billing information, but you can always make changes later.
To be GDPR compliant, every email campaign needs to have an unsubscribe footer at the bottom, where viewers can opt out of your email communications.
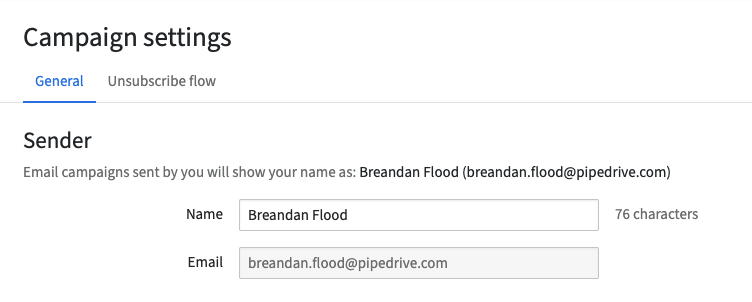
Set up your account by going to Campaigns > Settings.

You’ll also need to confirm your sender name and email address, so your customers know where the emails are sent from.

Start sending campaigns
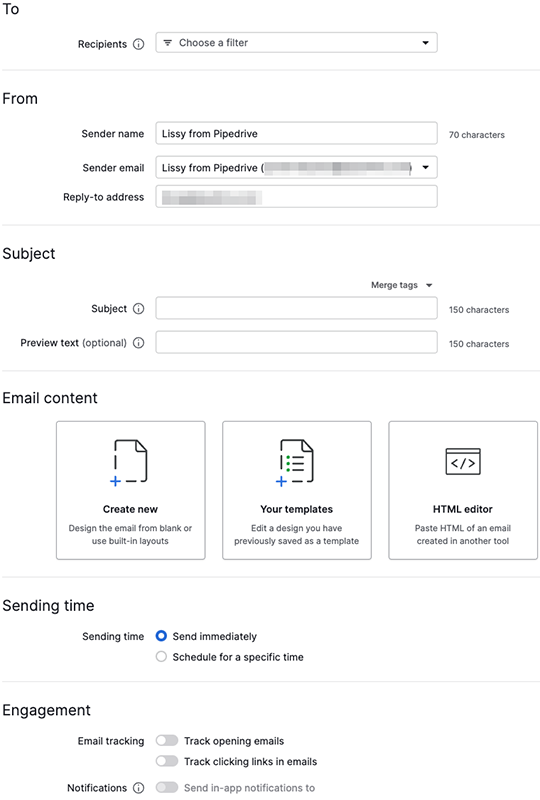
Once your customers are subscribed and your account is set up, you can start sending out campaigns. We’ve built an easy-to-use drag-and-drop editor in our campaigns tool, so you can design your own beautiful, professional-looking emails. You can also create templates that can be reused for future campaigns.
Learn more about CRM design
You can start creating your first campaign by going to Campaigns > Email Campaigns > + Campaign.

Learn how to create and edit campaign layouts in this article.
Monitor your campaigns
After you send out your campaign, you can monitor the performance easily on that campaign's Overview and Recipients pages after selecting the sent campaign. Here you can track:
- Engagement – Opens, clicks and open, click and click-through rates
- Delivery – Delivery success (successfully delivered, bounced, unsubscribed, reported as spam)
- Performance over time – Performance over time by hour or day,
- Links performance – How well links embedded in your email performed
- Top location performance – How your emails performed by country
- Recipients – Which contacts have engaged with your campaign and how
With this data, you can improve your segmentation and campaigns as well as help you keep track of which contacts have bounced or unsubscribed from your email communications. Read more about campaign reporting here.
Was this article helpful?
Yes
No