Data fields in Pipedrive
Pipedrive offers different types of data fields to keep your data organized and help you focus on information that needs special attention.
To view your data fields, open the account menu in the top right corner and go to Personal preferences > Data fields.
Understanding field types
All items (leads, deals, people, organizations, products and projects) follow a similar structure of default, system and custom fields.
These field types are the basis for how your data is organized in Pipedrive – each is designed for a specific purpose.
Default fields
Default fields are already built into your Pipedrive account and are commonly used for basic contact information like names, emails and phone numbers.
When you’ve just created your Pipedrive account, the default fields will be the first thing you see on the Data fields page. After creating some custom fields, they’ll appear right after the custom fields section.
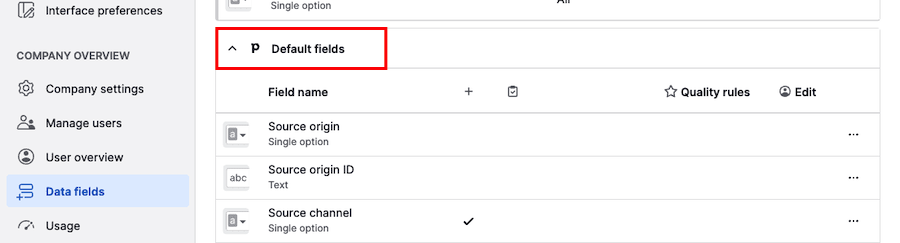
While their names and types can’t be edited, you can adjust quality rules for some of them.
You can also see default fields in the detail, list and project views.
System fields
System fields are part of the Pipedrive interface and reflect system-generated information, like the date an item was created or the number of emails exchanged with a contact.
You can find the system fields section right below the default fields section.
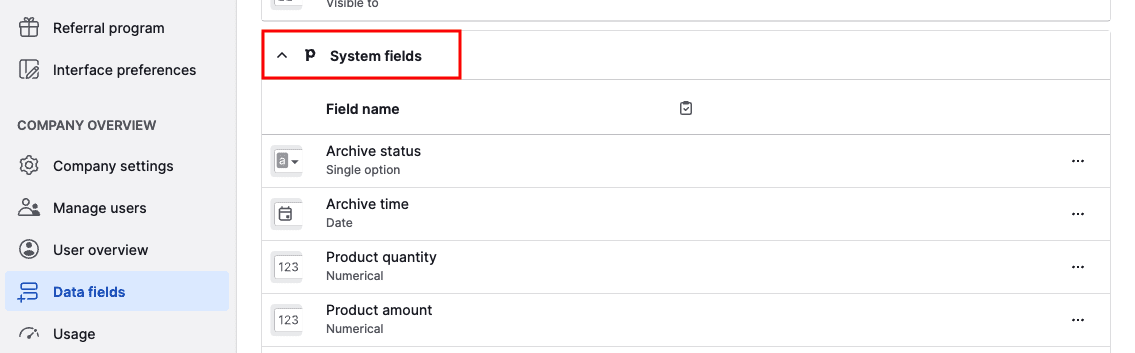
These fields are always visible when mapping your imports, and they’re helpful to update data into Pipedrive with spreadsheets.
Custom fields
Custom fields let you collect information tailored to your business needs. When a suitable default field isn’t available, simply add a custom field instead.
You can learn more about adding and configuring these fields in our custom fields article.
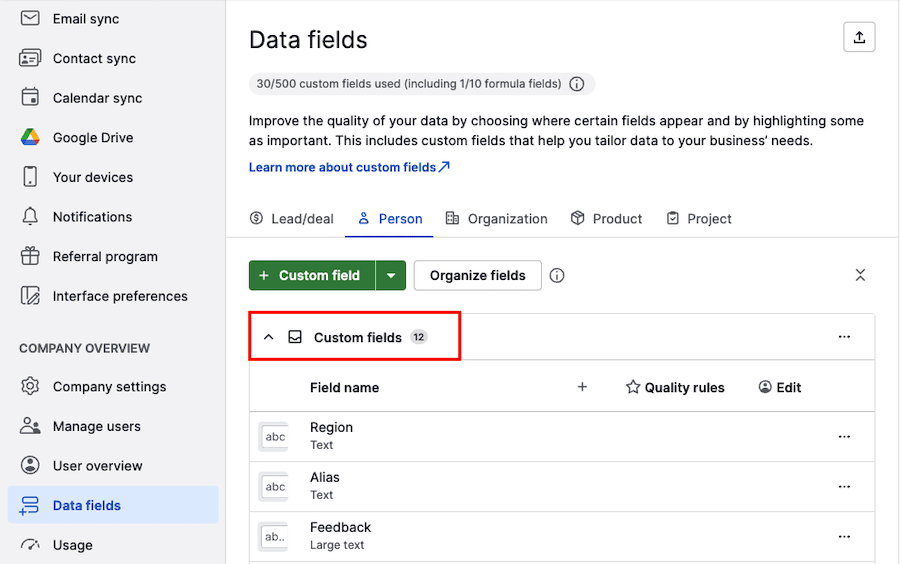
Once created, you can view custom fields in the detail, list and add views.
Advanced custom field settings
The Data fields page becomes especially useful as soon as you start creating custom fields. You can manage field settings and properties there to tailor them to your workflow.
Field group
Use field groups to organize your custom and default fields into clear sections, making it easier to view and manage the information that matters most to your team.

By grouping related fields together in the detail view, you can reduce clutter, improve data consistency, and ensure that everyone quickly finds the details they need.
Field description
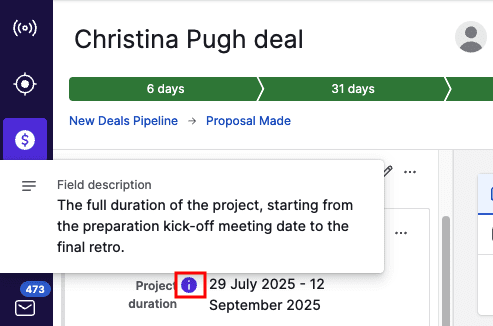
To help onboard new colleagues and maintain data quality, you can add a field description to deal or lead fields that guide your team in filling them out and understanding the data.
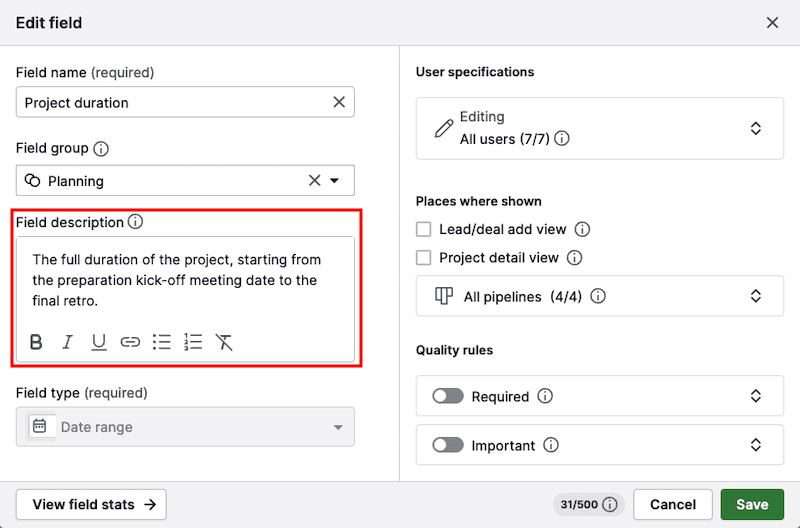
In the deal detail view, you can find the field description by clicking on the “i” icon.
Formula
If you use numerical or monetary deal fields to track things like commission, deal profitability or discounts, you can save time by turning these fields into automatically calculated formula fields.
To use a formula, make sure that “Apply formula to deals” is enabled.
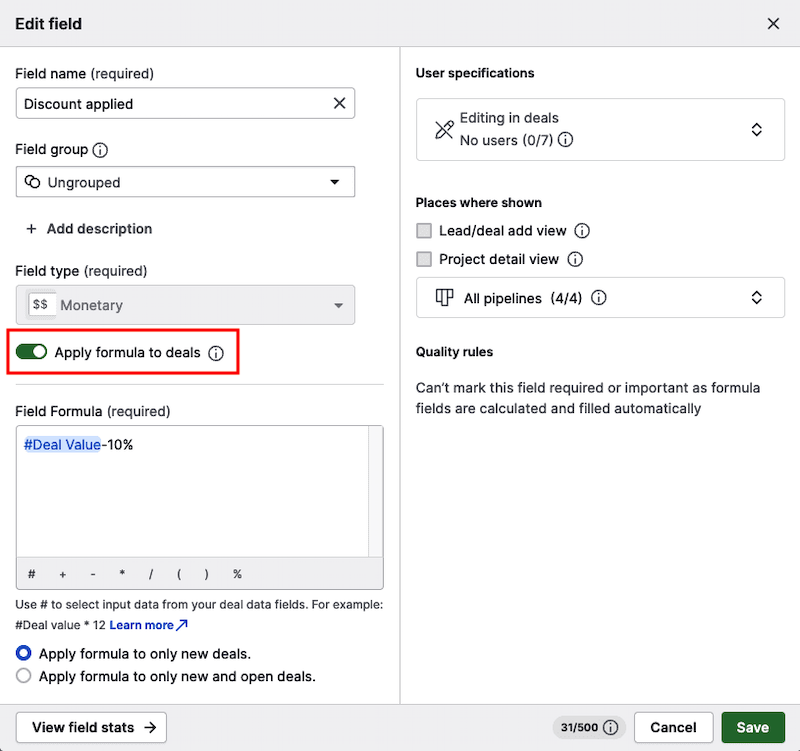
You can then write the calculation by using deal data fields in the field formula section.
By using formula fields, you’re reducing errors and making more accurate, data-driven decisions.
User specifications
To help you maintain consistent and accurate data across your account, you can restrict which users can edit the field based on their permission sets.
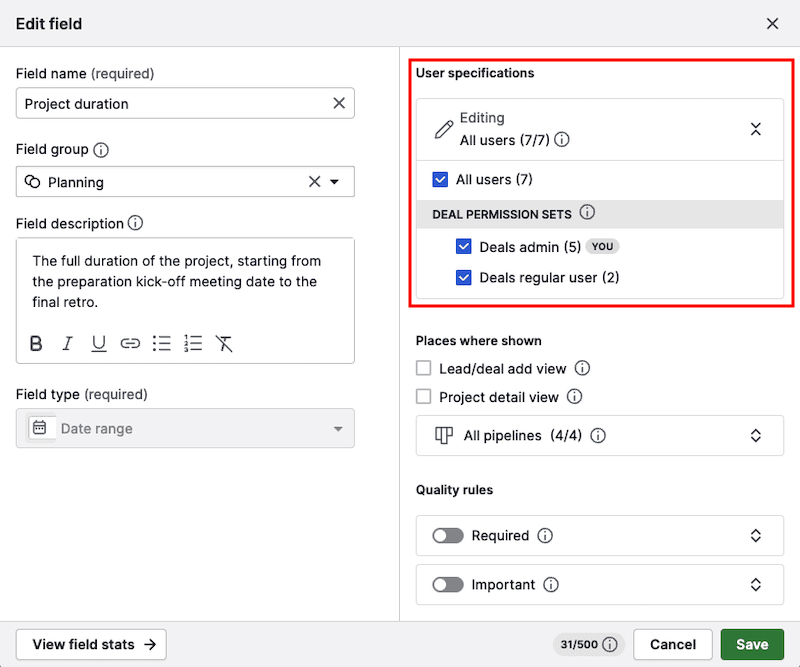
When disabled for users under the specific permission set, they can only view the field. To learn more about read-only fields, see this article.
Pipeline-specific custom fields
With this special custom field capability, you can control a deal field’s visibility by pipeline.
To make a deal custom field pipeline-specific, click the field to open the edit options. Then click on “All pipelines“ and deselect the pipelines where you want the field to be hidden.

When enabled, the field appears in all deals. When disabled for specific pipelines, it’s hidden from the deal detail view while the deal is in those pipelines.
If the field already contains some data, that data won’t be deleted, only hidden. It’s also visible in the list view, Insights and APIs.
Board-specific custom fields
Board-specific custom fields work similarly to pipeline-specific custom fields, but apply to projects instead of deals. They let you control where project custom fields are visible based on the board.
To manage this, open a project custom field and select the boards where the field should appear.
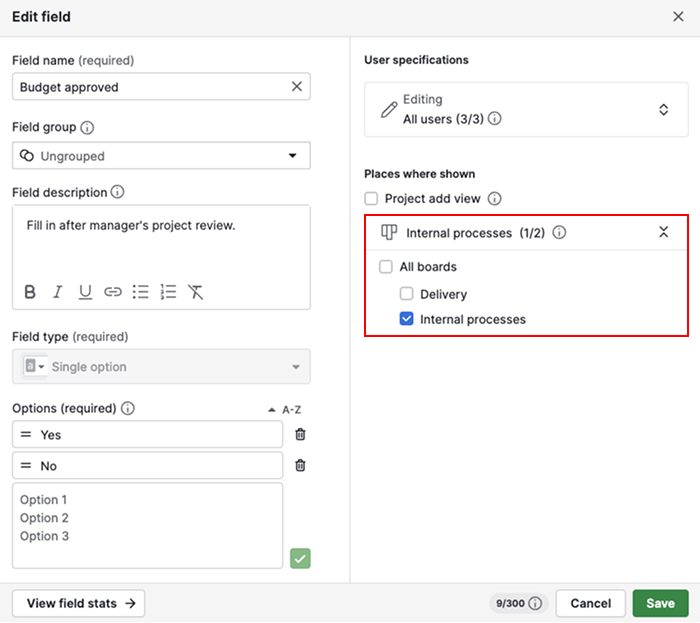
When the field is enabled for all boards, it’s visible in every project detail view. If you disable it for specific boards, it’s hidden from projects within those boards.
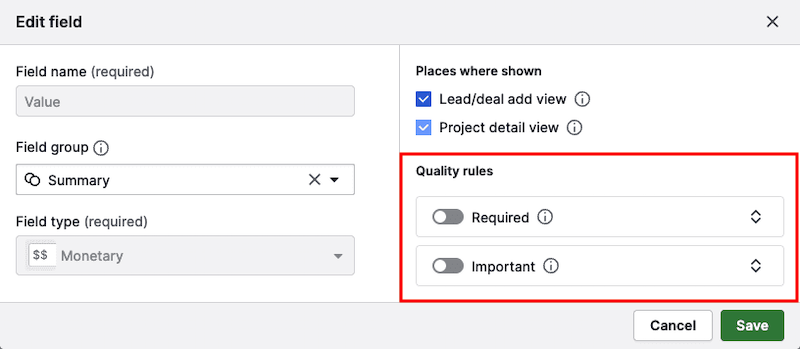
Required fields
Marking fields as required ensures your team fills in important deal details. If a required field is left empty, users won’t be able to save the deal and will see a reminder about it when viewing existing deals.
To set this up, click on the field to open the edit field options. Under the quality rules section, enable the “Required“ toggle.
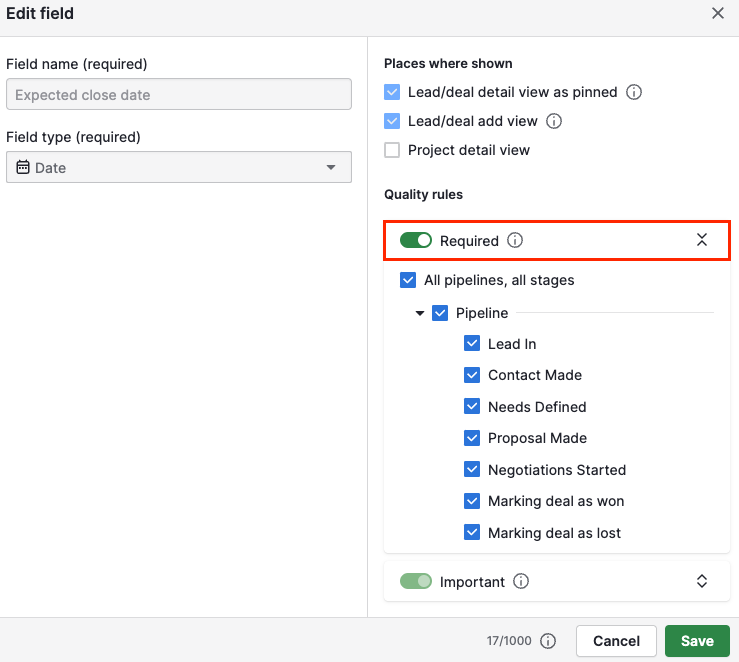
You can choose to require fields for specific pipelines or stages, depending on your workflow needs.
Learn more about required fields and how to configure them in this article.
Important fields
Marking fields as important helps to remind your team to fill in key deal information. If an important field is left empty, users will see a reminder in the detail view.
To set this up, click on the field and enable the “Important” toggle under quality rules. You can choose to apply this setting to specific pipelines or stages.
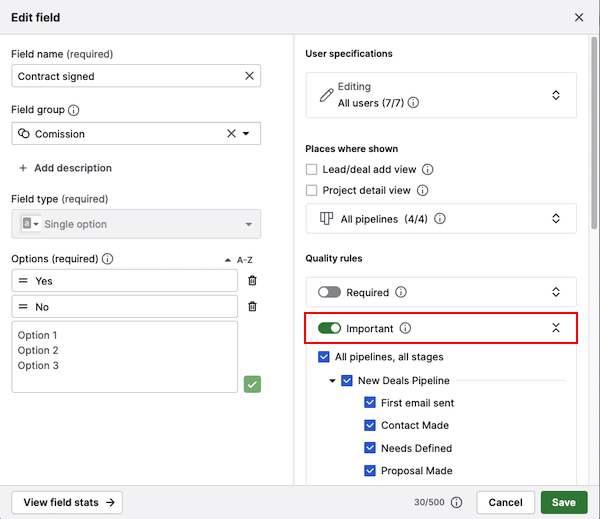
You can find more information and a video tutorial about important fields in this article.
Field stats
To check if your custom field contains data or is used in any filters, open the field and click on “View field stats”.
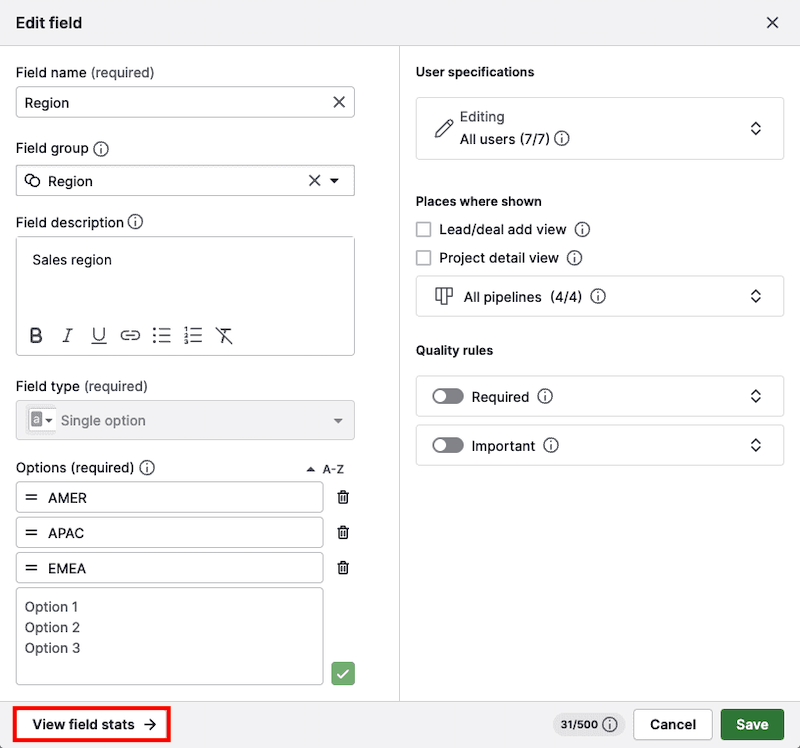
Additionally, you’ll see when the field was created or last edited and by which user.
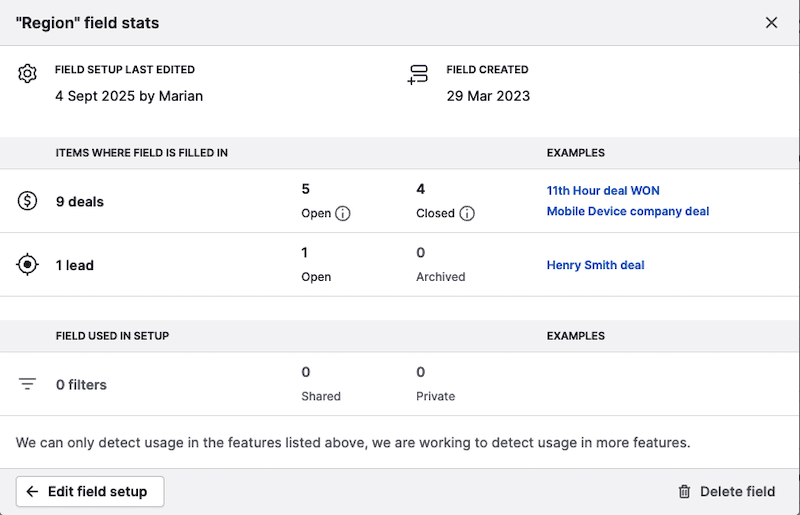
This information can help you assess data quality or decide whether to keep or delete the field.
Was this article helpful?
Yes
No