Pipeline: how to design your sales process
Customize your pipeline to match your company’s sales process. Each stage in the pipeline view represents a step your deals go through before they’re won or lost.
A well-structured pipeline helps you track progress, forecast revenue and identify bottlenecks in your sales cycle.

Tips for pipeline design
Your pipeline should align with how you sell.
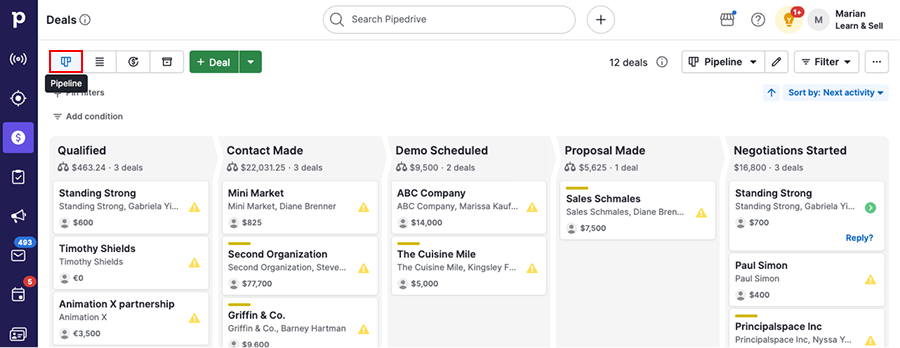
To help you get started, Pipedrive includes a default sales process. You can find it in the deals tab under pipeline view.
Before editing or creating your pipeline, review the points below with your team:
What to think about | Why it matters | Recommended approach |
What are the key steps from first contact to closed deal? | Your pipeline should reflect your real sales process. | List each major step a deal goes through and use those as your stages. Keep stage names clear and action-oriented. |
Are your stage names specific and actionable? | Vague stages make it unclear what needs to happen next. | Align stages with real actions, such as “Meeting scheduled” or “Proposal sent,” instead of broad labels like “In progress” |
How many stages do you really need? | Too many stages make the pipeline harder to scan and reduce adoption. | Create fewer stages to keep your pipeline focused and easy to manage. |
Do different teams follow different processes? | Different workflows in one pipeline can create confusion and messy data. | If teams work differently, create multiple pipelines to match each process. |
Should deals move between pipelines? | Moving deals across pipelines can affect reporting accuracy. | Avoid moving a deal through multiple pipelines, as this can affect reporting in Insights. |
Set up your pipeline
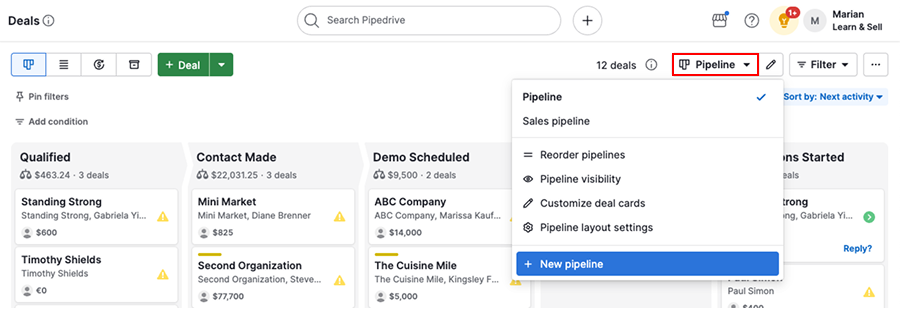
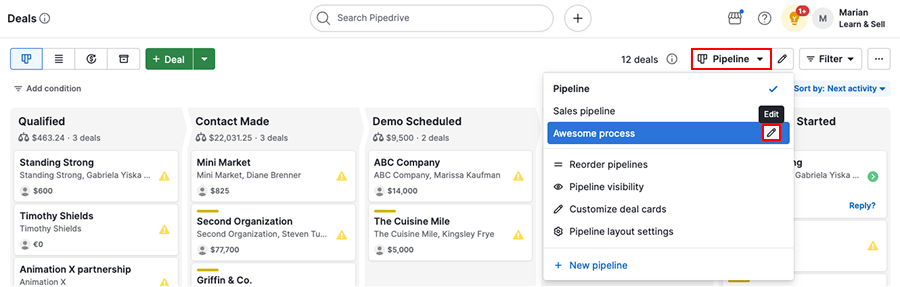
Click on the name of your pipeline to open the dropdown menu and select “+ New pipeline”.
You’ll then see a sample five-stage pipeline that you can edit.
Name the pipeline
Enter a name that reflects your sales process.
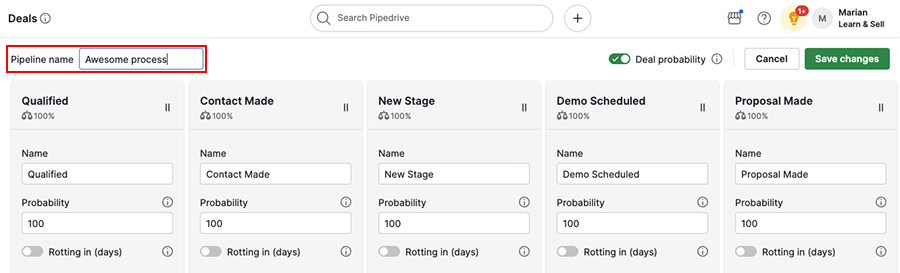
Name stages
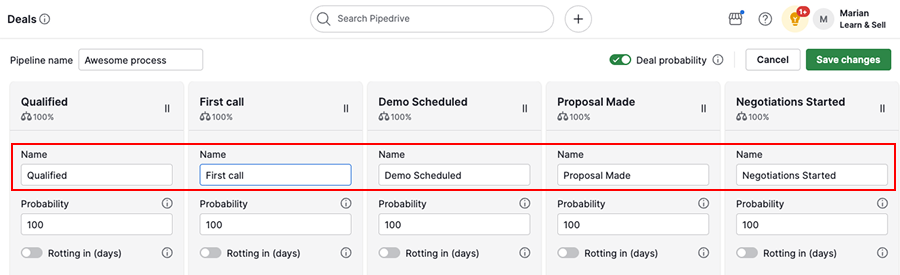
You can also rename the stages to match your sales process.
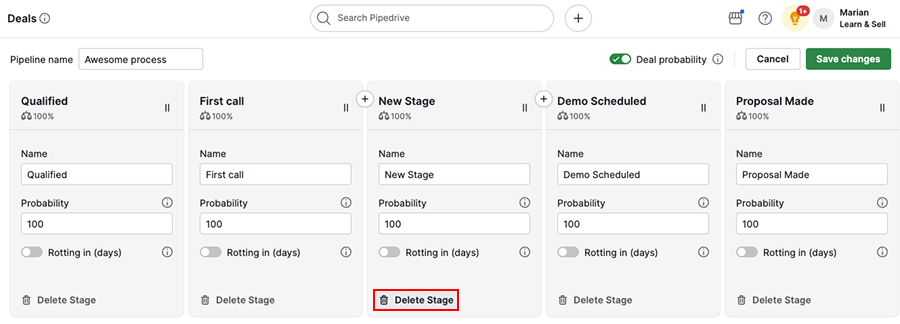
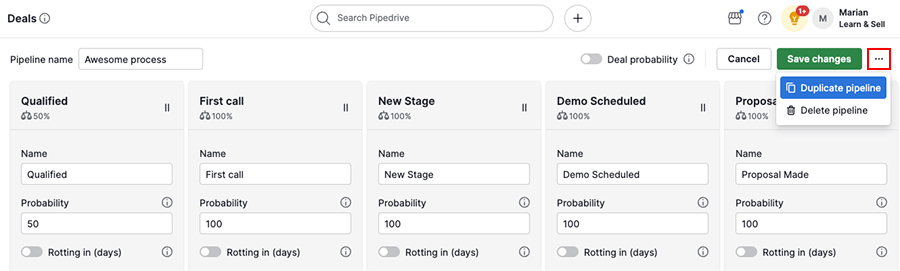
Add stages
Hover over a stage and click “+” to insert a new stage between existing ones.
Delete stages
Click “Delete Stage” and confirm your selection.
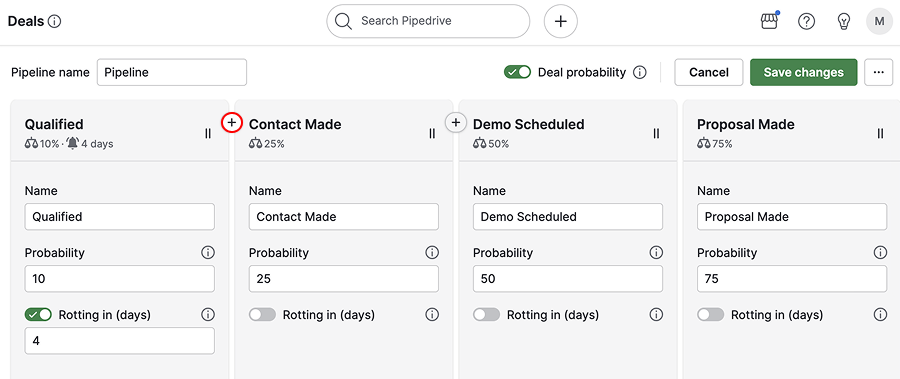
Stage and deal probability
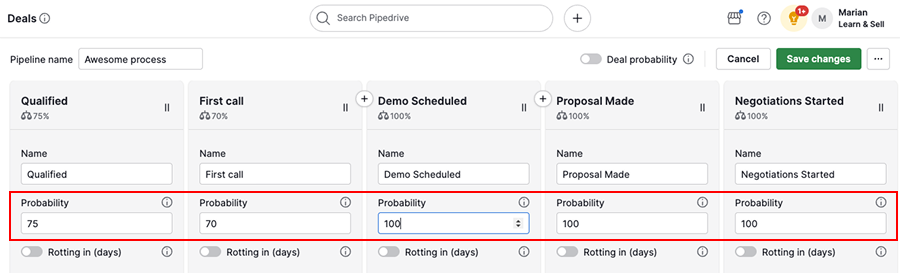
If you have historical performance data, you can set a stage probability to estimate how likely deals in that stage are to close.
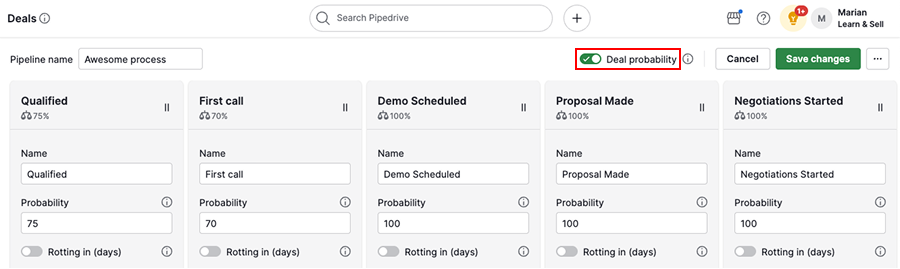
If you prefer to define the likelihood for each individual deal, enable deal probability instead.
Rotting deals
Enable the rotting feature to highlight deals that stay in a stage for too long.
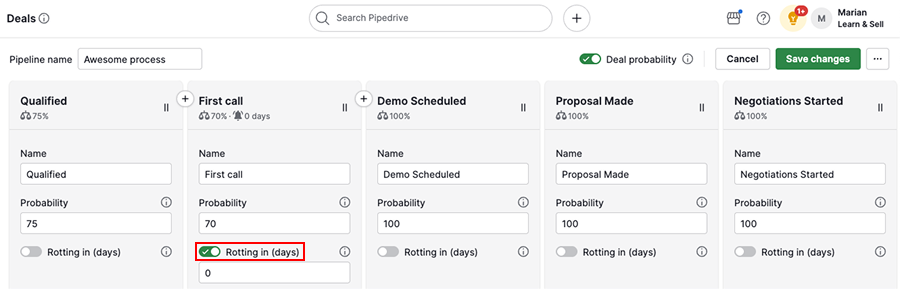
Set the number of days after which deals start to rot. You’ll be notified when deals remain in the same stage beyond that time.
When you're done, click “Save changes”.
Edit existing pipelines
Sales processes evolve over time, so review your pipeline regularly and adjust stages as needed.
Open the pipeline dropdown menu, then click on the pencil icon next to the pipeline you want to edit.
You’ll see the same editing options as when creating a new pipeline.
Click “...” to duplicate or delete the pipeline.
Was this article helpful?
Yes
No