How can I remove seats?
If your team size has reduced and you’re not replacing a deactivated user, consider removing their unused seat from your subscription.
Staying on top of your seat count ensures you’re only billed for team members who actively use Pipedrive.
Removing a seat
To remove an unused seat, you’ll first need to deactivate the user from your account. This article explains how to do so.
While deactivating a user, you’ll see a summary of all items owned by that user and a reminder to reassign their data.
When you tick the checkbox under remove unused seats, you’ll ensure that the user’s seat is removed from your subscription at the next renewal date.
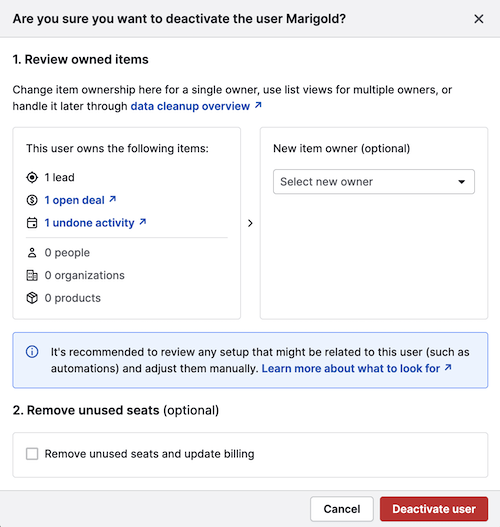
Click “Deactivate user” and follow the checkout steps to confirm the seat removal.
Removing a seat of a deactivated user
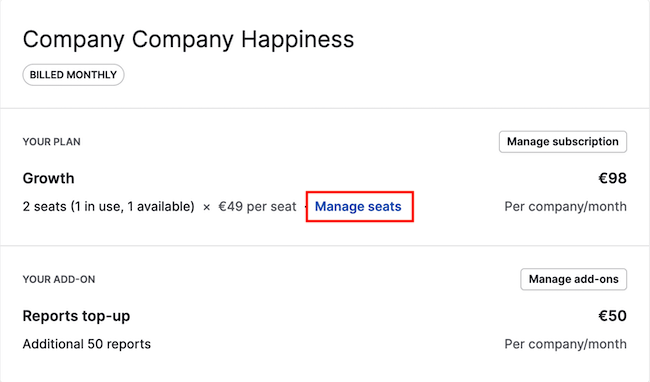
If you leave the checkmark unticked during deactivation, the deactivated user’s seat will be kept. You can remove it later by opening the account menu in the top right corner and selecting the “Billing” tab.
In your billing overview, you’ll see your user count, current subscription cost and your active plan.
Next to the cost of your current plan, you have the option to manage seats.
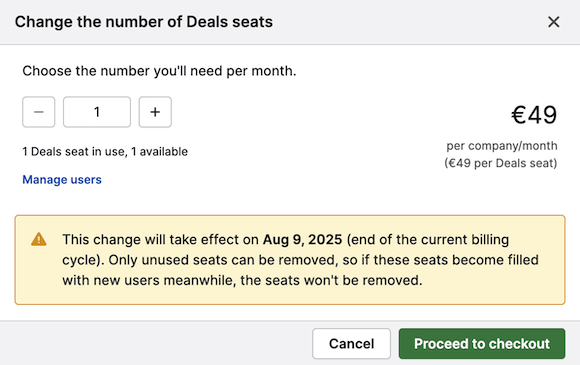
When you click on “Manage seats”, you’ll see a pop-up where you can edit the seat count. After reducing your seat count, you’ll additionally see a note confirming that the change will take effect in your next billing cycle, along with the exact billing date.
To save your changes, click on “Proceed to checkout” and complete the entire billing flow.
You can learn more about billing changes when deactivating a user in Pipedrive in this article.
Was this article helpful?
Yes
No