Custom fields
Pipedrive offers a highly customizable approach to managing your sales process. While your deals, leads, contacts, projects and products already include the default fields necessary for managing your data, you can also create custom fields to store relevant information for your company.
Custom fields make it easier to organize, filter and manage your data based on the information that matters most to your business.

Adding custom fields
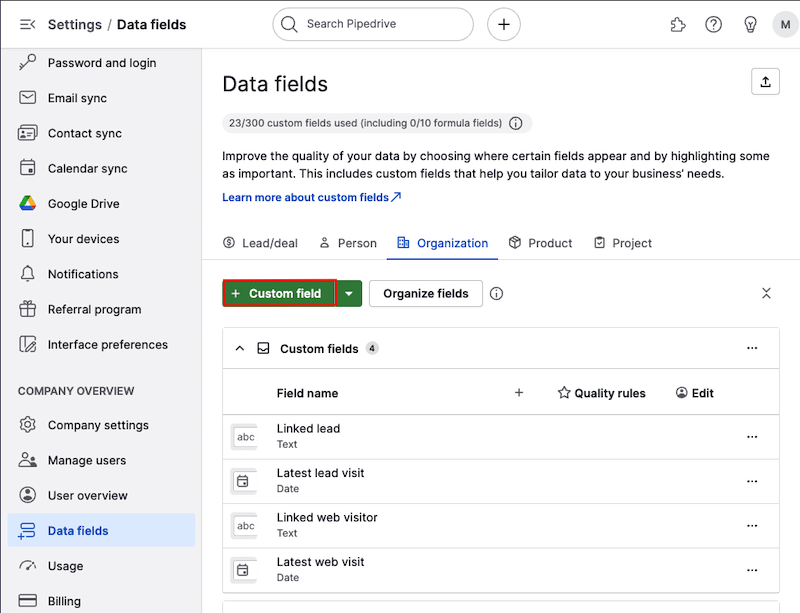
Open the account menu in the upper right corner, go to Personal preferences > Data fields and choose the entity (lead/deal, person, organization, product or project) where you want to create your new field. After selecting the entity, click “+ Custom field”.
Field properties
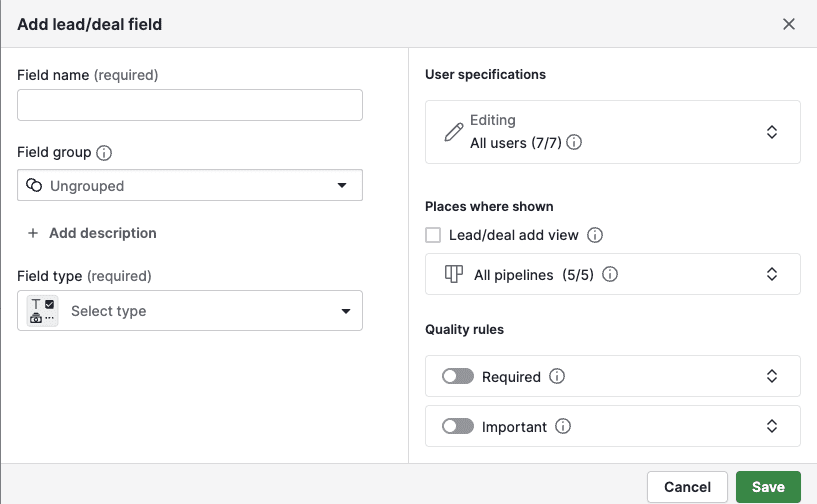
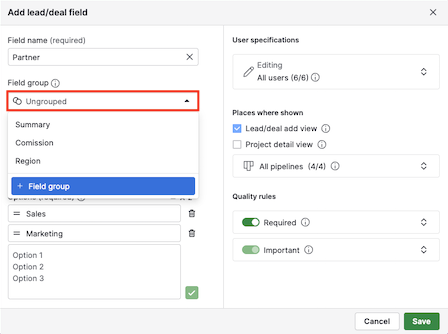
Once clicked, you’ll see an add field window where you can clarify the following details, depending on your Pipedrive plan:
Name |
Action |
Minimum required plan |
Field name |
Required for creating the field |
Lite |
Keeps your custom fields organized in the different detail views |
Lite |
|
You can let your team know why and how to fill the field (only available for lead and deal fields). They’ll see the description after clicking on the info icon next to the field. |
Growth |
|
Required for clarifying what kind of information you’ll store in the custom field | Lite | |
You can turn deal numeric and monetary field types into automatically calculated formula fields |
Premium |
|
User specification |
With read-only fields, you can decide which users can view and edit the fields | Premium |
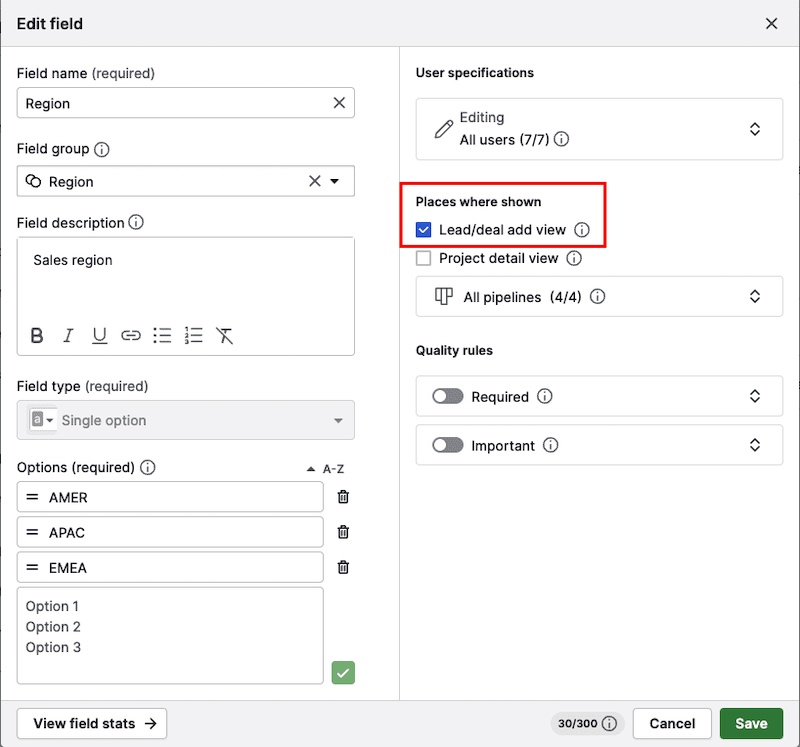
Places where shown |
Allows you to specify in which item’s add view and detail view you can find the custom field | Lite |
Allows you to select the pipelines where the custom field should be visible or hidden | Premium |
|
Quality rules |
Guide your team to fill in required or important fields. Marking fields as required will block saving a deal until key data is filled. Using important fields highlights missing info in the deal detail view without preventing it from being saved. |
Growth (Important fields)
Premium (Required fields) |
For the best results, we recommend completing all custom field details. To create a field successfully, you must at least name it and select its type.
Where else can I add custom fields?
If you’re working in any of the areas below and notice a missing field, you can add it directly without leaving the page.
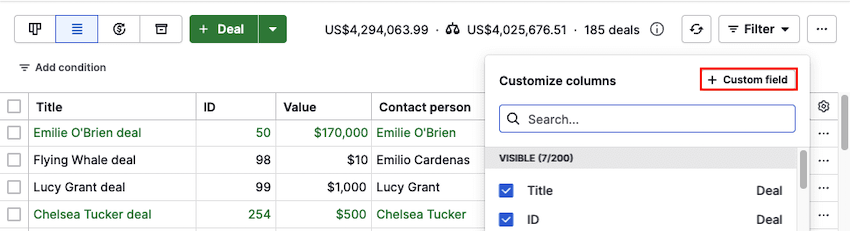
In the list view, click on the gear icon and select “+ Custom field".
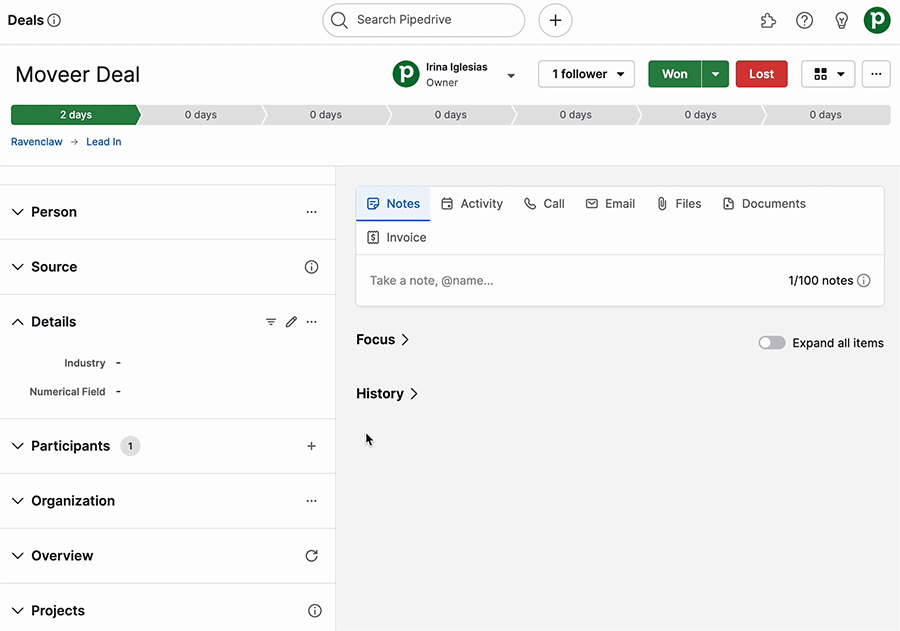
In the detail view, click on the “...” button near the details section, select “Customize fields”, then click “+ Custom field” to create a new one.
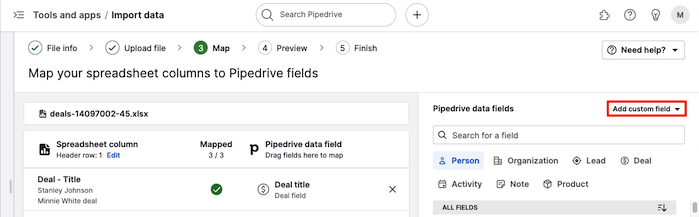
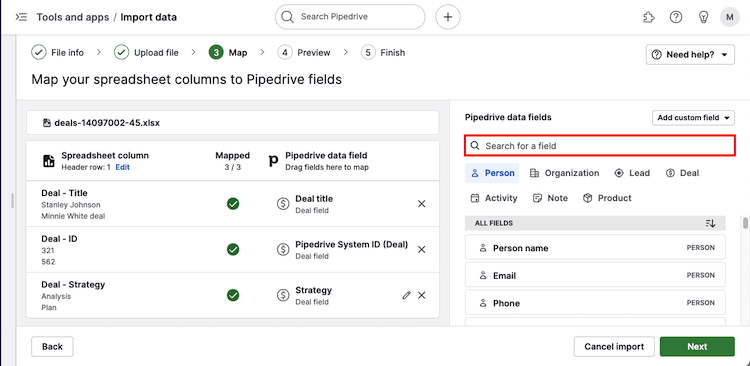
In the import page, you’ll see an option to add a custom field during the mapping step. Read more about importing in this article.
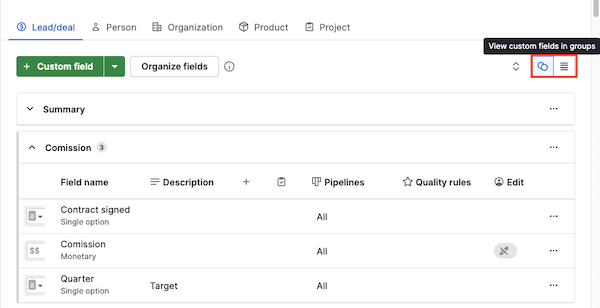
Viewing your custom fields
You can add, view, or delete custom field values in the following places within Pipedrive:
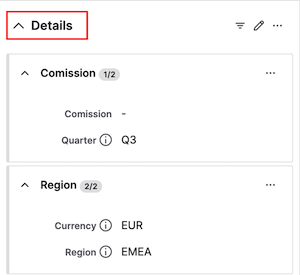
Detail view
In the detail view, any custom fields will appear in the details entity on the left.
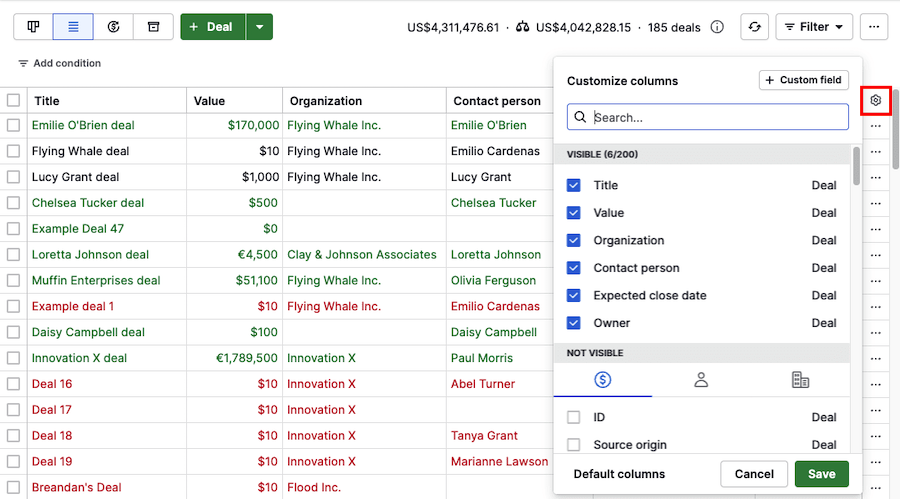
List view
Click on the gear icon to the right of the table and select the custom field in the “Choose columns” section. Click “Save” to make that custom field column visible in the list view.
Add view
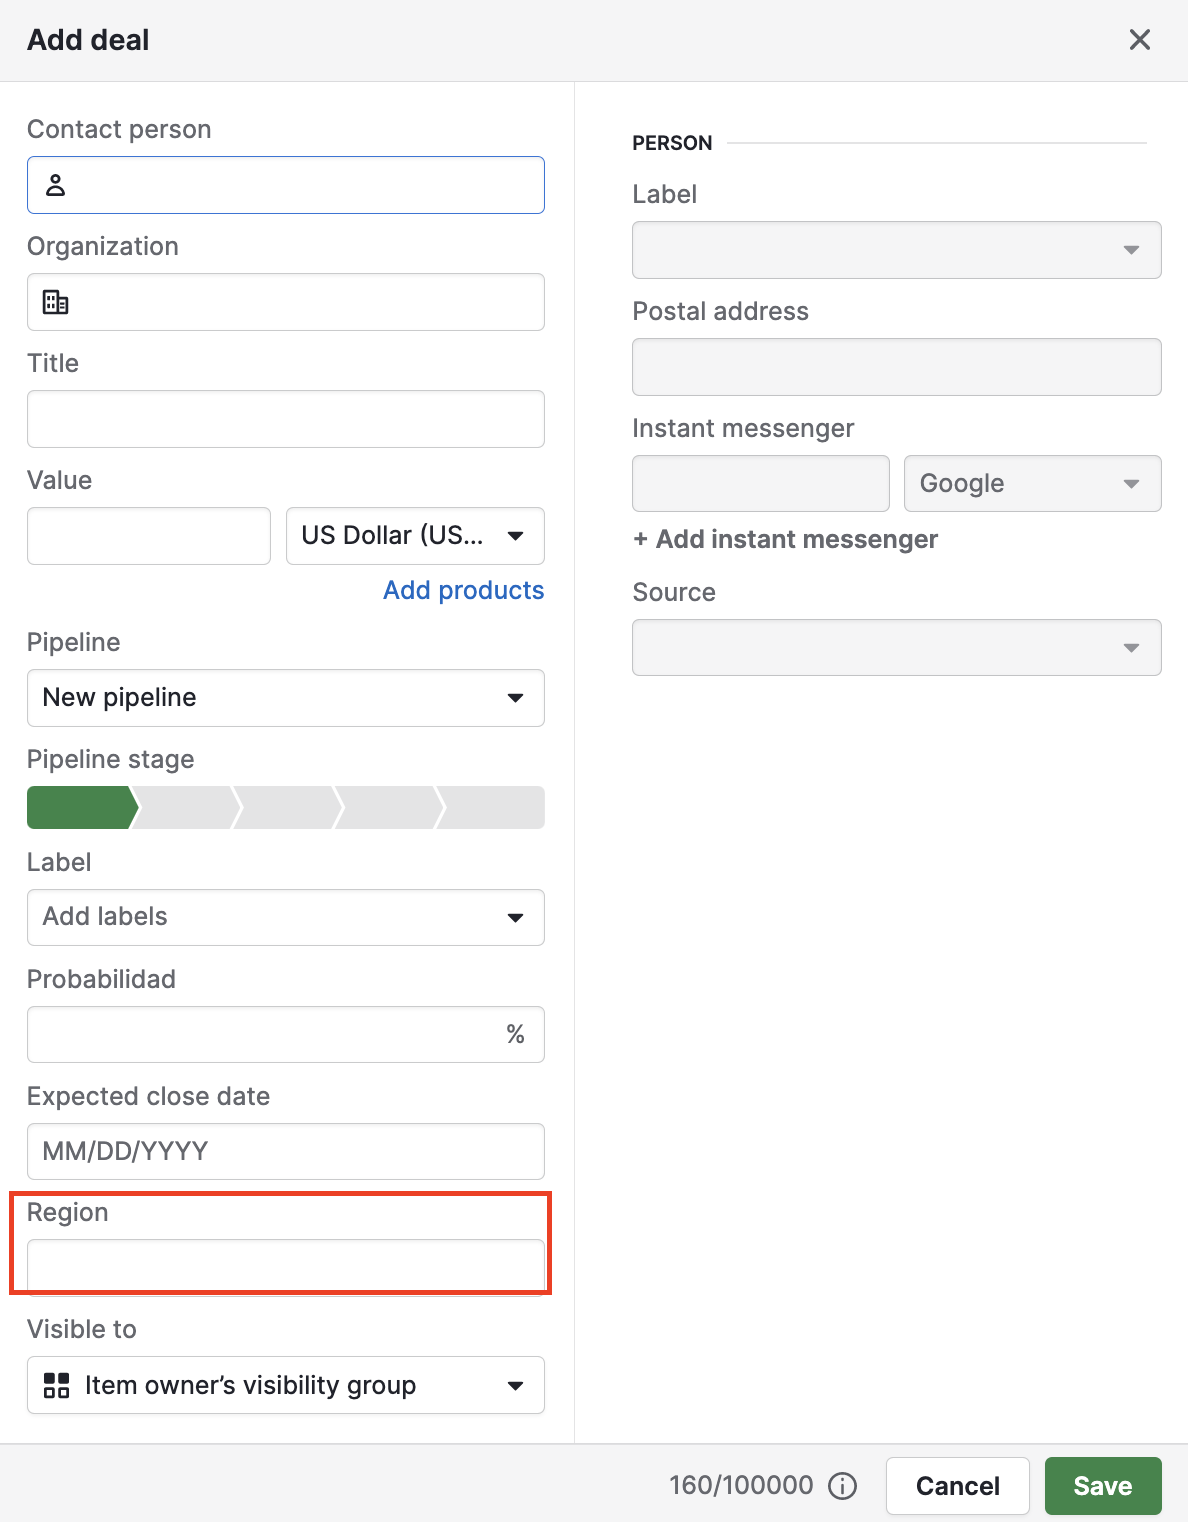
You can choose to show custom fields in add views.
When this option is enabled, the field will be visible when adding new items, such as deals or leads, in their respective add views.
Import
You can view and search for your custom fields during the mapping step when importing a spreadsheet into Pipedrive.
Where else can I use custom fields?
You can use custom fields to trigger actions in automations whenever their values are updated. To help you collect specific information from your customers, you can use custom fields when setting up LeadBooster’s Web Forms.
In addition, custom fields are supported in email templates and Smart Docs, allowing you to automatically pull relevant data into your email or document.
Once your fields contain data, you can also use them to build custom Insights reports for meaningful data representation.
Updating your custom fields
To change your custom fields, you’ll need to open the account menu and go to Personal preferences > Data fields and click the “...” button next to your custom field.
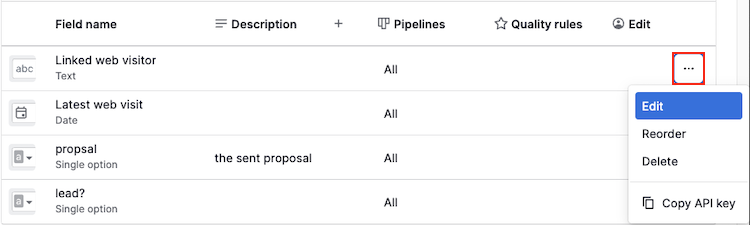
You’ll see the following options:
Edit
You can change the custom field name, group, description, user specification, places where shown and quality rules for your custom field at any time. The custom field type can’t be changed once it has been created.
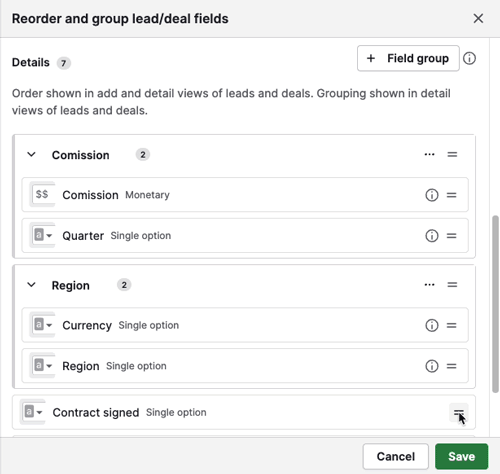
Reorder
You can change the order in which your custom fields are displayed.
After clicking on “Reorder”, you’ll be prompted with a window where you can change the order of fields. Once you click “Save,” the changes will be applied to the add and detail views.
Delete
Deleting your custom field will delete the field and its existing data from your Pipedrive account.
Copy API key
You can copy your custom field’s API key. For more information on how to use the API, you can look at our API documentation.
Custom field grouping
You can organize your custom fields into groups, making it easier to find the field you need.
While creating or editing your custom field, you can click on the field group section and select “+ Field group” to add a new one.
After you create your group, you can see it in your data fields.
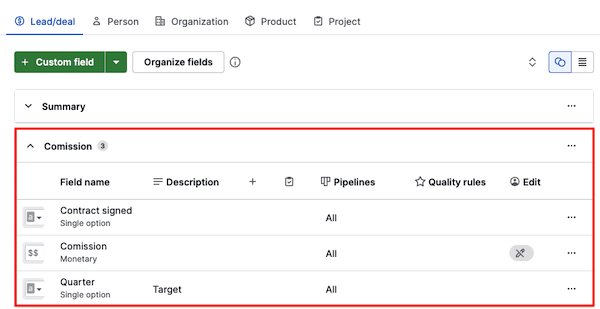
You can view your fields in groups or in a standard list view.
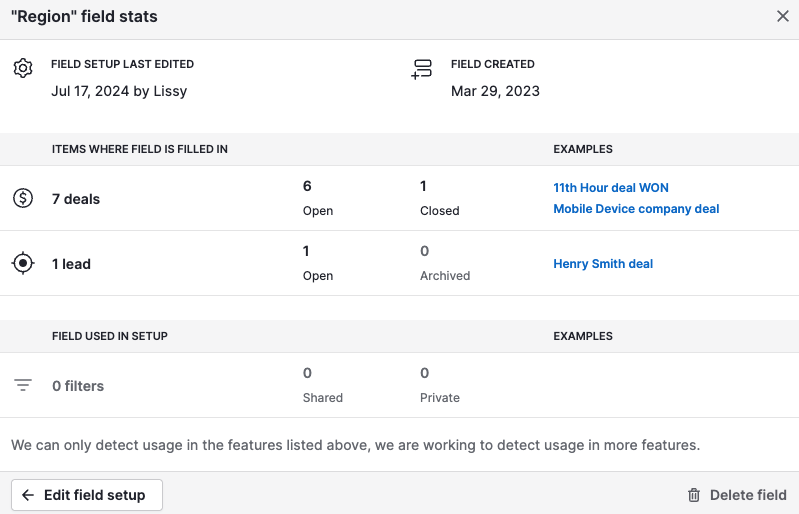
Custom field statistics
Admin users may not always know where a field is used or what data might get lost if they delete fields.
To measure the success and usefulness of your fields and avoid accidental deletions when editing, users can see their creation and update dates, along with stats showing where it is filled in or used in filters.
To view the field stats, admin users must click on the field to open the edit view. Then, at the bottom-left corner, click “View field stats”.
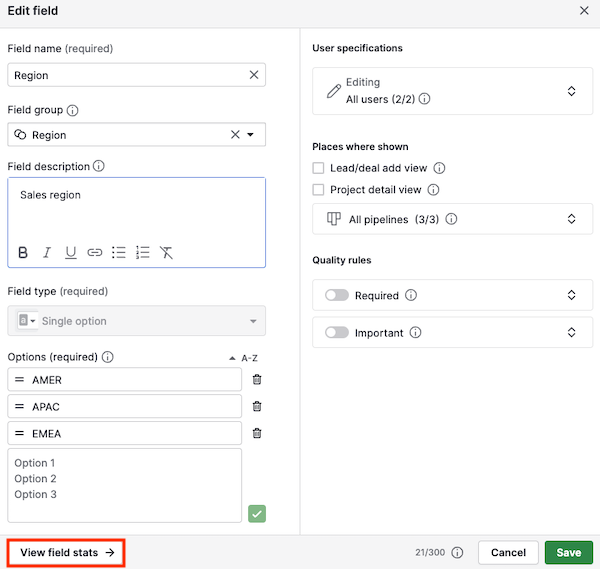
Then, a prompt will be displayed with the field stats. With this information in mind, you can either go back to edit the field or delete it.
Was this article helpful?
Yes
No