Ez a cikk gépi fordítás segítségével készült el.
Csoportos e-mail küldés
Az üzleti kommunikációban érdemes lehet ugyanazt az e-mailt több címzettnek is elküldeni. A Pipedrive csoportos e-mail küldés funkciójával pontosan ezt teheti.

A csoportos e-mail küldés funkció használatához a következőkre van szükség:
- E-mail szinkronizálás engedélyezve egy érvényes e-mail fiókkal
- Ha Ön rendszeres felhasználó, szüksége van egy adminisztrátor felhasználóra, hogy engedélyezze a “Tömeges elemek szerkesztése” lehetőséget a globális jogosultságok beállításainál
Hogyan küldjünk csoportos e-maileket
A csoportos e-mail küldés funkció a következő helyeken érhető el a Pipedrive-ban:
- A leadek fül listanézete
- A ajánlatok fül listanézete
- A személyek fül listanézete
- A tevékenységek fül listanézete
- A kapcsolatok fül kapcsolattartói idővonal nézete
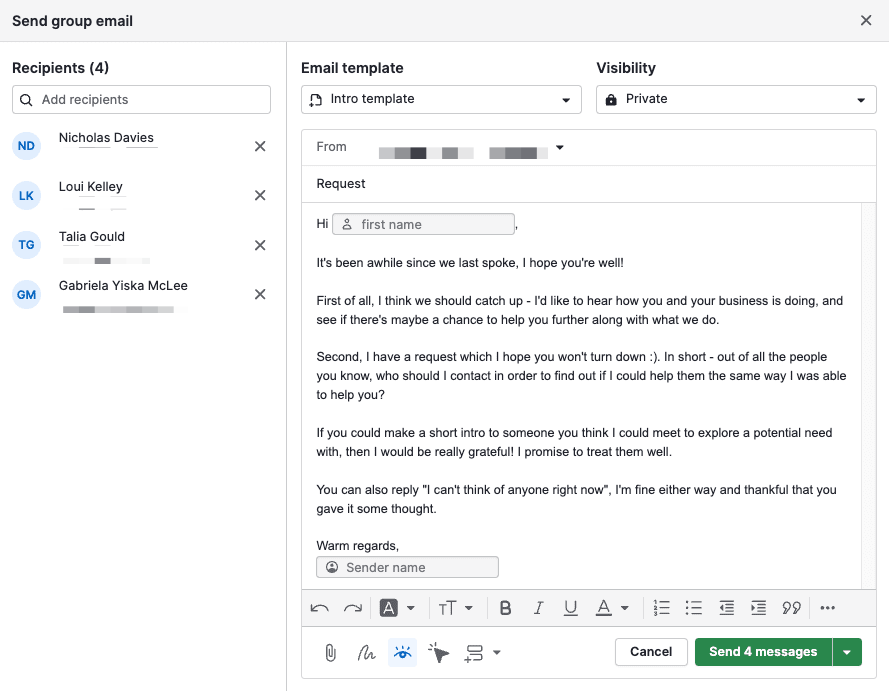
Miután több kapcsolatot választott ki a fenti helyek bármelyikén, rákattinthat a “Csoportos e-mail küldése” gombra, hogy egyszerre küldjön egy adott e-mailt az összes kiválasztott vagy összekapcsolt kapcsolathoz.

Meg kell adnia a csoporthoz küldendő e-mail releváns részleteit.
- Címzettek – Azok a kapcsolatok, akiket a “Csoportos e-mail küldése” gombra kattintás előtt választott ki, ebben az oszlopban fognak megjelenni. Itt további kapcsolatok keresésére és hozzáadására is lehetősége van.
- E-mail sablon – Kiválaszthat egy sablont, hogy egy korábban elkészített e-mailt küldjön. További információt az e-mail sablonokról ebben a cikkben talál.
- Láthatóság – Az e-mailek láthatósági engedélyek alapján láthatóvá tehetők más Pipedrive felhasználók számára, vagy privátként beállíthatók. További információt a láthatóságról ebben a cikkben talál.
Miután megadta ezeket a részleteket, kattintson a “Üzenet küldése” gombra az e-mailek elküldéséhez.
Elküldött e-mailek megtekintése
A Kimenő levelek szakaszba lépve megtekintheti a függőben lévő e-mailjeit, vagy az Elküldött szakaszban láthatja az elküldött e-mailjeit.
A kimenő levelek szakaszban láthatja a címzett(ek)et, az e-mail tárgyát, láthatóságát és az adott e-mail állapotát.
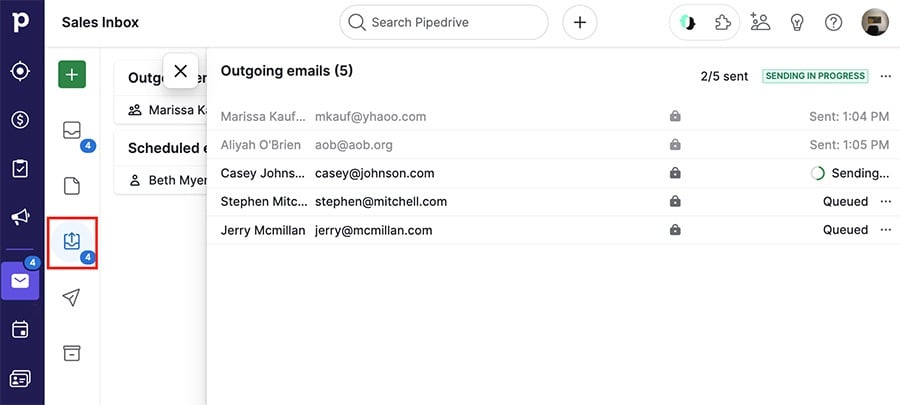
Miután egy e-mailt elküldtek, az nem lesz elérhető a kimenő levelek szakaszában.
Ehelyett ezek az e-mailek az elküldött szakaszban lesznek megtekinthetők.

Hogyan használjuk a szűrőket csoportos e-mailek küldésekor
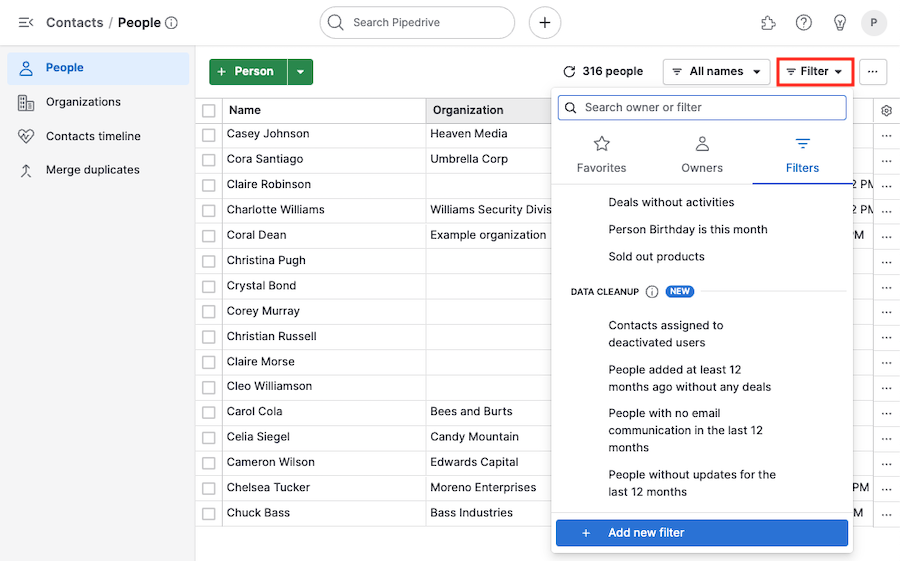
A már e-mailt küldött kapcsolatok kiszűréséhez lépj a személyek listanézetbe, kattints a jobb felső sarokban található „Szűrő” legördülő menüre, és válaszd az „Új szűrő hozzáadása.”
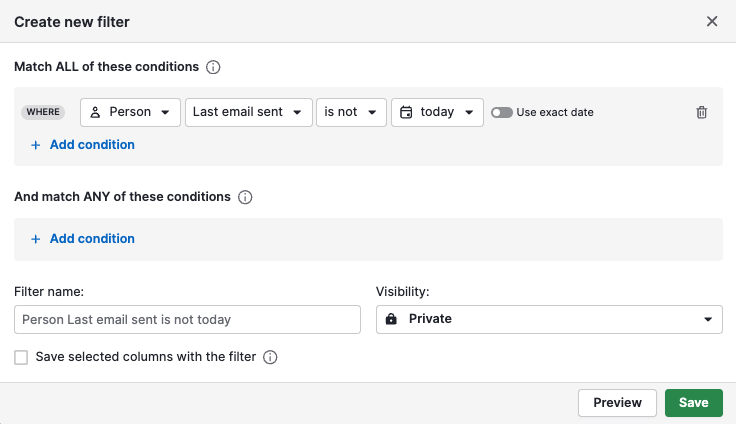
Itt létrehozhatsz egy utolsó e-mail küldve nevű szűrőt, hogy eltávolítsd azokat a kapcsolatokat, akik a megadott időkereten belül e-mailt kaptak tőled:
Használhatsz e-mail üzenetek száma szűrőt is.
Például, ha van egy teljesen új kapcsolati listád, amelyet e-mailben szeretnél megkeresni, beállíthatod a szűrőt e-mail üzenetek száma > van > nulla.
Ez csak azokat a kapcsolatokat fogja megjeleníteni, akiknek soha nem küldtél e-mailt.
Bármelyik szűrő esetén, amint e-mailt küldesz egy kapcsolatra, az eltávolításra kerül a szűrt listából.
Hasznos volt ez a cikk?
Igen
Nem