이 문서는 기계 번역을 사용하여 작성되었습니다.
Pipedrive integration: Trello
Pipedrive은 리드가 영업 프로세스에서 어디에 있는지 이해하는 데 도움이 되지만, Trello은 해당 프로세스의 특정 단계에서 발생할 수 있는 다른 작업을 추적하는 데 유용할 수 있습니다.
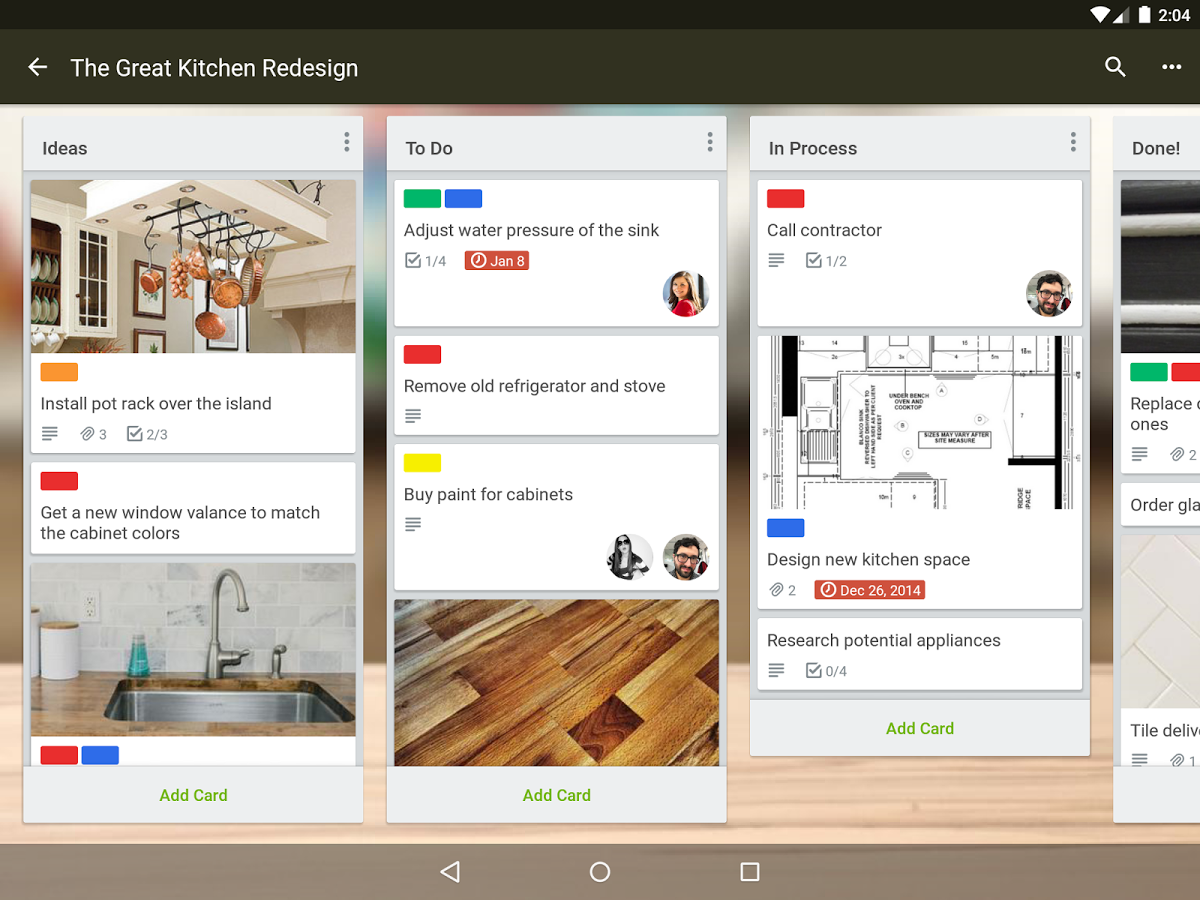
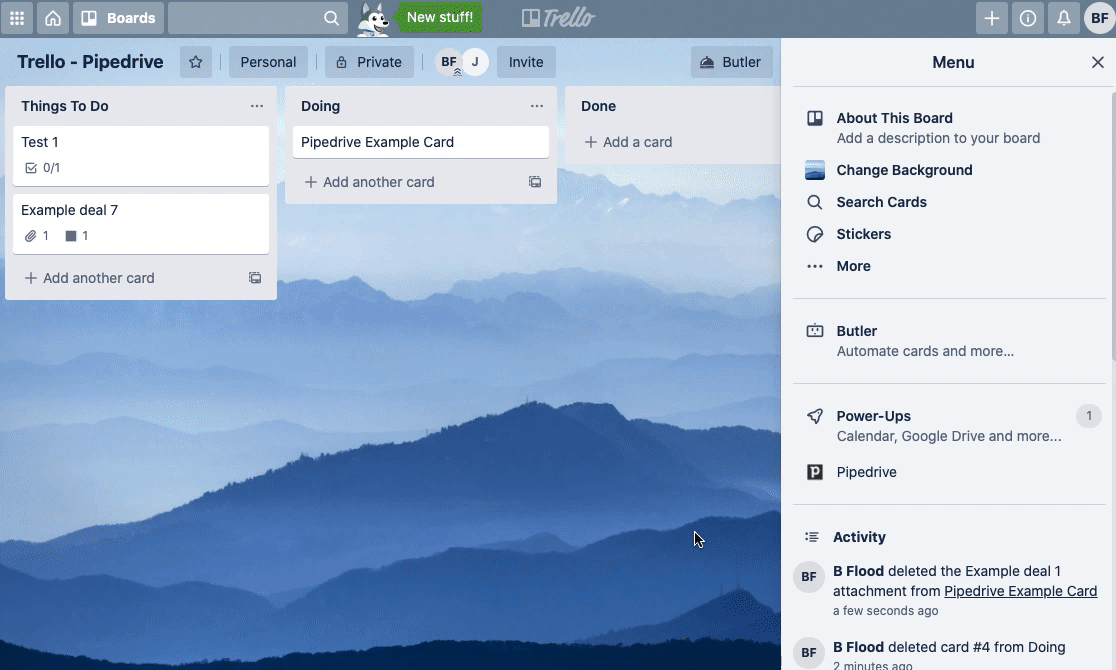
Trello는 프로젝트를 보드로 구성하는 협업 도구로, 무엇이 진행 중인지, 누가 어떤 작업에 참여하고 있는지, 무엇이 진행 중인지 알려줍니다. 이 통합에 대해 그리고 프로세스를 확장하는 방법에 대해 이 블로그 포스트에서 더 알아볼 수 있습니다.
파이프드라이브-Trello 통합을 사용하면 두 시스템 간에 정보를 동기화할 수 있습니다. 파이프드라이브 거래를 기반으로 카드를 자동으로 생성하거나 거래, 기관 및 개인을 Trello 카드에 연결할 수도 있습니다.
파이프드라이브에 대해 블로그에서 알아보세요 our blog.
통합 설정하기
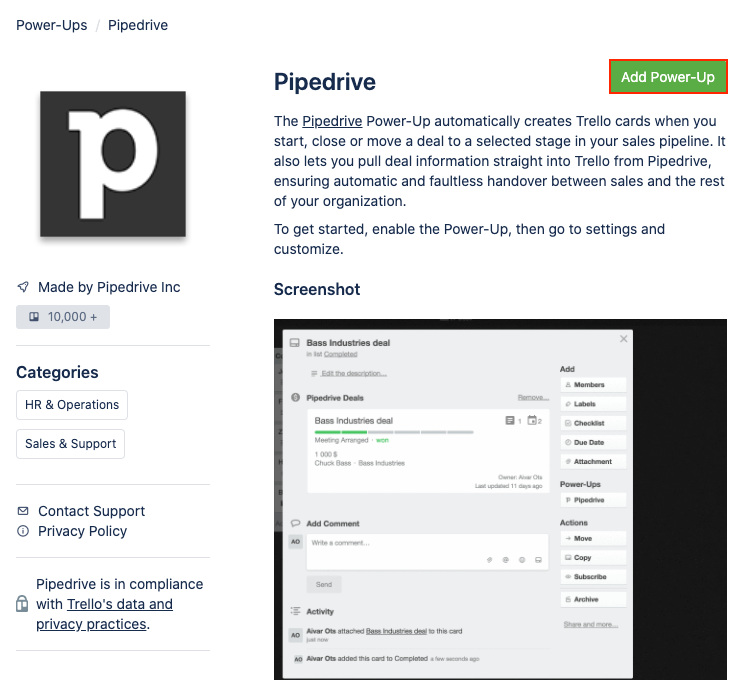
Pipedrive를 Trello 계정에 연결하려면 Pipedrive Marketplace의 Trello 페이지로 이동하고 "설치 진행"을 선택하십시오.

Pipedrive를 Power-Up으로 추가할 수 있는 Trello 페이지로 이동됩니다. 계속하려면 "Power-Up 추가"를 클릭하십시오.
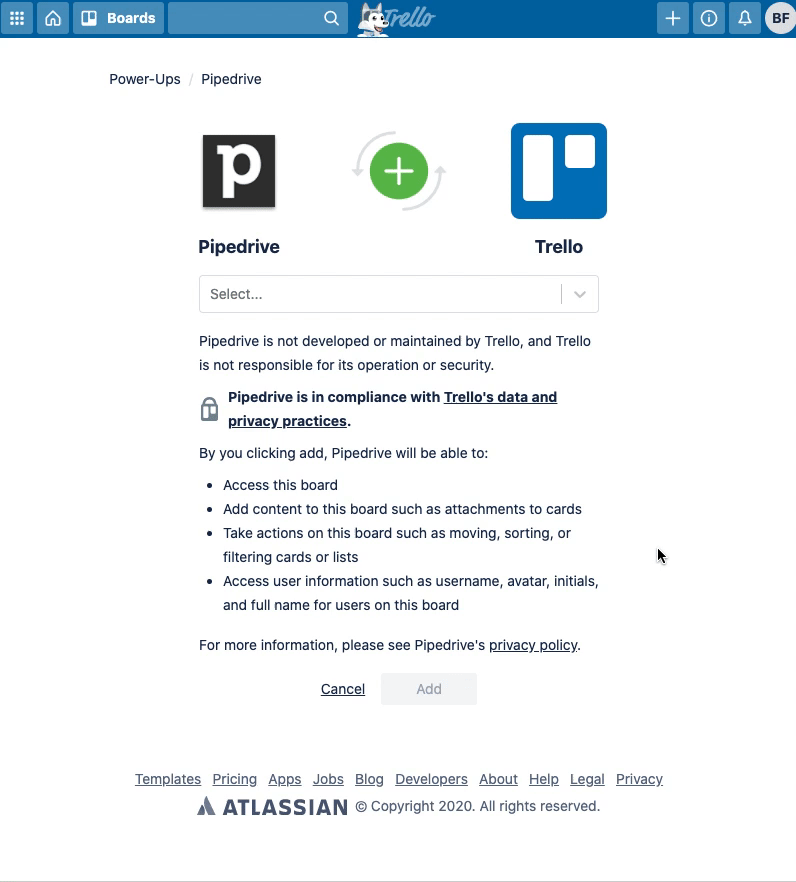
드롭다운 메뉴에서 Pipedrive에 연결하고자 하는 보드를 선택한 후 "추가"를 클릭하여 계속하십시오.
그런 다음 "보드로 이동"을 클릭하십시오. 이렇게 하면 Trello 보드로 이동되며, "Power-Ups" 아래 메뉴에서 "Pipedrive"를 클릭해야 합니다. 드롭다운에서 "Pipedrive" 및 "계정 승인"을 클릭하십시오. 그런 다음 "Pipedrive 계정 링크"를 클릭하십시오.
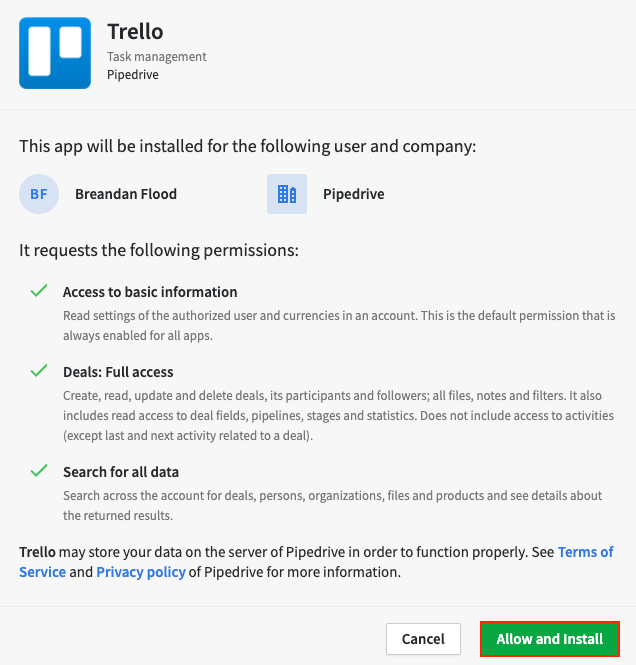
새 창이 열리면 Trello가 Pipedrive와 연결할 수 있도록 허용할 수 있는 창이 열립니다. 계속하려면 "허용 및 설치"를 클릭하십시오.
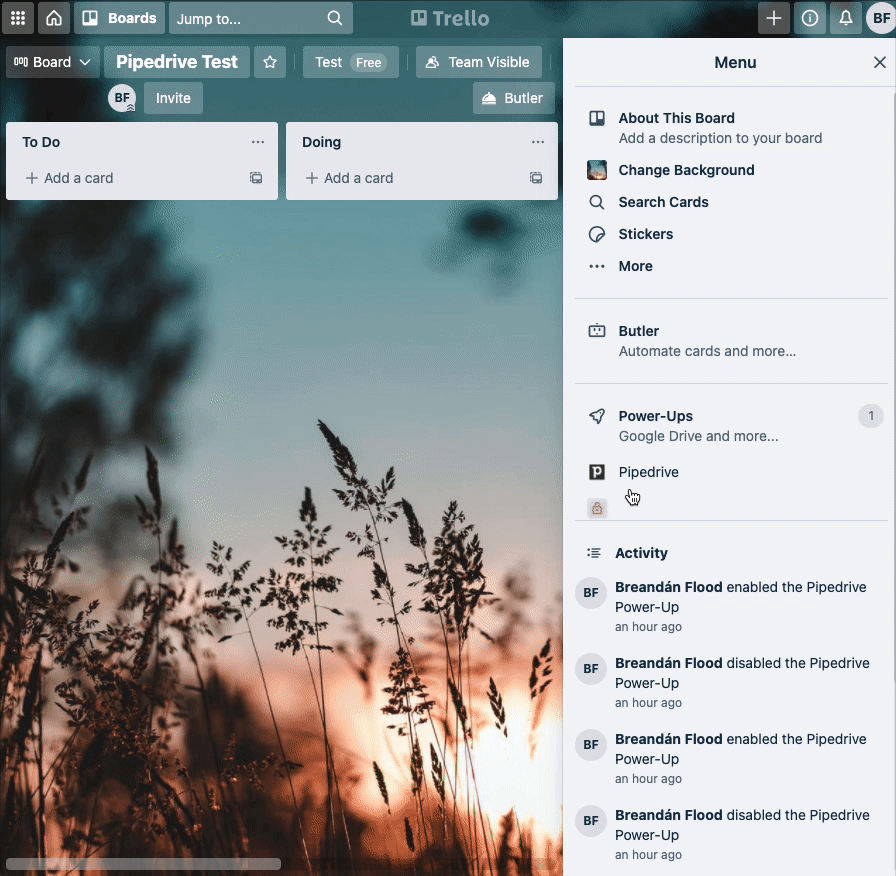
이제 설치 완료되었습니다. Trello 보드 메뉴에서 "Pipedrive Power-Up"을 클릭한 후 Pipedrive에서 권한 부여 옵션이 표시됩니다. 이것을 클릭하면 Pipedrive가 Trello 계정에 액세스할 수 있는 페이지로 이동됩니다.
"권한 부여"를 클릭하여 Pipedrive가 Trello에 액세스할 수 있도록 허용하십시오. 이제 귀하의 계정은 Pipedrive 및 Trello에 의해 연결되어 검증되었으며 통합 사용을 시작할 수 있습니다.
자동 생성 및 Pipedrive 필드 설정
자동 생성 설정
자동 생성 설정을 하려면, Trello 보드 메뉴에서 Pipedrive를 선택한 후 Power-Up 설정 편집을 선택하십시오. 그럼 보드의 규칙을 설정할 수 있습니다.
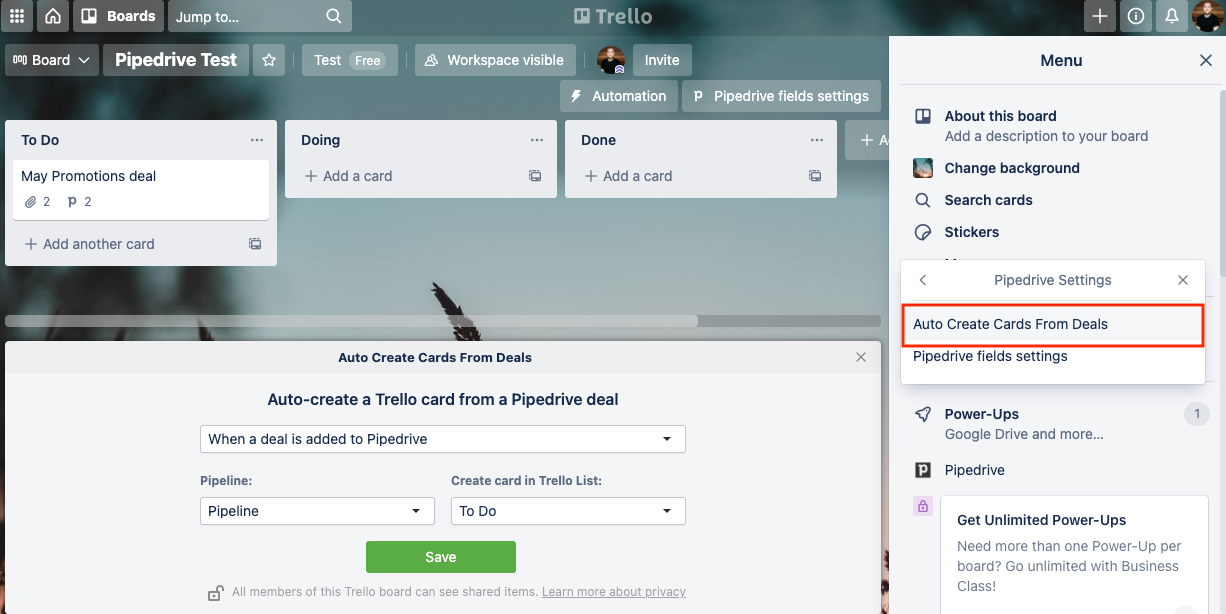
Trello에서의 자동 카드 생성은 세 종류의 규칙에 기반합니다:
- Pipedrive에 거래가 추가될 때
- 거래가 파이프라인 단계에 들어갈 때
- 거래가 성공 또는 실패로 표시될 때
위 중 아무 규칙이라도 선택할 수 있지만, 한 번의 Trello 보드 당 하나의 규칙만 설정 가능합니다. 그렇지 않으면, Power-Up에서 설정된 유사한 규칙 때문에 동일한 보드에 중복된 카드가 생길 수 있습니다.
Pipedrive 필드 설정
"Pipedrive 필드 설정"을 선택하면, Pipedrive 아이템 연결시에 표시할 최대 20개의 필드를 선택할 수 있습니다.
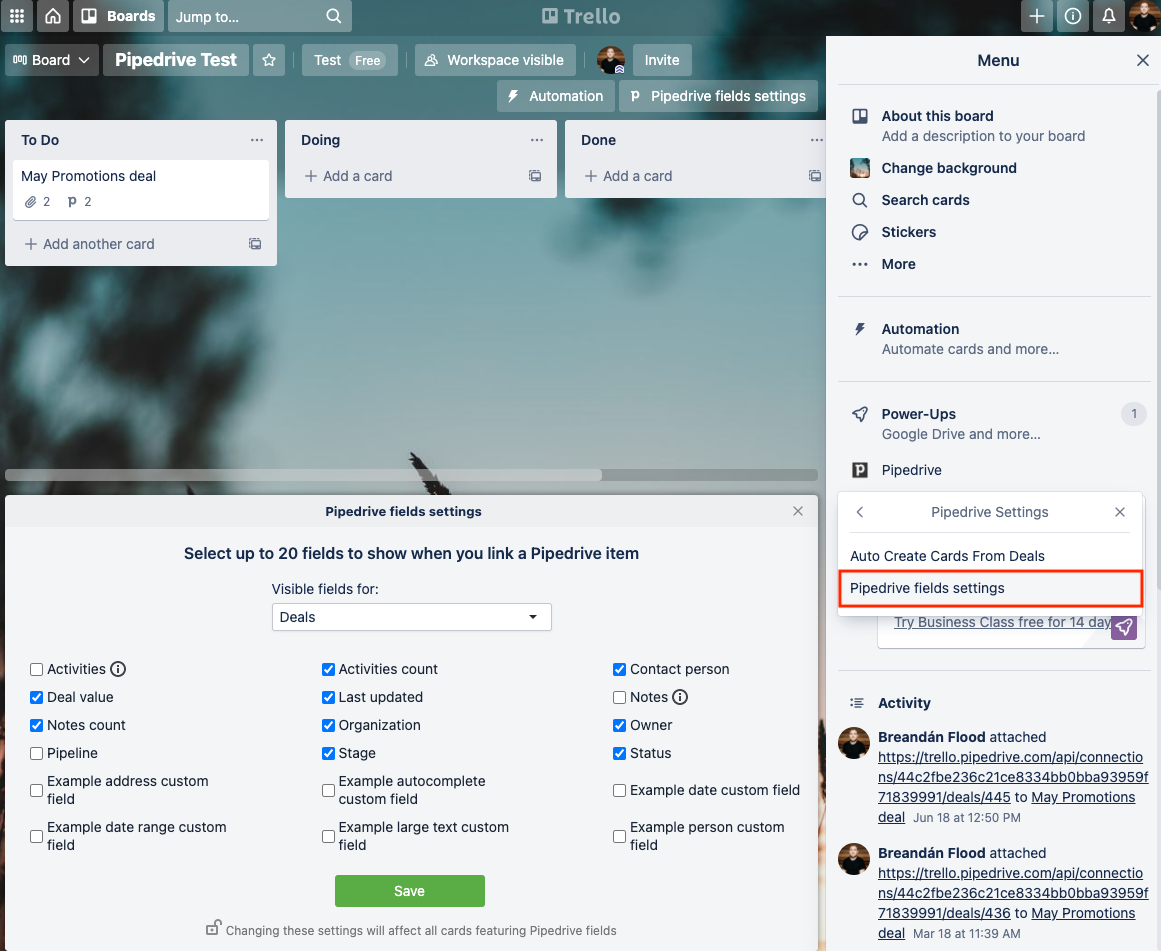
필드의 최대 개수가 20개이므로, 만약 20개가 넘어가면 더 많은 필드를 추가하려면 항목을 해제해야 합니다.
앱 작업 및 앱 패널
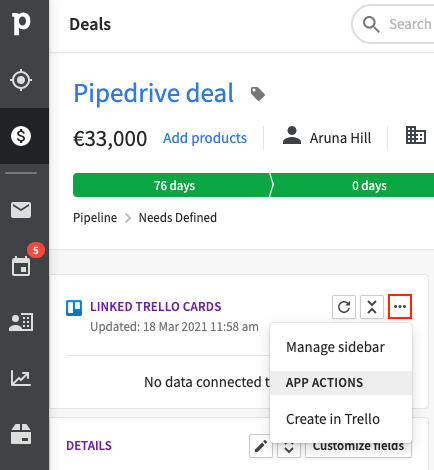
파이프드라이브 내에서 트렐로 보드, 목록 및 카드와 같은 항목을 빠르게 만들 수 있는 방법이 있습니다.
상세보기의 왼쪽에있는 앱 패널에서 세 개의 점 "..."을 클릭하여 옵션을 열고 트렐로에서 카드를 만들 수 있습니다.
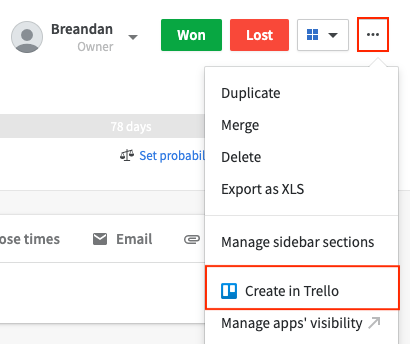
거래 상세보기에서 오른쪽 상단에있는 세 개의 점 "..."을 클릭하고 드롭다운 메뉴에서 "트렐로에 만들기"를 선택하십시오.
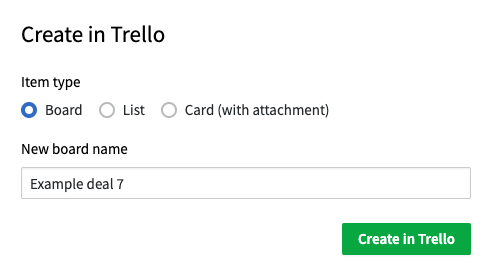
이로써 트렐로에서 새로운 창이 열리고 업데이트하고 싶은 항목 유형을 선택할 수 있습니다.
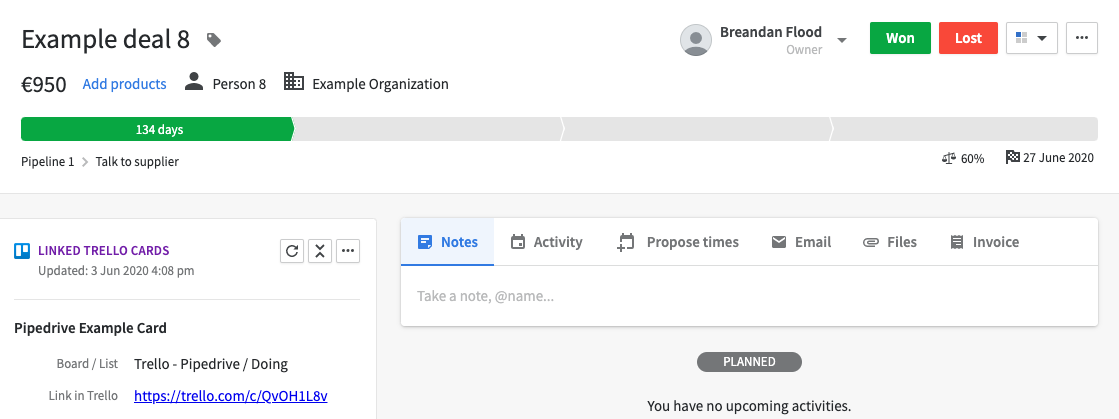
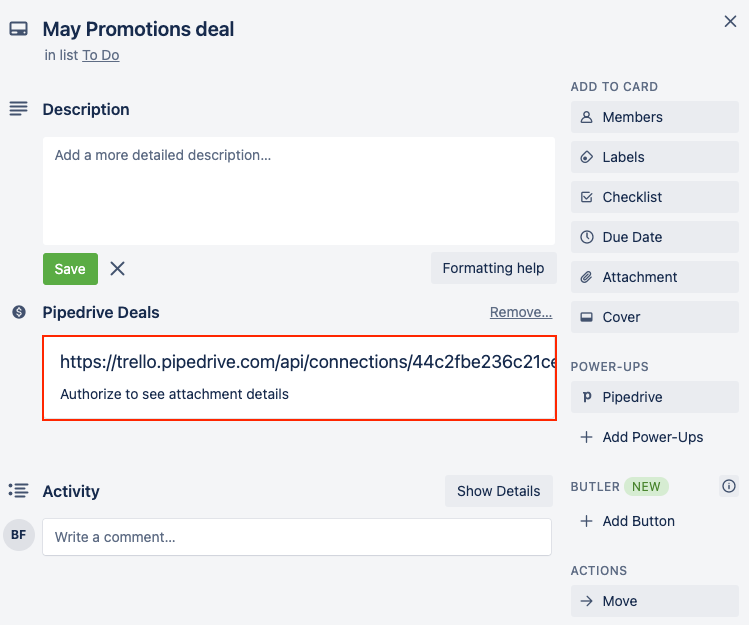
트렐로에서도 카드를 파이프드라이브에 연결할 수 있습니다. 연결하려는 카드를 클릭하고 파워-업 섹션에서 "파이프드라이브"를 선택하고 카드를 연결할 거래를 선택할 수 있습니다.
그럼 이제 트렐로의 앱 패널에서 파이프드라이브 거래에 연결된 카드가 표시됩니다.
가시성
트렐로 보드의 모든 멤버는 트렐로 보드에 파이프드라이브 데이터를 볼 수 있습니다. 심지어 파이프드라이브 계정이 없어도 가능합니다. 파이프드라이브 계정이 없는 트렐로 보드 멤버들은 파이프드라이브 정보를 추가, 수정 또는 삭제할 수 없습니다.
파이프드라이브에서 트렐로 앱을 삭제하면 더 이상 트렐로 보드에서 파이프드라이브 데이터를 볼 수 없습니다. 이 경우에는 계정을 다시 인증해야 합니다. 파이프드라이브에서 트렐로가 삭제된 후에는 연결된 트렐로 카드에 계정을 다시 인증할 수 있는 링크가 제공됩니다.
작업 흐름 자동화에서의 Trello
Pipedrive의 작업 흐름 자동화 기능을 사용할 수도 있습니다. 자동화를 생성할 때, Trello를 작업 중 하나로 선택할 수 있습니다.
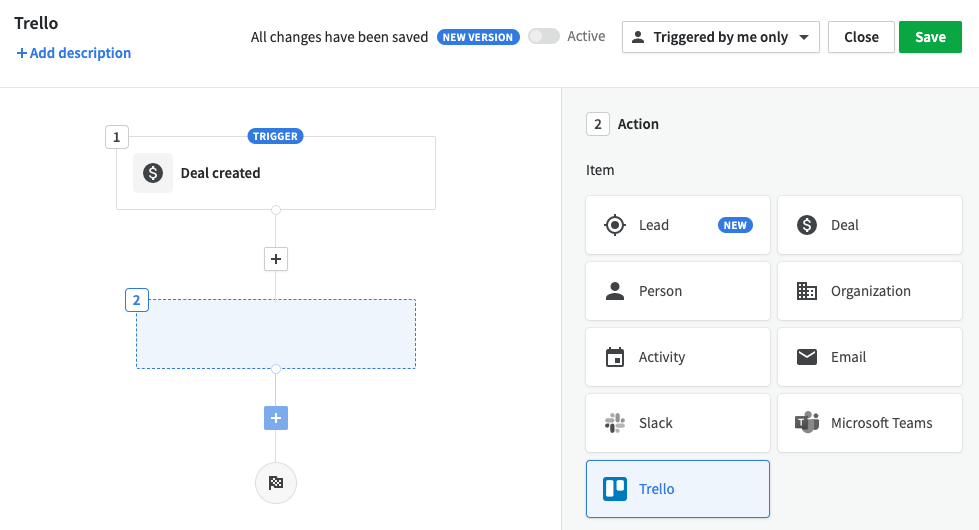
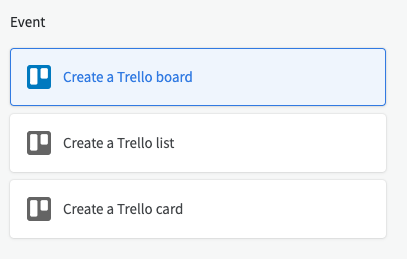
Trello를 작업으로 선택한 후, Trello 보드, 목록 또는 카드를 만드는 세 가지 가능한 이벤트 중 하나를 선택할 수 있습니다.
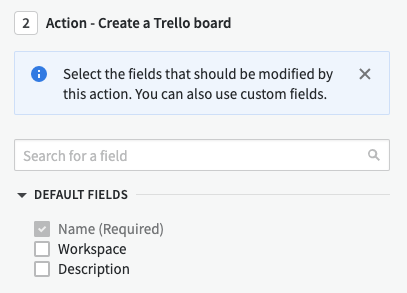
그런 다음, 이 작업으로 수정해야 할 필드를 선택할 수 있습니다.
작업 흐름 자동화가 트리거되면, 선택한 이벤트가 Trello에서 발생합니다.
템플릿
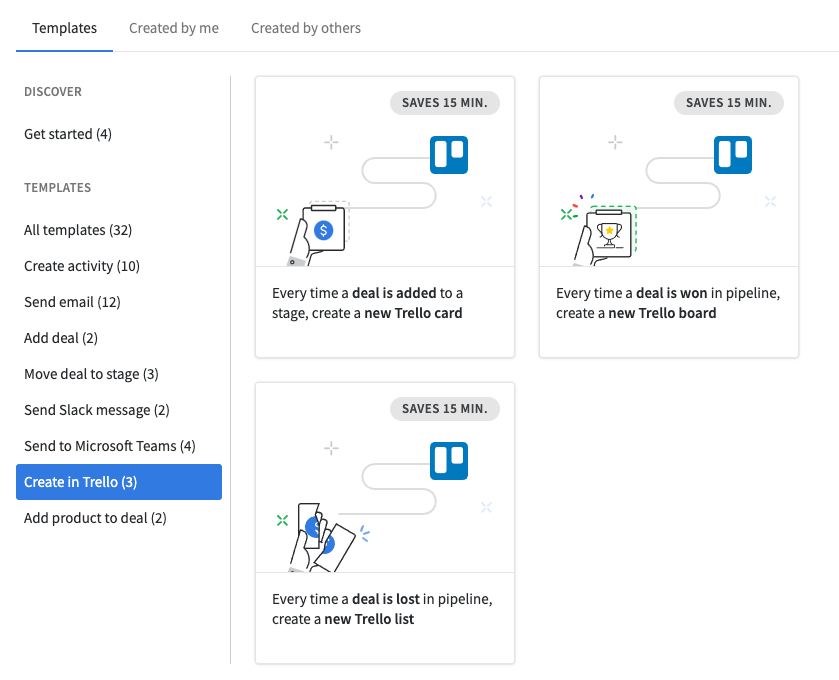
Trello를 사용하여 작업 흐름 자동화 템플릿을 사용할 수도 있습니다. 작업 흐름 > 템플릿 > Trello에서 만들기로 이동하여 사용할 수 있는 세 가지 미리 제작된 템플릿을 볼 수 있습니다.
문제 해결
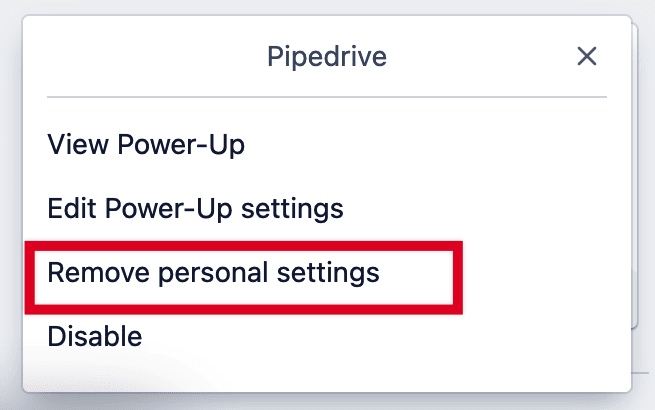
Trello 통합을 문제 해결하려면 앱을 다시 설치해보세요. 앱을 다시 설치할 때 앱을 다시 활성화하기 전에 "개인 설정 제거"을 선택하십시오.
이 문서가 도움이 되었습니까?
예
아니요