Automations: sequences based on email conditions
At Pipedrive, we’re always looking for ways to help you save time on repetitive tasks so you can focus on things that matter, like closing deals.
With sequences, you can minimize human error and send perfectly timed follow-ups to increase your win rate.
How do sequences work?
You have the possibility to create sequences based on existing email conditions within your automations.
These sequences allow you to:
- Check basic email fields. E.g., the email subject.
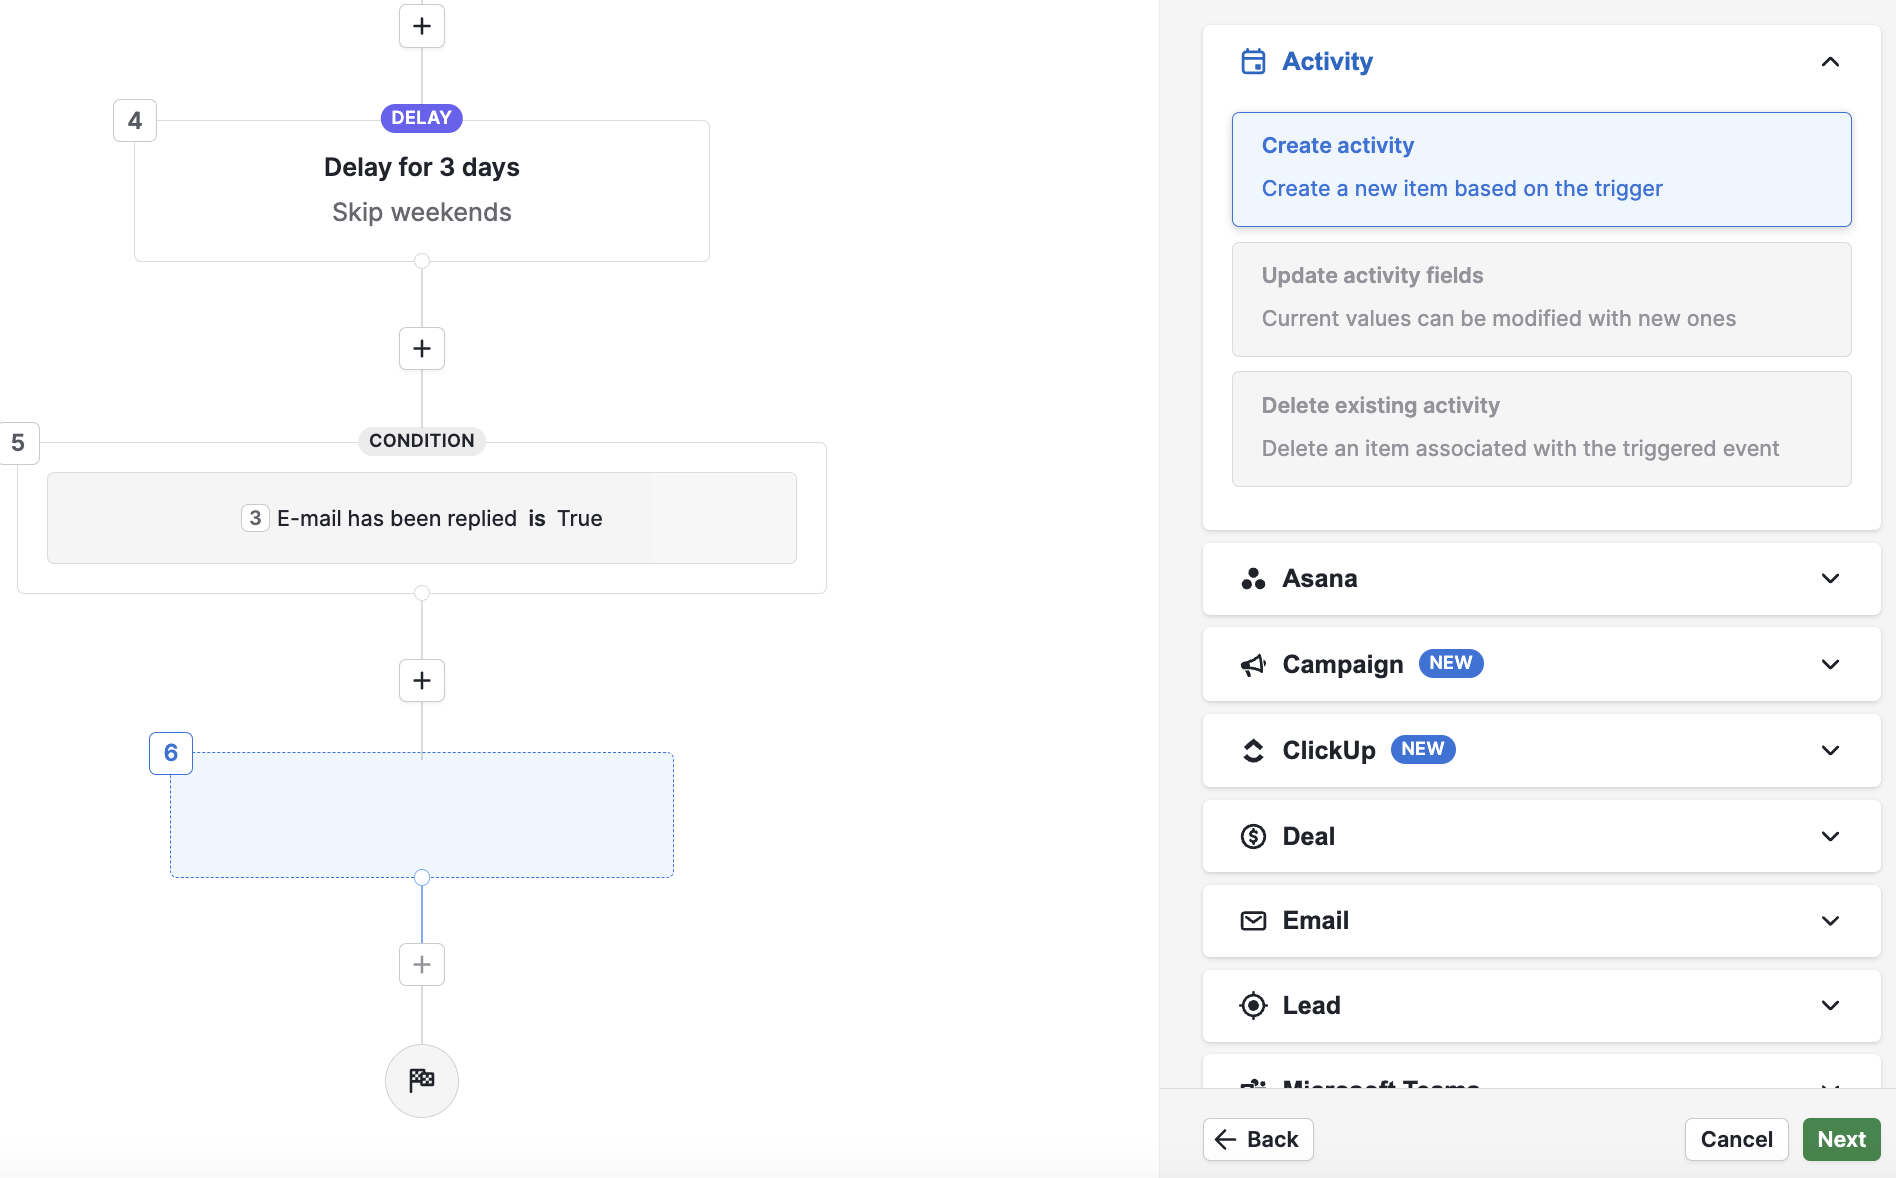
- Check if a previous email configured in the automation has been replied to after a delay step. E.g., Trigger: Deal moved stages > Action: Send email > Delay: 3 days > Condition check: Check if the email was replied to > Action: Send another email.
- Check if a link in a previous email body was clicked after a delay step. E.g., Trigger: Deal moved stages > Action: Send email > Delay: 3 days > Condition check: Check if a link within the email was clicked > Action: Move deal to a different stage.
How can I create a sequence based on email conditions?
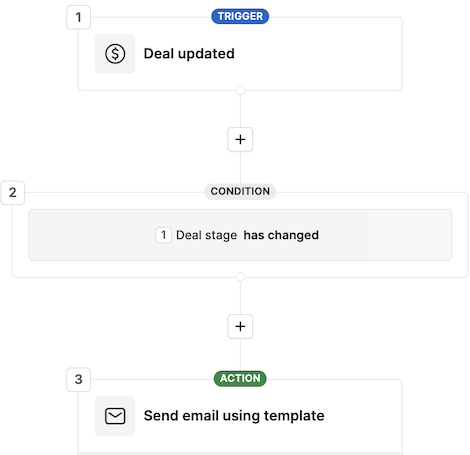
First, you need to create an automation that sends an email (action) when triggered. You can create an automation or choose from one of our templates.
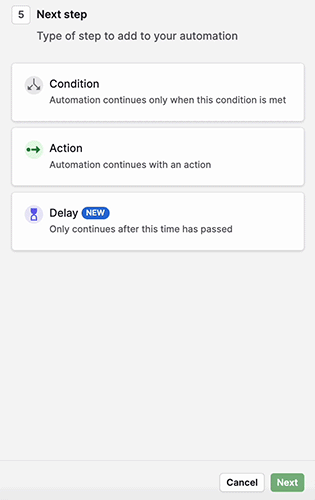
Click the “+” sign to add a delay step to your automation. This will trigger another action after a specific time frame has passed.
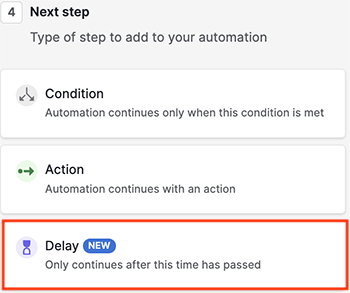
Select the duration of the delay. This delay will start counting as soon as the first action is triggered.
Click the “+” sign again. Add a condition step to your automation and choose the option “E-mail with template sent”.
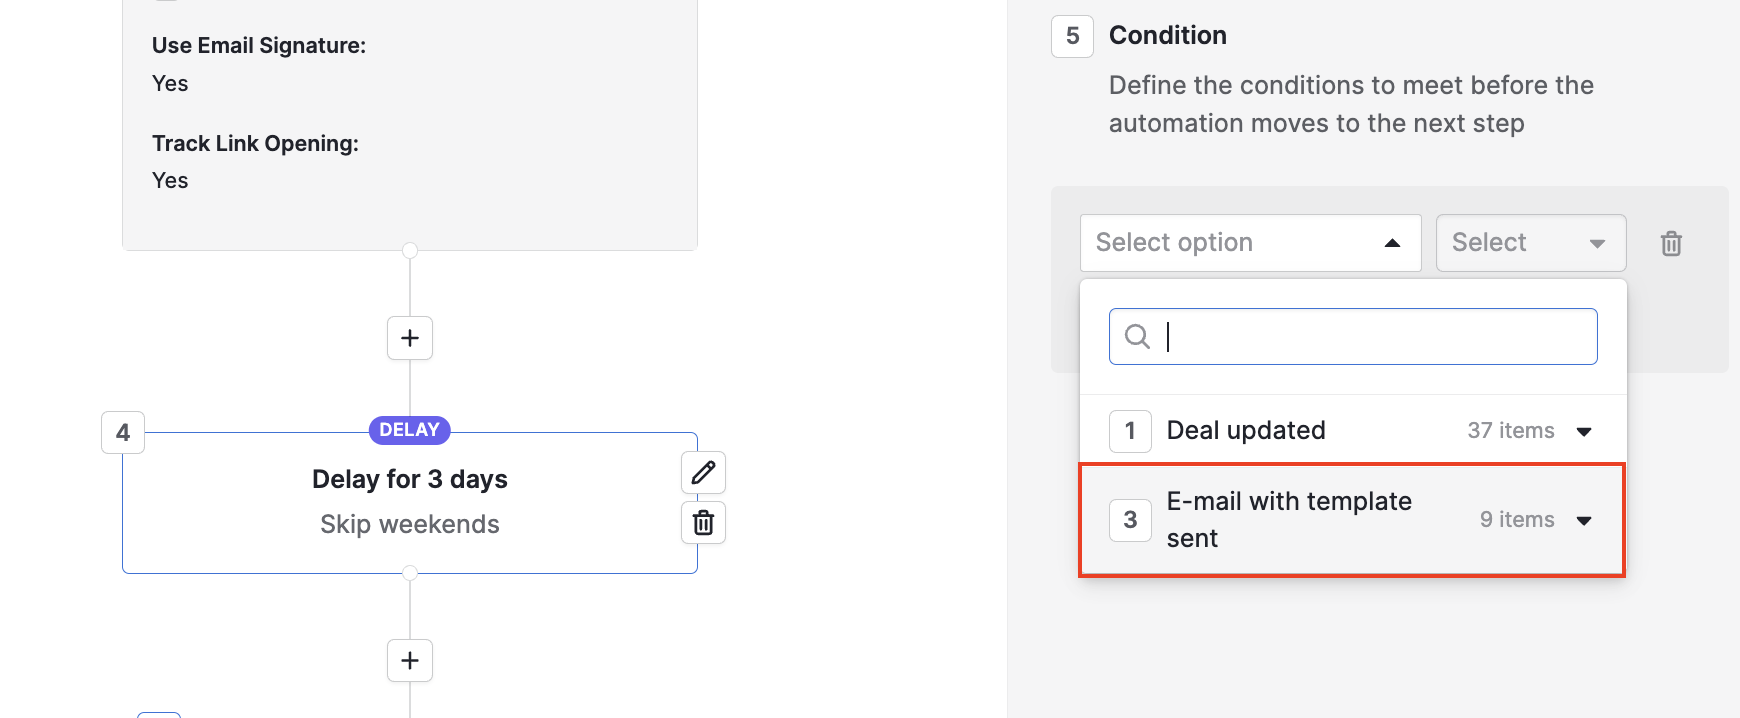
You will see several fields and conditions that can be met before the automation moves to the next step. Select the condition that will follow your email sequence.
Once you’ve set the email conditions, click the “+” sign to add an action step to your automation.
This action will occur after the delay step has passed and the conditions are met. If the conditions are not met, the automation will stop.
After you define and save the action, your sequence will be complete. You can add more actions and conditions or save and exit the automation.
Was this article helpful?
Yes
No