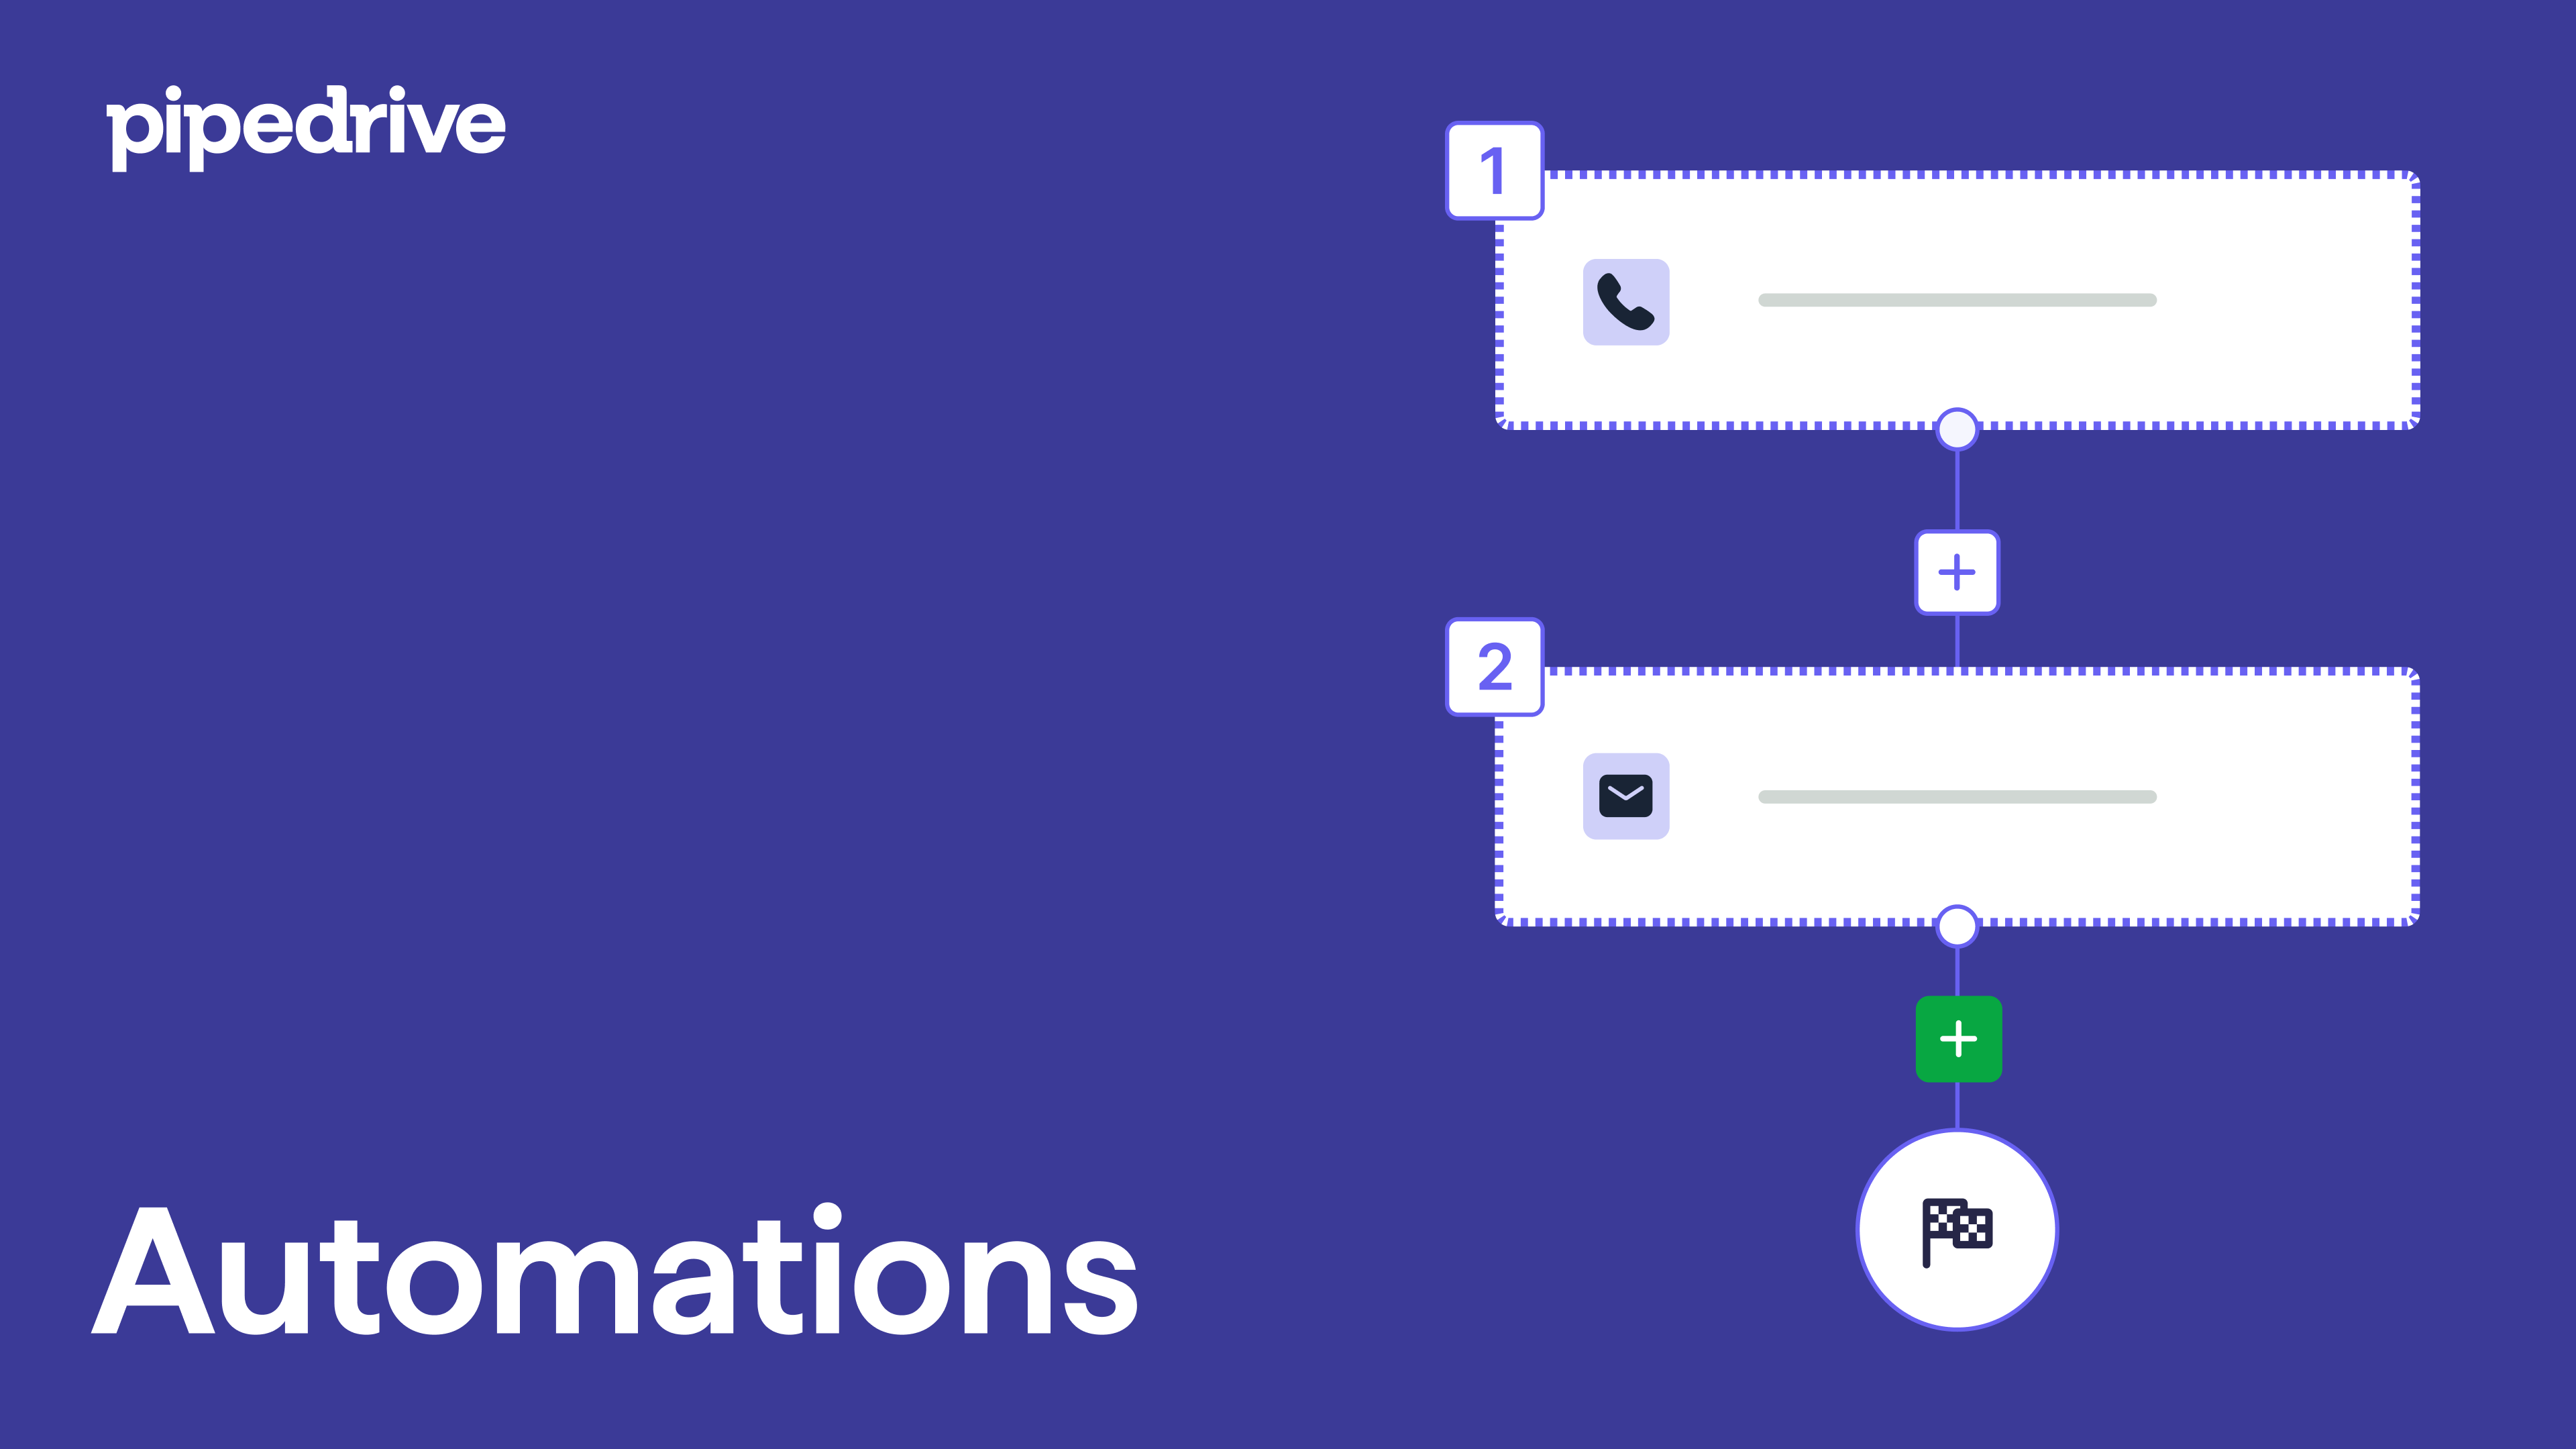
Automations: first steps
Getting started with Automations
If you often repeat the same administrative tasks in Pipedrive – like scheduling an activity when a deal moves to a specific stage – it may be worth automating them, so you can focus on the important things that make your business thrive.
Automations in Pipedrive are made up of two parts – a trigger event and an action event.
- The trigger event represents the “if” part of an if-then statement: For the automation to run, a specific action must occur first.
This action could involve creating, updating, or deleting a person, organization, activity, or deal in Pipedrive. Alternatively, you can use a date trigger, which will initiate the automation based on a specified date, such as a contract renewal or event deadline. - The action event represents the “then” part of an if-then statement: Once the trigger event occurs, this is the step that defines what the automation will do in response.
This action can include automatically creating, updating, or deleting a person, organization, activity, or deal in Pipedrive. Additionally, it can involve sending an email from the email address synced to your Pipedrive account.
Creating your first automation
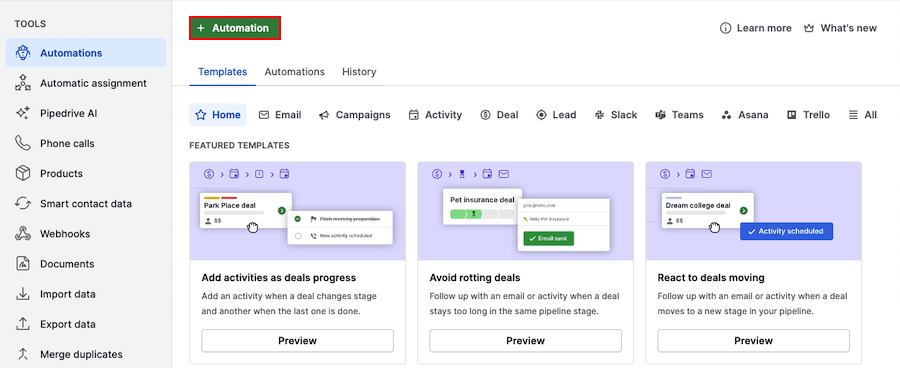
To access the automation feature, open the account menu at the top right corner and go to Tools and apps > Automations.
To begin creating an automation, click the“+ Automation” button.
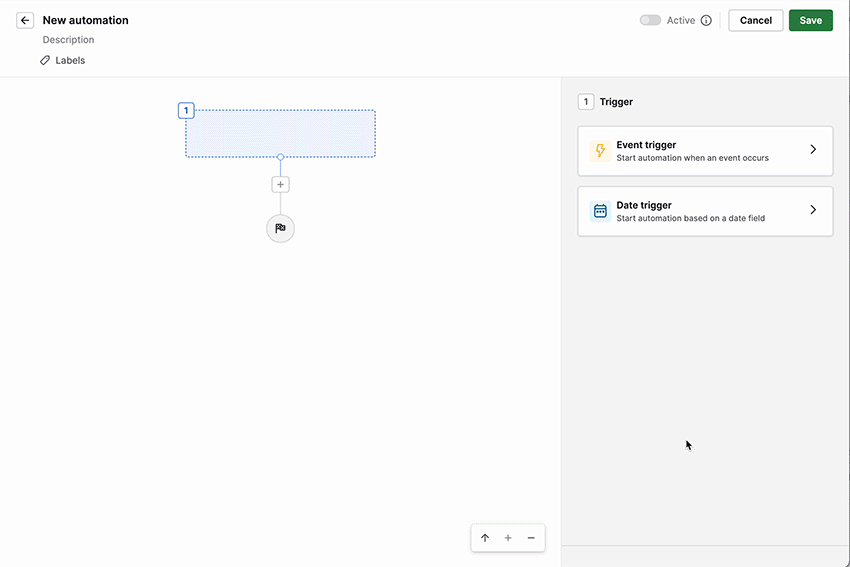
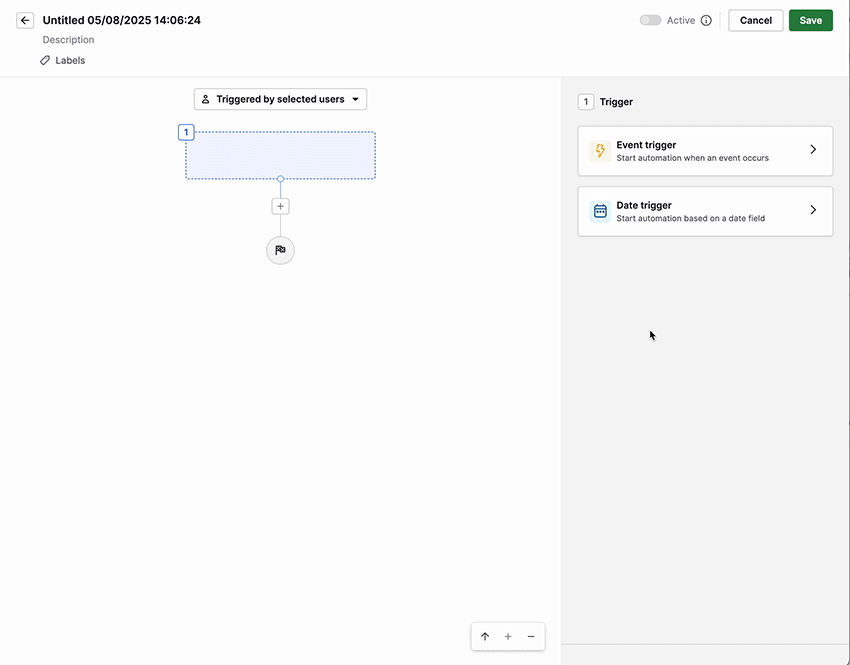
Choose whether to begin with an “Event trigger” or “Date trigger”. This opens a sidebar where you can define the item and event that will launch your automation.
The event trigger provides you with six entity options (deal, person, activity, lead, organization and project), each with three types of events that will trigger the automation (added, updated, or deleted).
The date trigger provides you with four entity options (deal, person, activity, and organization), each with options to choose the specific date field, and three parameters (exact date, before date, and after date) to trigger the automation.
For more information on date triggers, check out this article.
Once you have chosen the trigger type and the trigger event, click the “Apply trigger” button.
With the trigger event in place, you’ll then have the option to apply a condition (or conditions) to your trigger. Here, you can choose from suggested conditions or add your own to define when your automation should run.
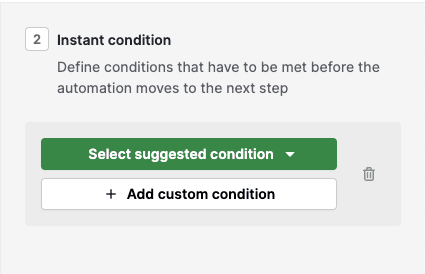
After saving your condition, click on the “+“ icon to add another step, either another condition or your action event.
For more advanced automation, you can add wait for conditions or if/else conditions to split your automation into two or more paths.

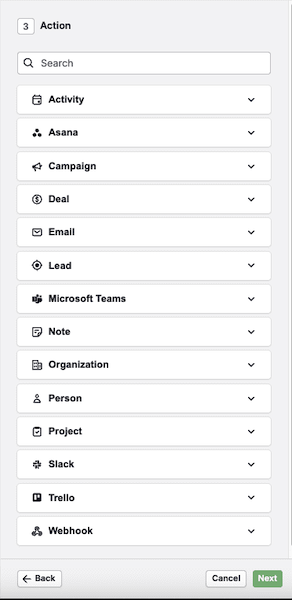
When defining your action, you can choose between default options – person, organization, lead, deal, activity, email, notes, campaigns, projects and webhooks – as well as integrations – Slack, Microsoft Teams, Trello and Asana. You’re able to choose action types that are specific to each option.
You can add multiple actions to your automation, and they’ll always be executed from the top and work down the list. For example, step 3 will only be executed after step 2 is done.
However, note that automations will check only once if the condition for every triggered action is met unless you use the wait until event condition. If a condition of a specific action is not met, the action won’t be executed, and the system won’t execute the next step.
Here, you can see how to set up an automation that moves your new deal to a different pipeline depending on the deal owner.
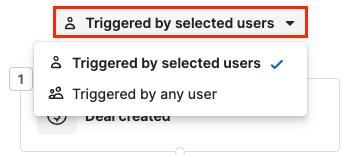
To specify which users are allowed to trigger this automation, check the option at the top of the automation and select which option you would prefer.
After setting up your automation, click the “Save” button and then set it to “Active” to start using it.

Once active, your automation will run automatically whenever the trigger conditions are met.
You can manage your saved automation in the automation list view at any time.
Automation list view
In the automation list view, you can view all your automations alongside those created by your teammates, sort by last updated time and apply filters.
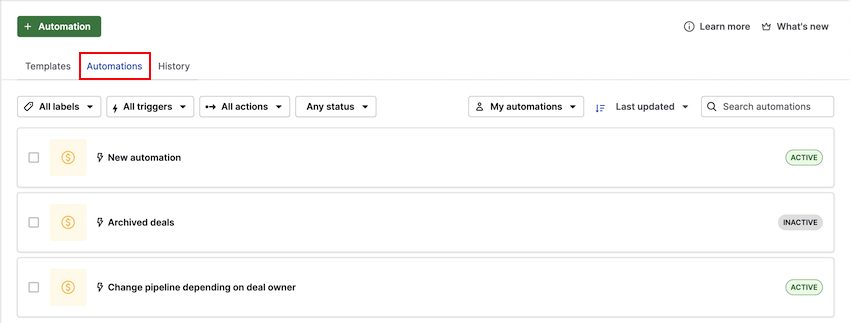
You can edit, delete, or toggle automations between active and inactive. If an automation is inactive, its trigger and actions won’t run.
Inactive automations appear grayed out, allowing you to quickly identify which ones are currently active in your Pipedrive account.
Learn more about the automation list view in this article.
Transfer automations
Whether a user is leaving the company or just taking time off, another user may need access to their automations for troubleshooting purposes or to assign them to someone else. To do this, transfer the ownership of the automation.
Users and permissions
Only the following types of users are able to transfer automations:
- Global app admin users can transfer any automation to themselves or to any other global app admins
- Deals app admin users and global regular users with the permission ”Add automations” can transfer their own automations to global app admins
Transfer ownership
Single transfer
Open the automation preview. When hovering over the owner’s name on the left, click the pencil icon, or click”...” on the right and “Transfer ownership.”
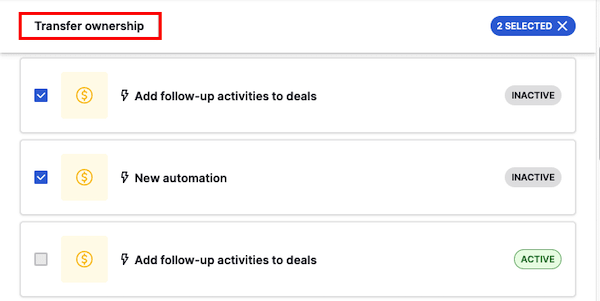
Bulk transfer
On the Automations view, mark the checkboxes of the automations you want to transfer on the left-hand side of your screen.
Then, click “Transfer ownership”.
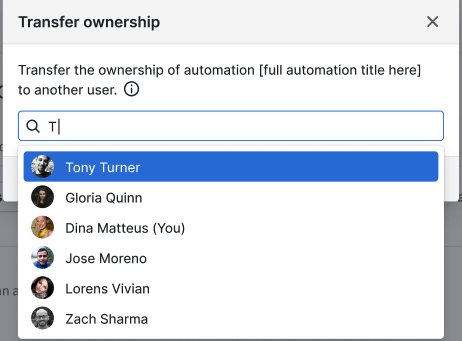
When clicking on “Transfer ownership,” you must select the user to whom you want to transfer the automation.
Before finishing the transfer, you’ll see a disclaimer listing what will happen after the automation is transferred. The events in the disclaimer may vary depending on the automation steps (for example, if there are pending executions active, if an integration is installed and used in an automation).
Make sure to read this disclaimer carefully before proceeding.
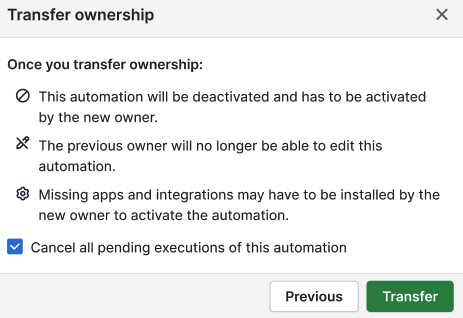
If you have any pending executions for that automation, you can cancel them all by ticking the checkmark. E.g., if the automation is configured to send an email 5 days after a trigger and those executions are still in progress, they’ll be canceled, and the email won’t be sent.
Once the automation is transferred, it will appear in the receiving owner’s automations list view. The transferred automation is deactivated, so the receiving owner can review and troubleshoot it if necessary.
The automation will have a transferred label added to indicate that it has been transferred.
The receiving owner is now able to configure the automation, including editing and activating.
Was this article helpful?
Yes
No