Ez a cikk gépi fordítás segítségével készült el.
Automatizálások: első lépések
Automatizálásokkal való kezdés
Ha gyakran ismétled ugyanazokat az adminisztratív feladatokat a Pipedrive-ban – például egy tevékenység ütemezését, amikor egy üzlet egy konkrét szakaszba lép – érdemes lehet automatizálni őket, hogy a fontos dolgokra összpontosíthass, amelyek segítik a vállalkozásod fejlődését.
Automatizálások a Pipedrive-ban két részből állnak – egy trigger eseményből és egy akció eseményből.
- A trigger esemény képviseli az “ha” részét egy ha-akkor állításnak: Az automatizálás futásához először egy konkrét eseménynek kell bekövetkeznie.
Ez az esemény magában foglalhatja egy személy, szervezet, tevékenység vagy üzlet létrehozását, frissítését vagy törlését a Pipedrive-ban. Alternatívaként használhatsz dátum trigger-t, amely a megadott dátum alapján indítja el az automatizálást, például egy szerződés megújítása vagy esemény határideje esetén. - A akció esemény képviseli az “akkor” részét egy ha-akkor állításnak: Miután a trigger esemény bekövetkezik, ez a lépés határozza meg, hogy az automatizálás mit fog tenni válaszként.
Ez az akció magában foglalhatja egy személy, szervezet, tevékenység vagy üzlet automatikus létrehozását, frissítését vagy törlését a Pipedrive-ban. Ezenkívül magában foglalhatja egy e-mail küldését a Pipedrive fiókodhoz szinkronizált e-mail címről.
Első automatizálásod létrehozása
Az automatizálási funkció eléréséhez nyisd meg a fiók menüt a jobb felső sarokban, majd menj a Eszközök és alkalmazások > Automatizálások menüpontra.
Az automatizálás létrehozásának megkezdéséhez kattints a “+ Automatizálás” gombra.
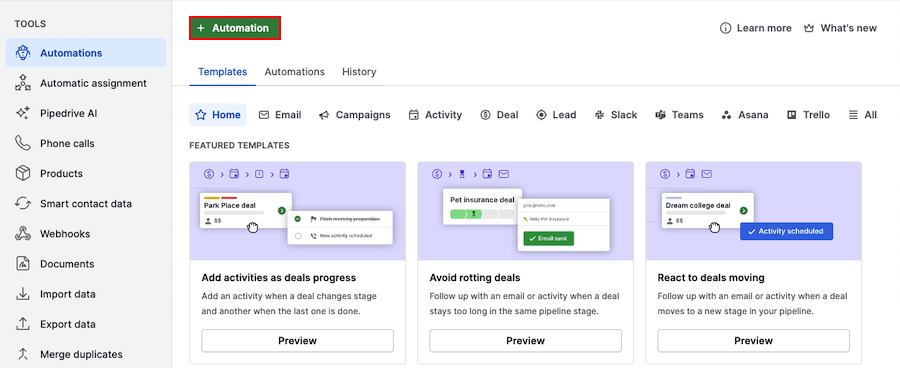
Válaszd ki, hogy “Esemény indító” vagy “Dátum indító” típussal szeretnél kezdeni. Ez megnyit egy oldalsávot, ahol meghatározhatod azt az elemet és eseményt, amely elindítja az automatizálásodat.
Az esemény indító hat entitás opciót kínál (üzlet, személy, tevékenység, lead, szervezet és projekt), mindegyikhez három eseménytípus tartozik, amelyek elindítják az automatizálást (hozzáadva, frissítve vagy törölve).
A dátum indító négy entitás opciót kínál (üzlet, személy, tevékenység és szervezet), mindegyikhez lehetőségek a konkrét dátummező kiválasztására, és három paraméter (pontos dátum, dátum előtt és dátum után) az automatizálás elindításához.
További információért a dátum indítókról nézd meg ezt a cikket.
Miután kiválasztottad az indítótípust és az indító eseményt, kattints az “Indító alkalmazása” gombra.
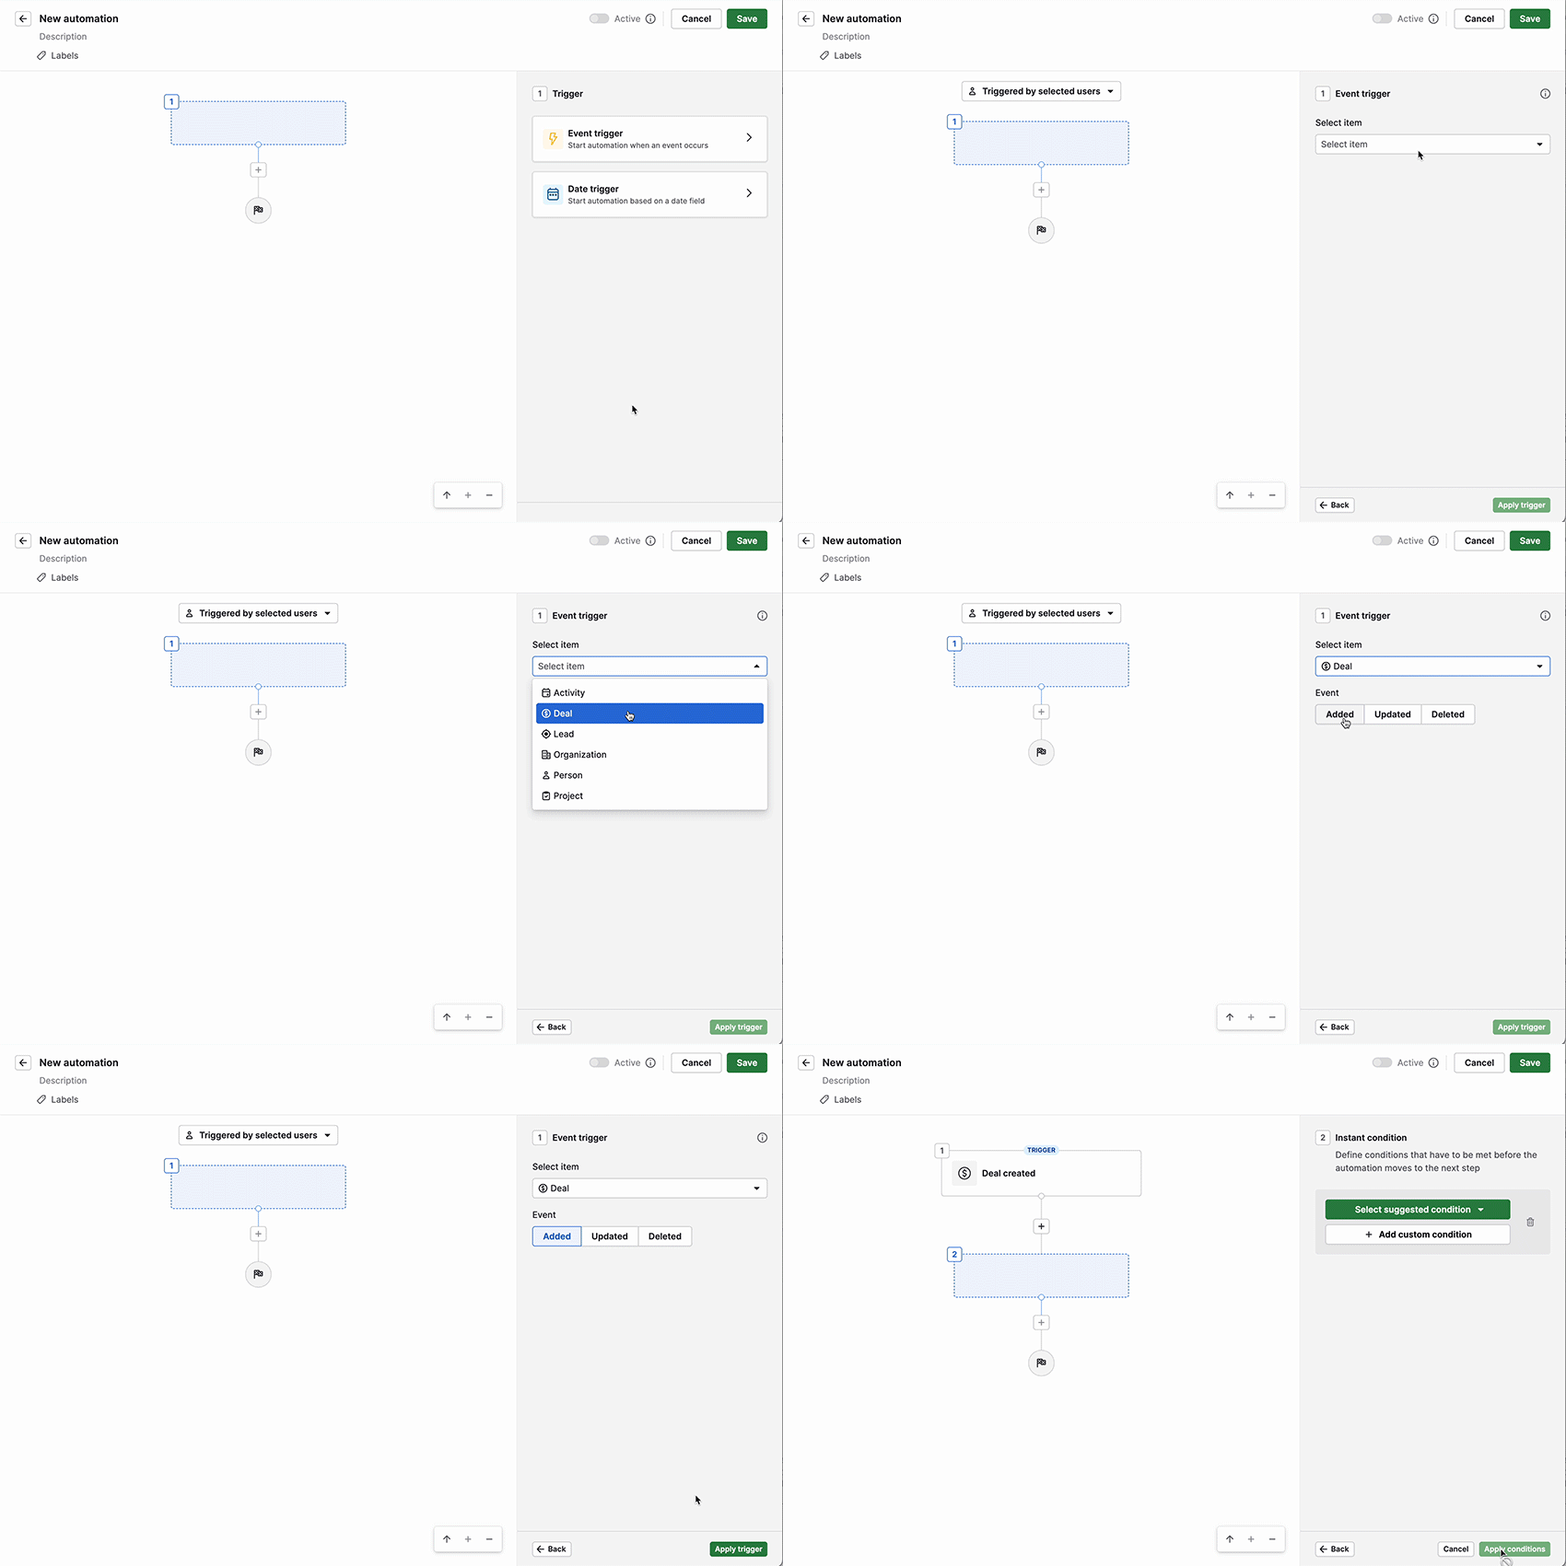
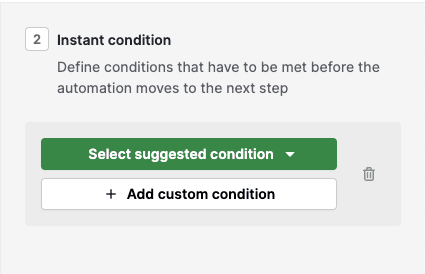
Az indító esemény beállítása után lehetőséged lesz feltételt (vagy feltételeket) alkalmazni az indítódra. Itt választhatsz a javasolt feltételekből, vagy hozzáadhatod a sajátodat, hogy meghatározd, mikor fusson az automatizálásod.
A feltétel mentése után kattints a “+“ ikonra, hogy hozzáadj egy új lépést, akár egy másik feltételt, akár a te akció eseményedet.
Fejlettebb automatizálás érdekében hozzáadhatsz várakozási feltételeket vagy ha/akkor feltételeket, hogy az automatizálásodat két vagy több útra oszd.
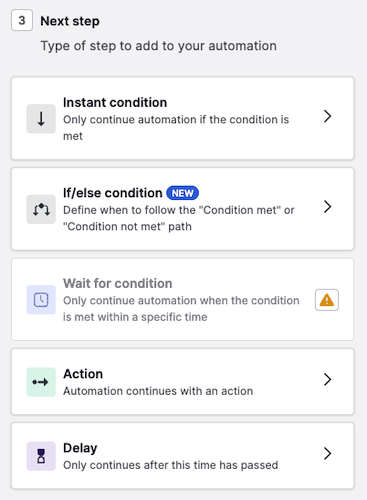
Az akció meghatározásakor választhatsz az alapértelmezett opciók között – személy, szervezet, lead, üzlet, tevékenység, email, jegyzetek, kampányok, projektek és webhookok – valamint integrációk – Slack, Microsoft Teams, Trello és Asana. Különböző opciókhoz specifikus akciótípusokat választhatsz.
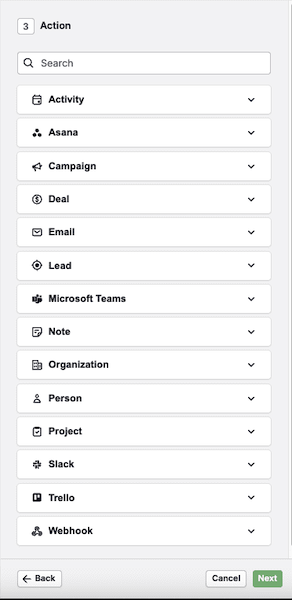
Több akciót is hozzáadhatsz az automatizálásodhoz, és ezek mindig a lista tetejéről lefelé hajtódnak végre. Például a 3. lépés csak akkor hajtódik végre, ha a 2. lépés befejeződött.
Fontos megjegyezni, hogy az automatizálások csak egyszer ellenőrzik, hogy a minden indított akció feltétele teljesül-e, hacsak nem használod a várj az eseményig feltételt. Ha egy adott akció feltétele nem teljesül, az akció nem hajtódik végre, és a rendszer nem hajtja végre a következő lépést.
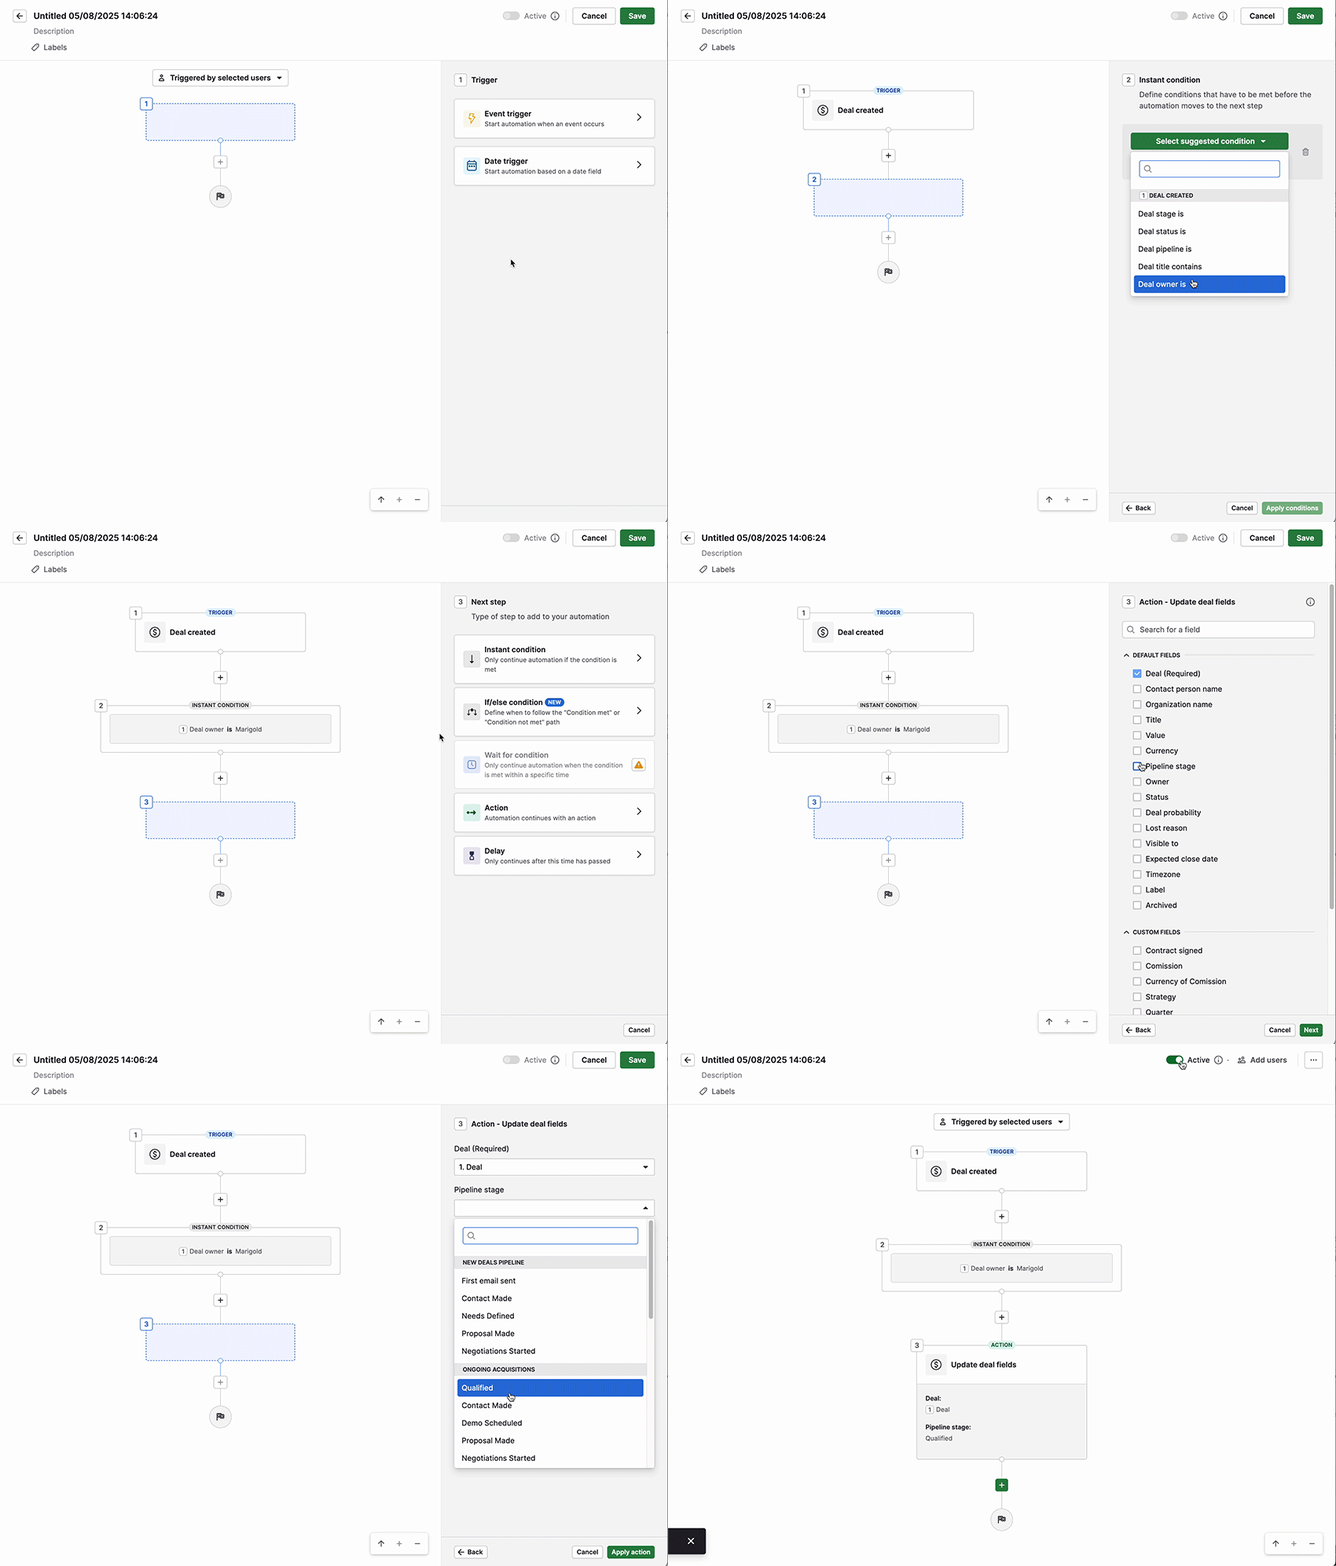
Itt láthatod, hogyan állíthatsz be egy automatizálást, amely a te új üzletedet egy másik csővezetékbe helyezi a deal tulajdonosa szerint.
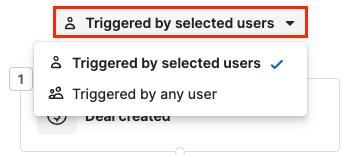
Azt is meghatározhatod, hogy mely felhasználók indíthatják el ezt az automatizálást, a automatizálás tetején található opciók ellenőrzésével, és válaszd ki, hogy melyik lehetőséget preferálod.
Az automatizálásod beállítása után kattints a “Mentés” gombra, majd állítsd be “Aktív” állapotra, hogy elkezdhesd használni.

Ha aktív, az automatizálásod automatikusan futni fog, amikor az indító feltételek teljesülnek.
Bármikor kezelheted a mentett automatizálásaidat az automatizálások listanézetében.
Automatizálási lista nézet
Az automatizálási lista nézetben megtekintheti az összes automatizálását, valamint a csapattársai által létrehozottakat, rendezheti az utolsó frissítés időpontja szerint, és alkalmazhat szűrőket.
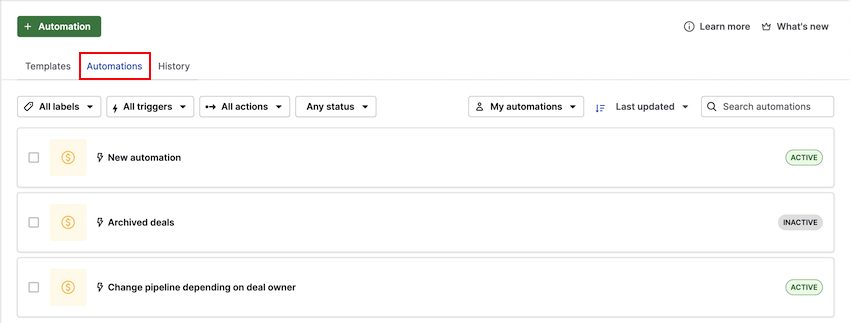
Szerkesztheti, törölheti vagy átkapcsolhatja az automatizálásokat aktív és inaktív állapot között. Ha egy automatizálás inaktív, a kiváltó eseménye és az akciók nem fognak végrehajtódni.
Az inaktív automatizálások szürkére vannak állítva, lehetővé téve, hogy gyorsan azonosítsa, melyek aktívak a Pipedrive fiókjában.
Tudjon meg többet az automatizálási lista nézetről ebben a cikkben.
Átviteli automatizálások
Akár egy felhasználó távozik a cégtől, akár csak szabadidőt vesz ki, egy másik felhasználónak szüksége lehet az automatizálásaikhoz való hozzáférésre hibaelhárítási célokból vagy hogy átadhassa őket valaki másnak. Ehhez át kell adni az automatizálás tulajdonjogát.
Felhasználók és engedélyek
Csak az alábbi felhasználói típusok képesek automatizálásokat átadni:
- Globális alkalmazás admin felhasználók bármilyen automatizálást átadhatnak maguknak vagy bármely más globális alkalmazás adminnak
- Ügyletek alkalmazás admin felhasználók és globális normál felhasználók az engedéllyel ”Automatizálások hozzáadása” átadhatják saját automatizálásaikat globális alkalmazás adminoknak
Tulajdonjog átruházása
Egyszeri átruházás
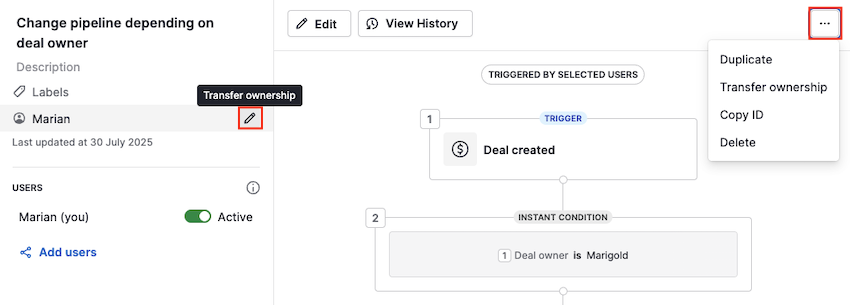
Nyissa meg az automatizálás előnézetét. Amikor az owner neve fölé viszi az egeret bal oldalon, kattintson a ceruza ikonra, vagy kattintson ”...” a jobb oldalon, majd “Tulajdonjog átruházása.”
Tömeges átruházás
Az Automatizálások nézetben jelölje be azokat az automatizálásokat, amelyeket át szeretne adni a képernyő bal oldalán.
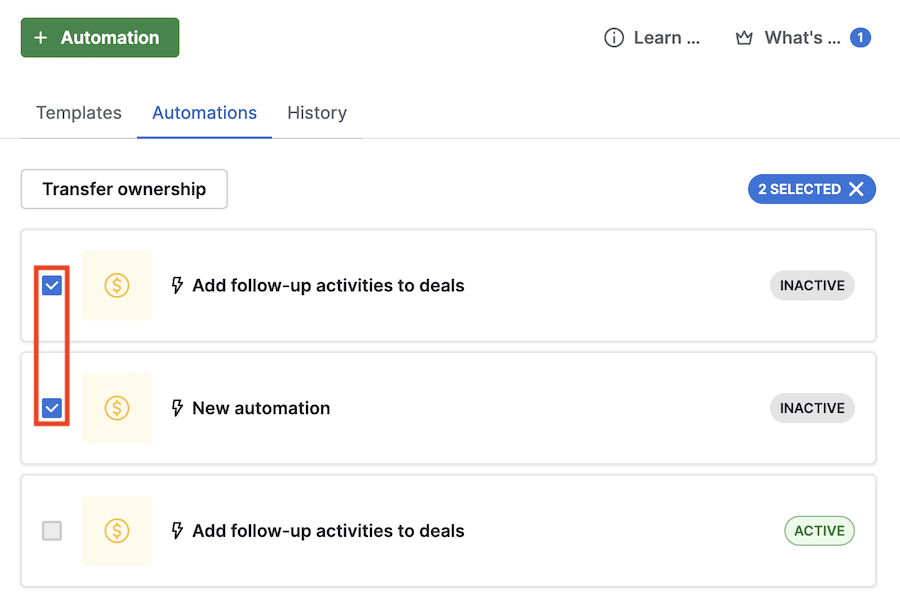
Ezután kattintson “Tulajdonjog átruházása”.
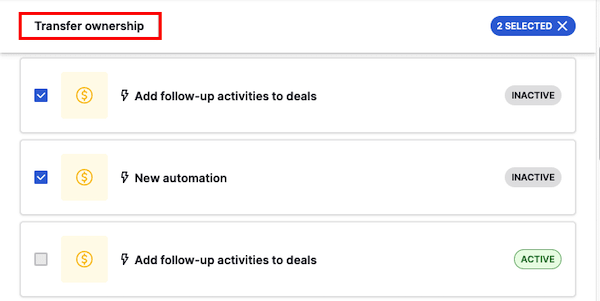
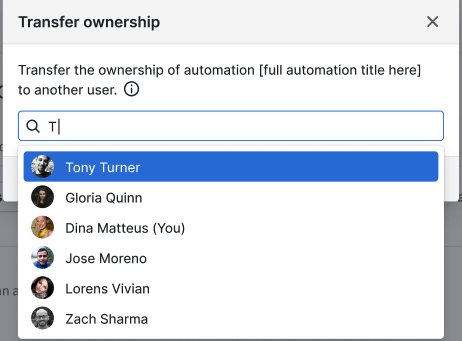
Amikor a “Tulajdonjog átruházása” gombra kattint, ki kell választania azt a felhasználót, akinek át szeretné adni az automatizálást.
Az átruházás befejezése előtt egy figyelmeztetést fog látni, amely felsorolja, mi fog történni az automatizálás átruházása után. A figyelmeztetésben szereplő események változhatnak az automatizálás lépései alapján (például, ha vannak függő végrehajtások, ha egy integráció telepítve van és használatban van egy automatizálásban).
Győződjön meg róla, hogy alaposan elolvassa ezt a figyelmeztetést, mielőtt folytatná.
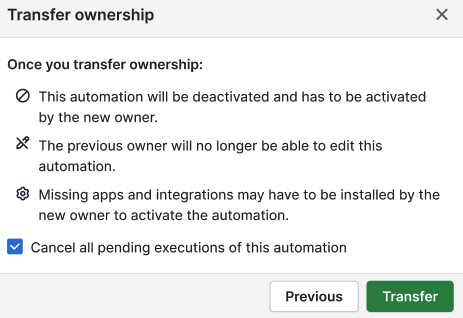
Ha van bármilyen függő végrehajtás az automatizálásra, azokat mind törölheti a jelölőnégyzet bejelölésével. Például, ha az automatizálás úgy van beállítva, hogy 5 nappal a kiváltó esemény után küldjön egy e-mailt, és ezek a végrehajtások még folyamatban vannak, akkor törlésre kerülnek, és az e-mail nem lesz elküldve.
Miután az automatizálás át lett adva, megjelenik a fogadó tulajdonos automatizálásainak listájában. Az átadott automatizálás deaktiválva van, így a fogadó tulajdonos át tudja nézni és hibaelhárítani, ha szükséges.
Az automatizáláshoz egy átruházott címke kerül hozzáadásra, hogy jelezze, hogy át lett adva.

A fogadó tulajdonos most már képes konfigurálni az automatizálást, beleértve a szerkesztést és aktiválást.
Hasznos volt ez a cikk?
Igen
Nem