Pipedrive Nova: set up
Before you can use Pipedrive Nova, you’ll need to complete a short setup. Then, you’ll connect your Google accounts and configure a few settings.
This article explains how to:
- Complete the Nova setup wizard
- Connect Gmail, calendar and Slack
- Enable the required Nova permissions
- Choose which calendar events and Pipedrive activities sync to Nova
Manage Nova access
Nova is included in all plans, at no additional cost, and is turned on by default for all users. You don’t need to enable Nova or assign seats.
If your company admin has turned off your access to Nova, you’ll see a message when you open it. To regain access, ask your admin to turn it on under Settings > Manage users > Users and access.
Admin users
Admin users can turn Nova access on or off for any user at any time from Settings > Manage users > Users and access.
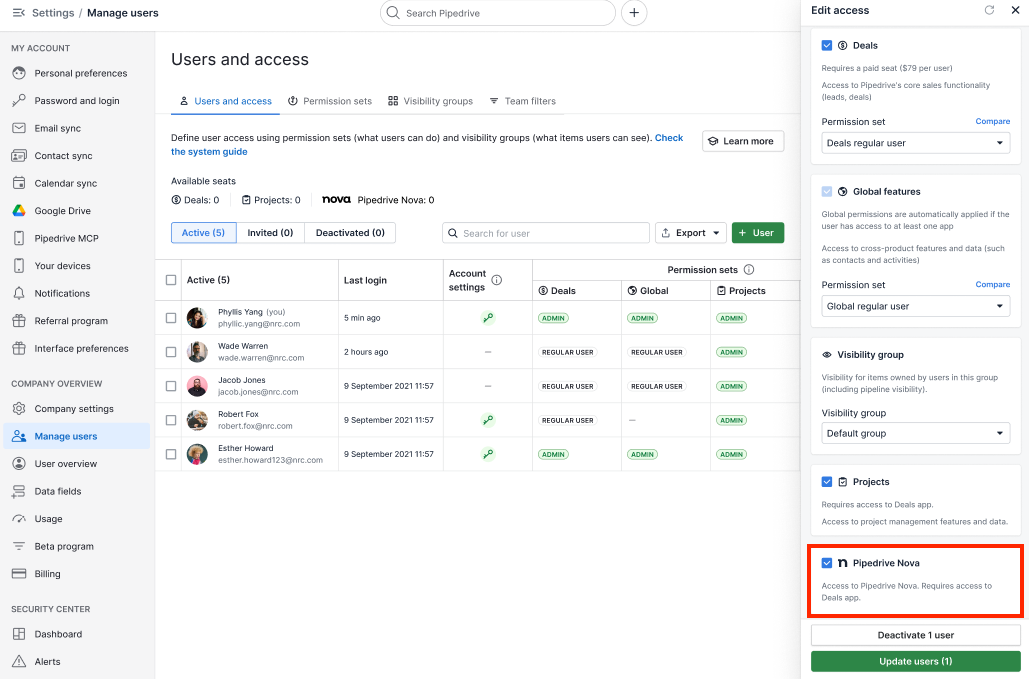
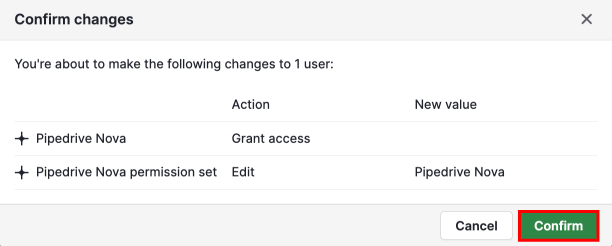
After enabling Nova, click “Confirm” in the confirmation dialog.
To remove a user’s access, clear the checkbox for the same permission.
Non-admin users
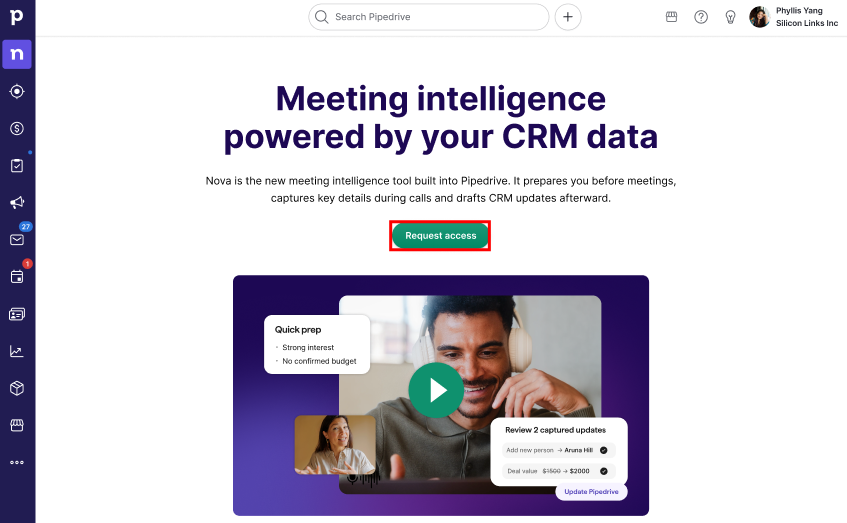
Non-admin users can’t enable Nova for themselves. If you don’t have access yet, open Nova and click “Request access” to send an email request to your admins.
Nova uses a single permission set that grants access to all Nova features. Individual Nova permissions can’t be enabled or disabled separately.
Once your admin enables Nova for you, it becomes available in your Pipedrive account.
Set up Nova
The first time you open Nova, a setup wizard guides you through connecting your accounts and configuring your settings. You must complete the required setup before you can use Nova.
Click “Get started” to begin.
During the setup wizard, you’ll:
- Read and accept Nova’s Terms of Use (required)
- Review your AI notetaker settings. Auto-join is enabled by default for new users, and you can change how the AI notetaker joins your meetings, how participants get notified of meeting capture or choose to use the Companion desktop app in Settings > Meeting Notetaker
- Connect your Gmail account (optional, but recommended).
- Connect another calendar service.
- Connect your Slack workspace (optional).
Connect your accounts
After completing the setup wizard, you can manage your connected accounts in Settings > Connections.
Gmail
Even if Gmail is already synced with Pipedrive, Nova still requires its own connection to your Gmail account.
Nova reads your emails in real time to generate meeting briefings. This requires different permissions from Pipedrive’s standard email sync, so connecting Gmail to Nova is a separate step.
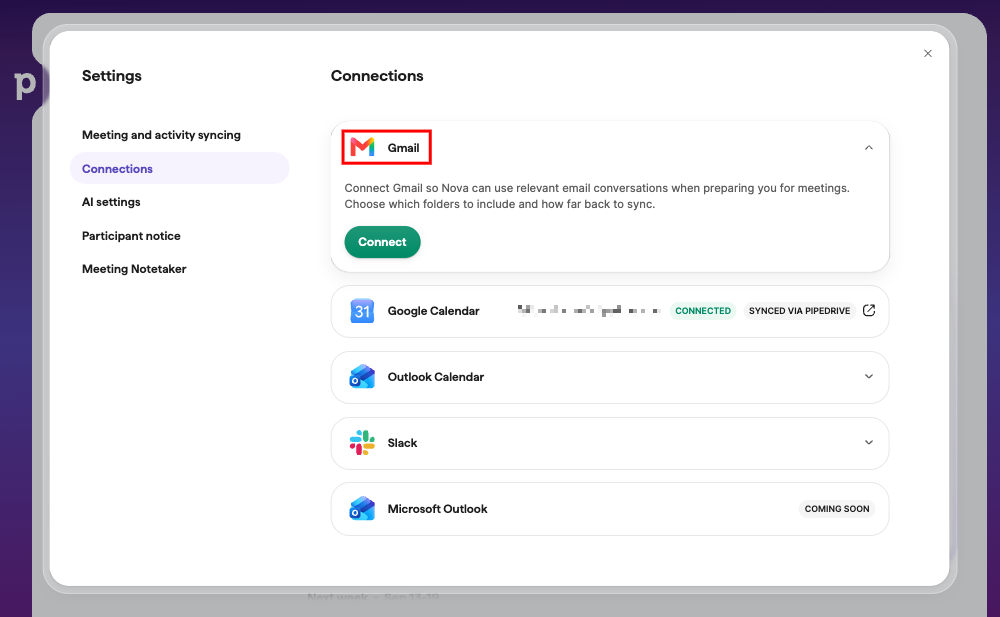
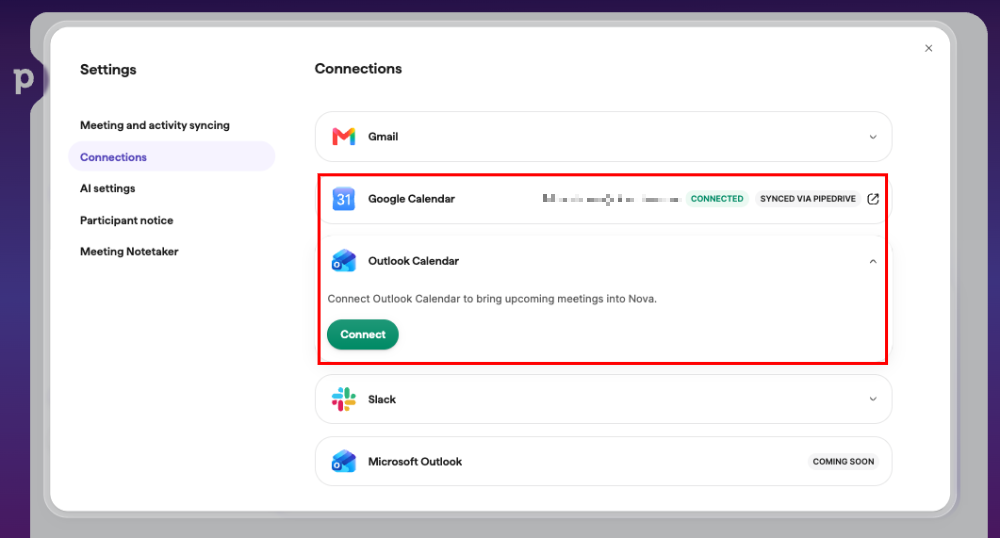
Google or Outlook Calendar
If your calendar is already synced with Pipedrive, you don’t need to connect it again to Nova. Your calendar events are already available in Nova through Pipedrive and you’ll see the synced via Pipedrive tag on it.

If you prefer, you can connect Nova to a different calendar (Google or Outlook).
Nova only reads your calendar to help prepare you for meetings. It doesn’t create, edit or delete calendar events.
Slack
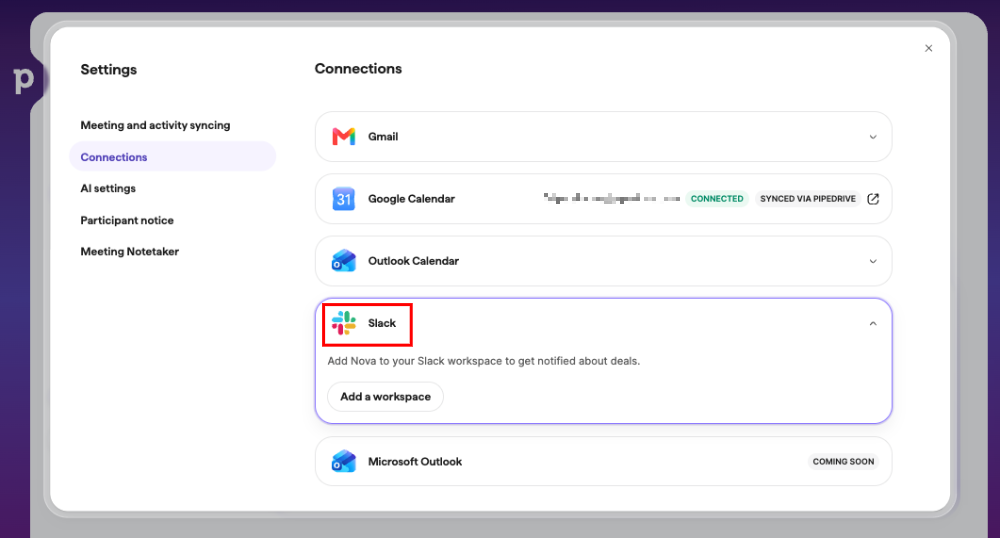
You can also add Nova to your Slack workspace to get notifications to get pre-meeting briefs and post-meeting recaps. Find out more about it in the article Pipedrive Nova: Slack notifications.
Choose what to sync
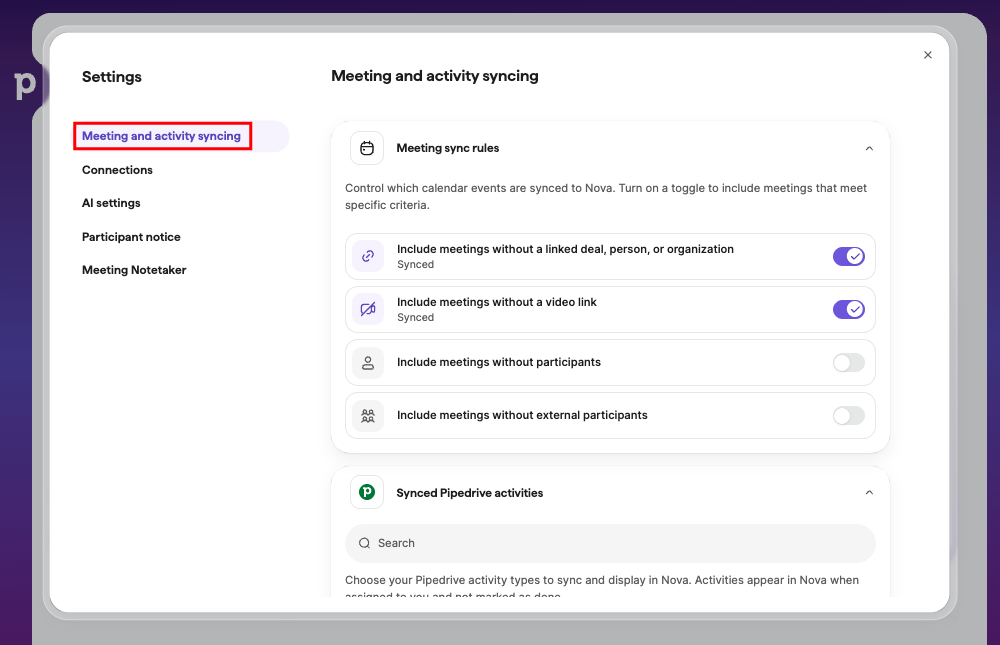
Go to Settings > Meeting and activity syncing to choose which events you want to include in Nova and which Pipedrive activities you want to sync and display in Nova.
Calendar events
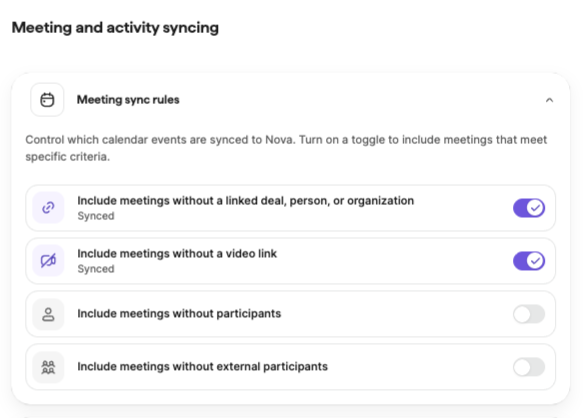
You can control which type of events you want to display in Nova by turning on the toggles.
Activities
You can also set which Pipedrive activity types Nova treats as meetings.
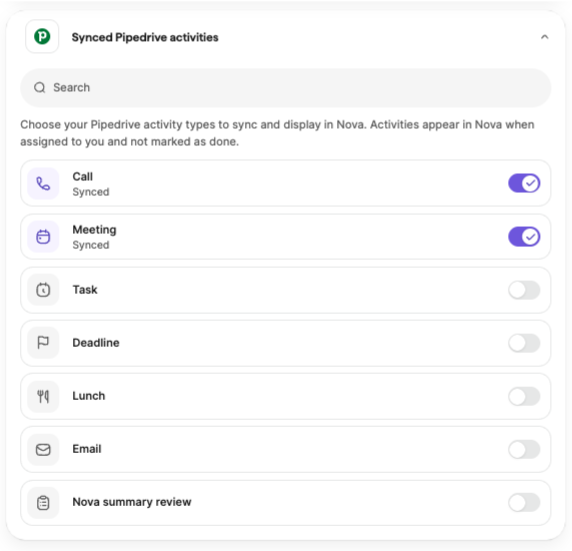
When you save your changes, newly selected activity types appear inMeetings, while deselected types are removed. Your preferences remain in effect until you change them.
Once you’ve connected your accounts and completed the required setup, you’re ready to start preparing for meetings and using the AI Notetaker. Learn more in Meetings with Nova.
Customize Nova’s AI settings
You can customize how Nova works with your CRM data and how it generates meeting summaries in Settings > AI settings.
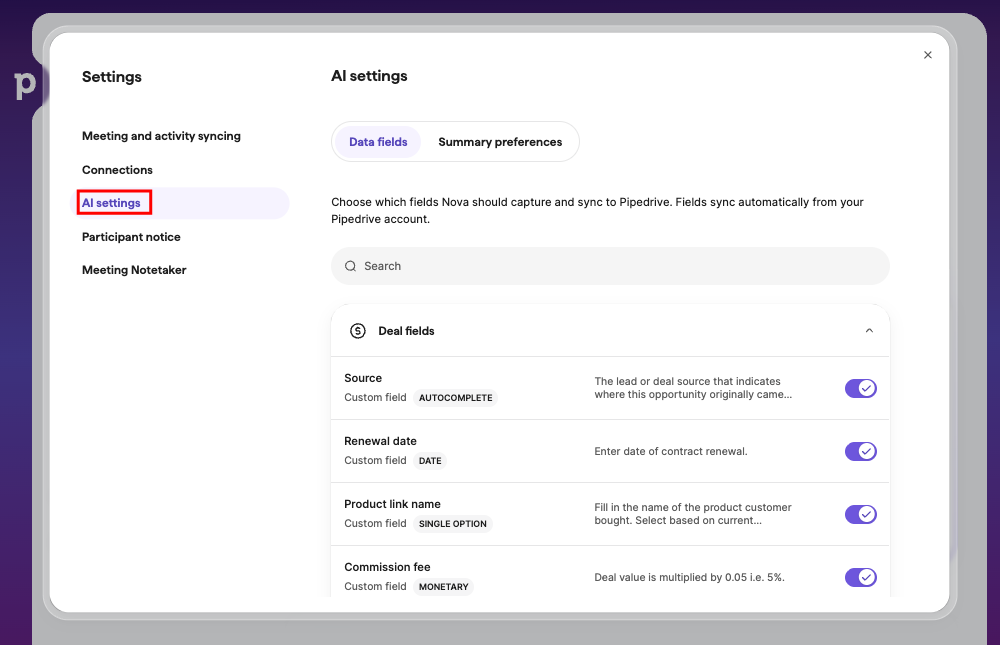
Choose and customize data fields
In the Data fields tab, choose which deal, person and organization fields Nova can suggest updates for, and customize how it interprets each field.
Use the toggle next to each field to enable or disable CRM update suggestions.
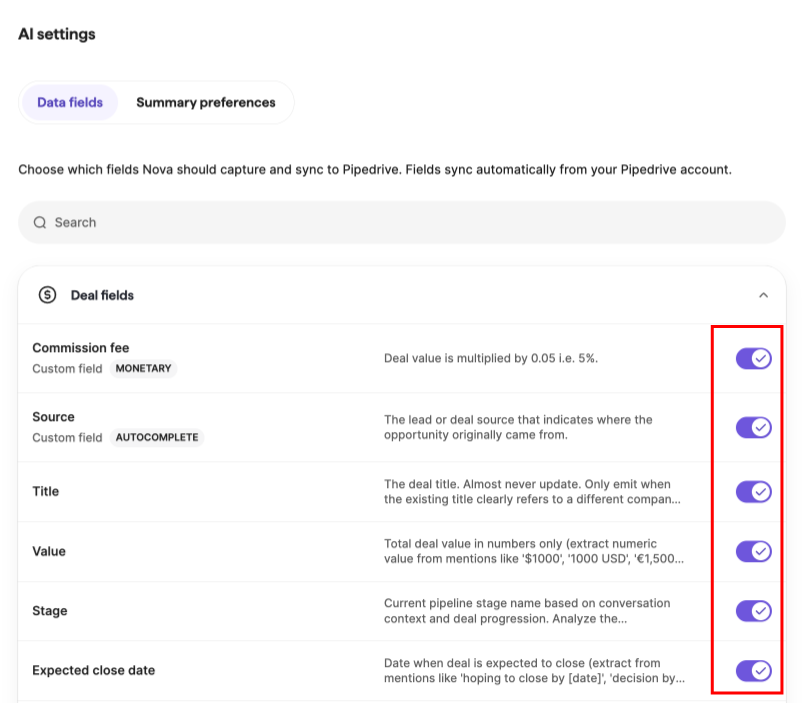
Click a field to open its instructions. There, you can tell Nova how to extract or format the field’s value. For example, how to interpret currency amounts or where to find an expected close date.
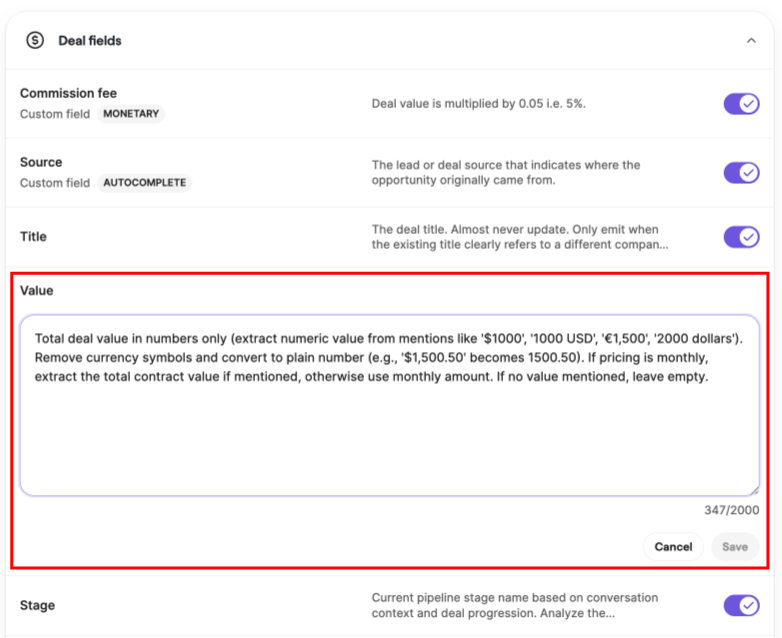
After editing a field’s instructions, click “Save” to apply your changes or “Cancel” to discard them.
Set summary preferences
In the Summary preferences tab, customize how Nova generates meeting summaries. These settings apply to all future meetings.
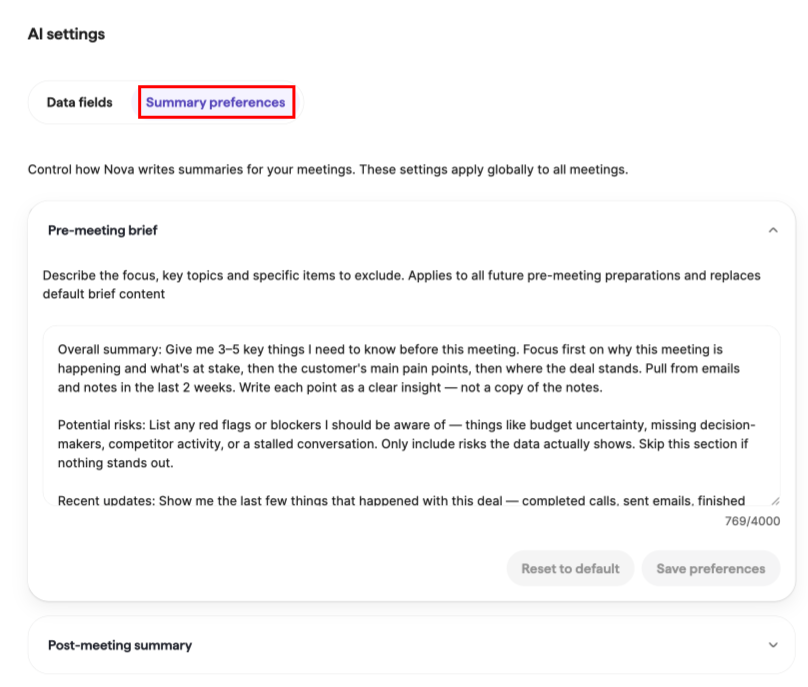
Nova generates two types of summaries:
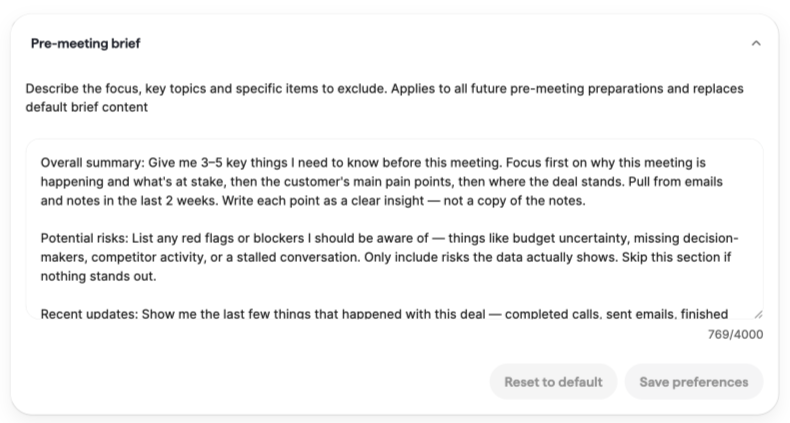
- Pre-meeting brief – the briefing Nova generates before a meeting
- Post-meeting summary – the recap Nova generates after a meeting
For each summary type, you can add custom instructions describing the focus, key topics or information to exclude. These instructions apply to all future briefs or summaries and replace Nova’s default instructions.
For post-meeting summaries, you can also choose:
- Tone: Professional, Friendly or Formal
- Length: Concise, Regular or Detailed
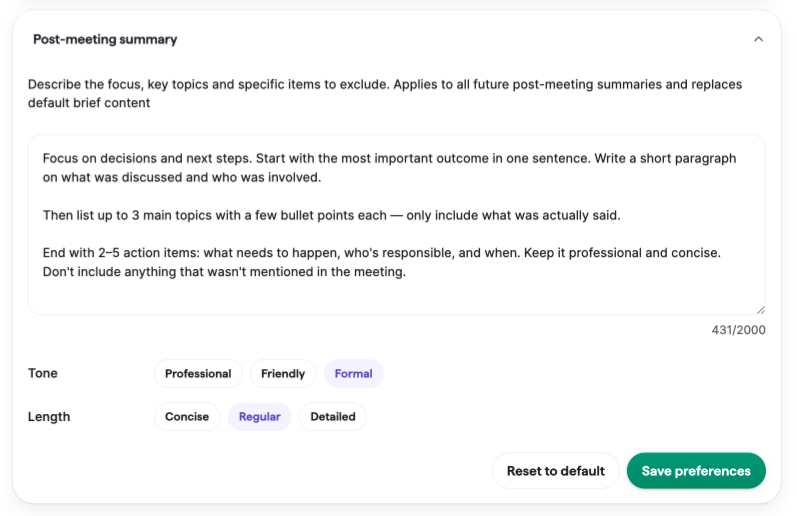
Click “Save preferences” to apply your changes or “Reset to default” to restore Nova’s default summary style.
Was this article helpful?
Yes
No