Changing the field type of a custom field
With custom fields, it’s important to choose the correct field type from the start. Since each format stores data differently and changing types might disrupt your existing filters, reports, automations or integrations, you can’t directly change the field type in Pipedrive.
If you still want to change the type, the best method is to recreate the custom field in the new type and use the Pipedrive System ID feature to transfer the existing data to the new field. To achieve this, you’ll want to follow these steps:
- Create a new custom field with the correct type
- Export the old custom field information along with the Pipedrive System ID, make the necessary edits in the spreadsheet and import it back into Pipedrive
- Delete the old custom field once all the correct information has been moved to the new custom field
Getting started
Before exporting, make sure the new custom field with the correct type has been created in your account so the old custom field information has somewhere to go.
To create a custom field, open the account menu at the top right corner, navigate to Personal Preferences > Data Fields, make sure you have the right entity selected and click on “+ Custom field”.
Once created, you’ll see both the new and old custom fields on that page.

Exporting your data
To begin your export, open the lead, deal, person, organization or product list view where the custom field you want to update is located.
You can filter the view using the old custom field to help you find the necessary information (for example, by using the [field] is not empty filter operator).

Click on the gear icon and make sure the following fields are displayed:
- Main item ID (deal, person or organization)
- Old custom field
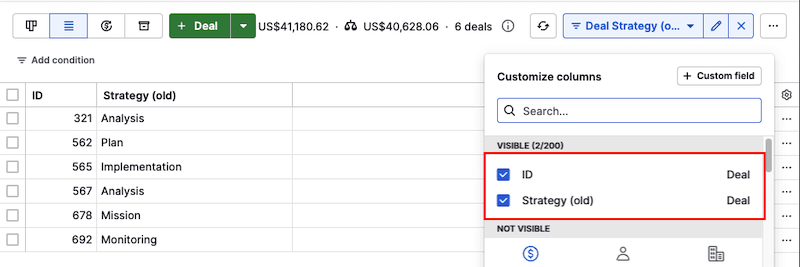
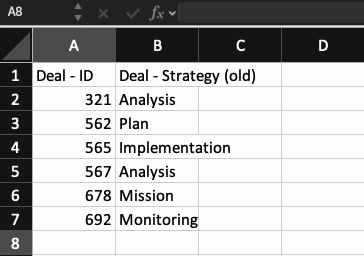
Once you have these two fields applied in your list view, you can export the list to a spreadsheet by clicking on “...” and selecting “Export filter results”.
Importing your updated data
You can import the updated spreadsheet back into Pipedrive by opening the account menu and going to Tools and apps > Import data > Import from spreadsheet. This article explains importing in more detail.
When you get to the mapping step of your import, make sure all of the columns in your spreadsheet are mapped to the correct field in your Pipedrive account.
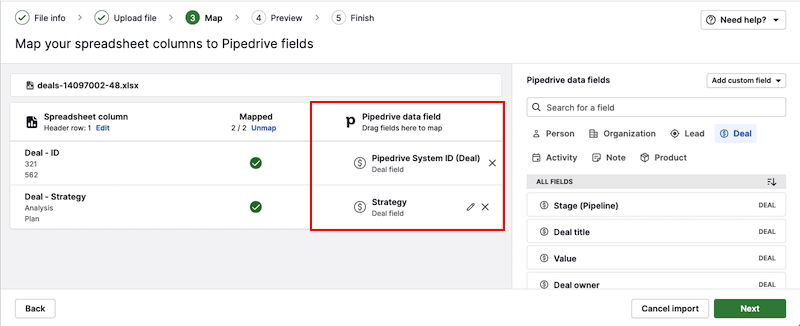
Click on the “Next” button to proceed with your import, confirm once again that everything is in order and click on the “Start import” button to complete the process.
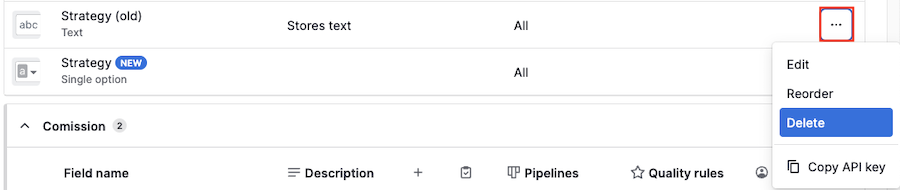
Deleting old custom field
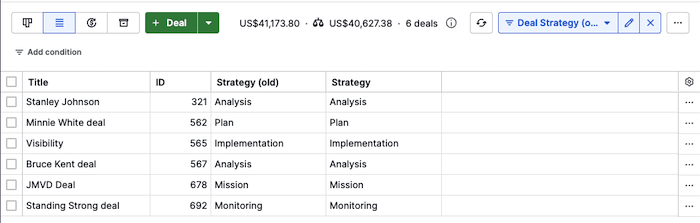
To check the results of your import, return to the list view.
After you have checked that all data is correct, delete the old custom field in the data fields page by clicking on “...” next to the field name.
Was this article helpful?
Yes
No