Send emails with automations
Automations lets you send emails automatically based on events in your sales process, such as when a deal moves to a new stage or a lead is created.
Automated emails are sent through connected email accounts. Depending on how your automation is configured, emails can be sent from the automation owner, item owner, whoever triggers the automation or a connected Team Inbox.
Set up an email automation
Open the account menu and go to Tools and apps > Automations, then click “+ Automation”.
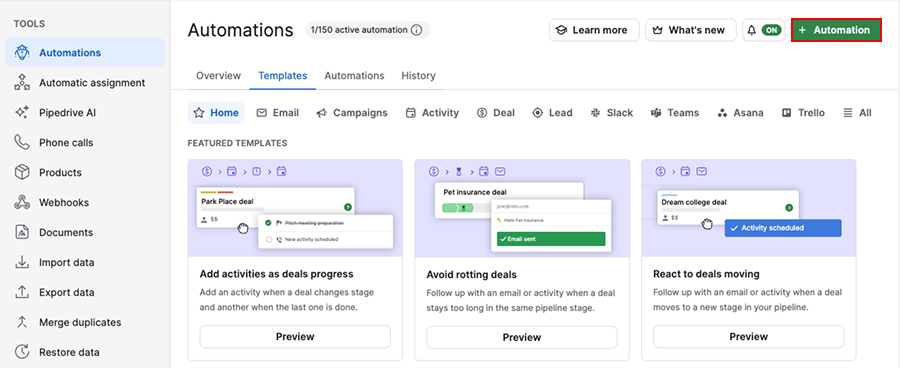
Choose a trigger event and add conditions to narrow down when the email should be sent.
Once your trigger is ready, go to Take an action > Send email.
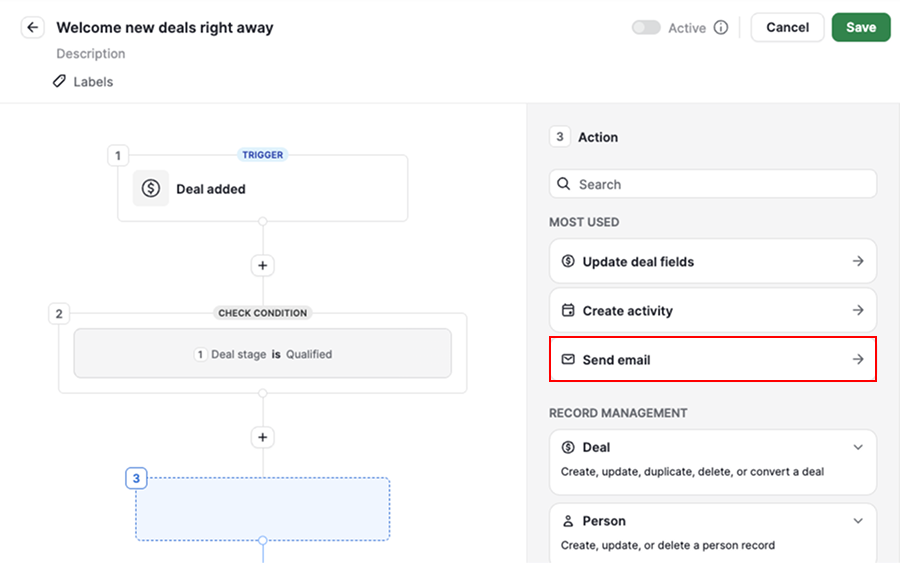
Choose a recipient and sender
Use the “To” field to define who receives the email. You can add predefined recipients or insert specific email addresses.
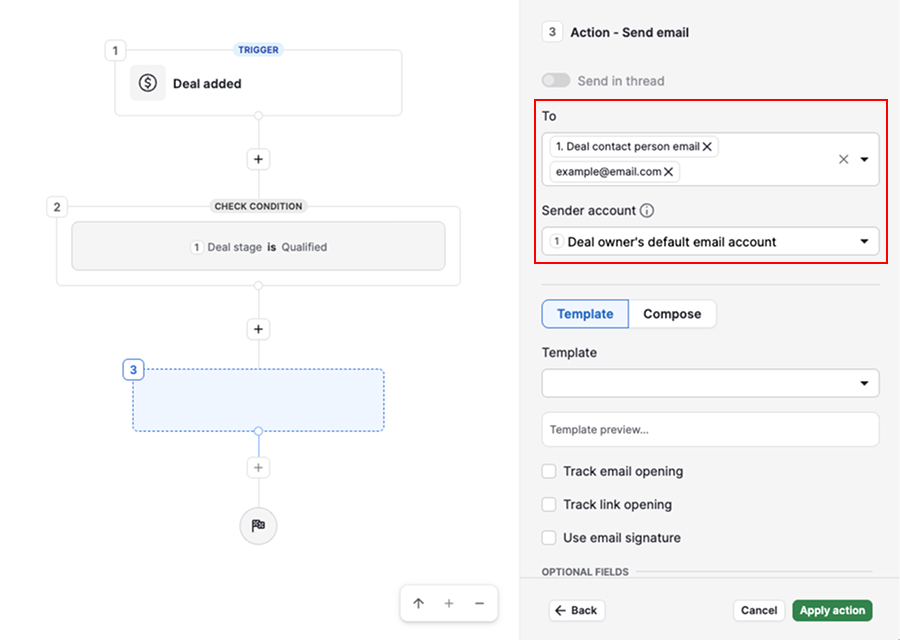
Use the “Sender account” field to choose who the email sends from. Depending on your setup, you can choose from:
- Automation owner – sends from the automation owner’s connected email account
- Item owner – sends from the default email account of the item’s current owner
- Triggering user – sends from the default account of whoever triggered the automation
- Team Inbox – sends from a connected Team Inbox account
Item owner and triggering user are dynamic sender options, meaning the sender is determined when the automation runs. The relevant user must have a personal email account connected to Pipedrive and set as their default email account. If they don’t, the automation will fail at the email sending step.
For more information about sender options and default email accounts, see Email senders in automations.
If replies should go somewhere other than the sender address, open the “Add fields” menu and select “Reply-to email address” to add one or more email addresses. For example, an automation can send an email from one account while directing replies to the deal owner or another team member responsible for the conversation.
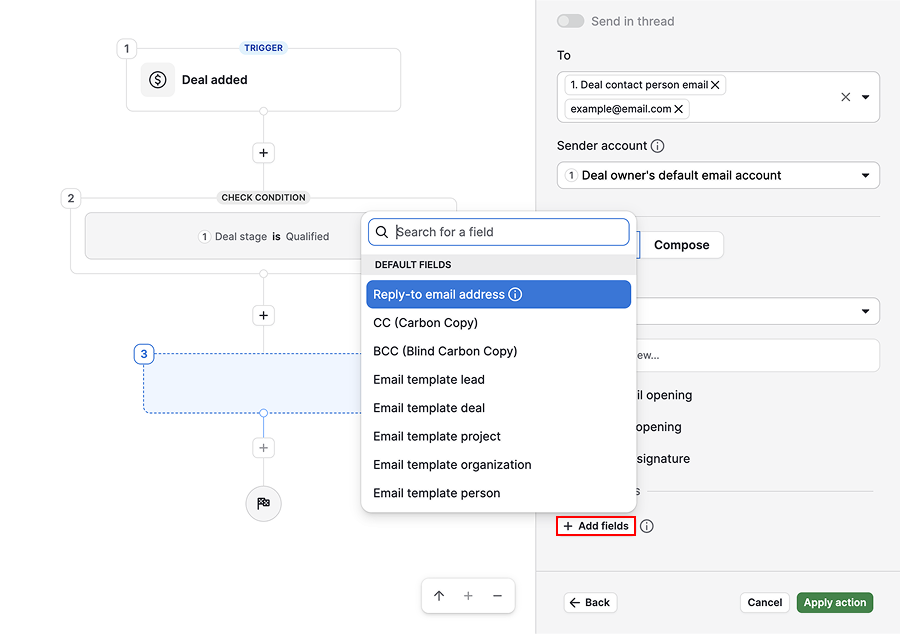
From the add fields menu, you can also add Cc and Bcc recipients for carbon copy and blind carbon copy delivery.
Send using a template
Select the “Template” tab, then choose the template you want to use. You can preview the full email content to help pick the right one.
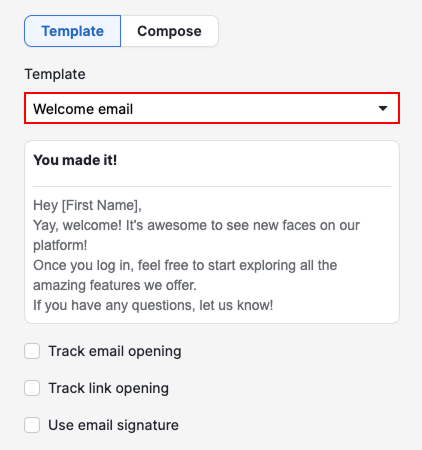
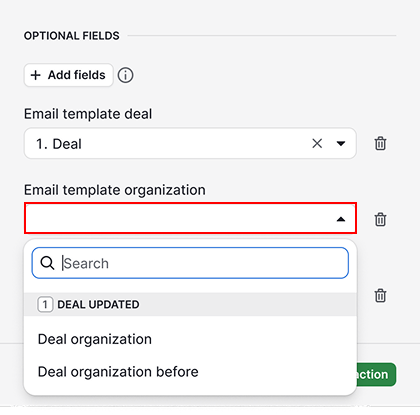
If your template includes merge fields for deals, leads, projects, people or organizations, you’ll need to link them to the relevant items in your automation. This tells the automation where to get the data used to populate each merge field.
For example, if your template contains deal merge fields, link the email template deal to the deal you want the automation to use. If more than one matching item is available, select the one you want to use for the email.
Compose from scratch
Select the “Compose” tab to write the email yourself instead of using a template.
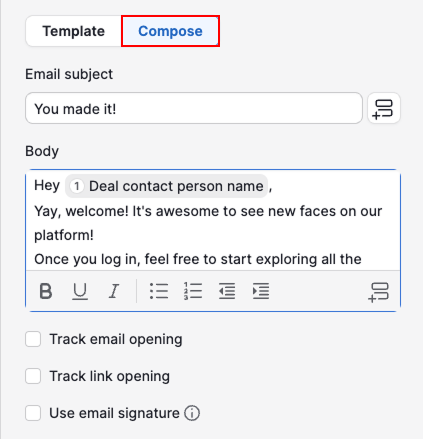
Enter the email subject and compose the email body.
You can also use merge fields to insert information from items already used in your automation. For example, if your automation triggers from a deal, you can automatically add details such as the deal contact person name, deal title, deal owner and other deal information to your email.
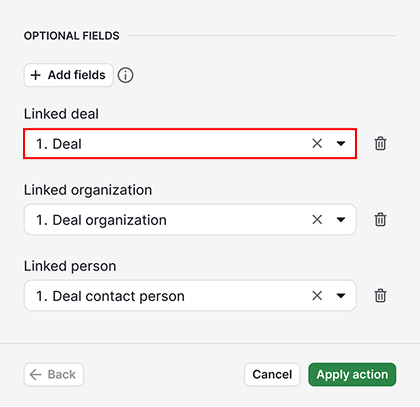
For your email to appear in the right detail views after sending, click “+ Add fields” and select the linked items you want it to appear in. For example, linking the email to a deal ensures it appears in that deal detail view.
Track engagement and add a signature
Below the email body, you’ll find three checkboxes that apply whether you’re composing an email or using a template:
- Track email opening – notifies you when the recipient opens the email
- Track link opening – notifies you when the recipient clicks a link in the email
- Use email signature – adds the signature configured in your email sync settings
Once you’re ready, click “Apply action”.
Control when the email is sent
You can combine your send email action with other automation steps to control exactly when the message goes out or what happens after it’s sent. Go to Next step > Wait, then choose a wait type.
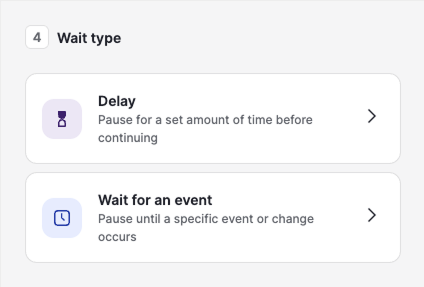
| Wait type | What it does | Example use case |
|---|---|---|
| Delay | Pauses automation for a set amount of time before continuing | Wait three days before sending a follow-up reminder |
| Wait for an event | Pauses automation until a specific event or condition occurs within a set timeframe | Wait until a recipient replies to an email, then send a follow-up |
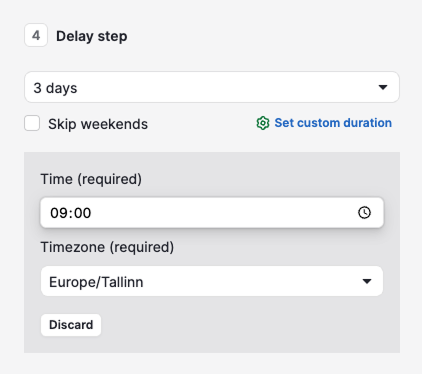
Add a delay
Select from the dropdown menu how long the delay should last in minutes, hours, days or weeks. If you selected days or weeks, you can also set a time when the delay ends.
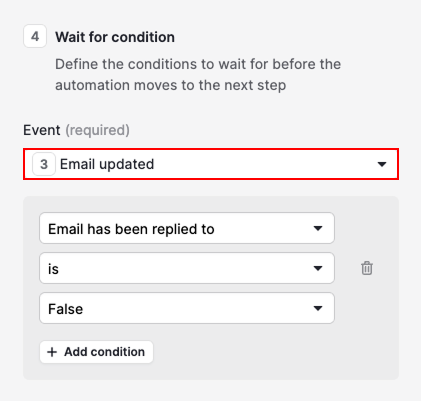
Add wait for an event
Choose an event to watch, such as email updated, then define the condition that should trigger the next step.
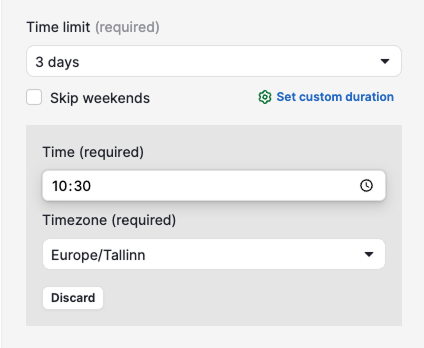
Next, set the time limit for how long the automation waits for your specified event.
Reply in an existing conversation
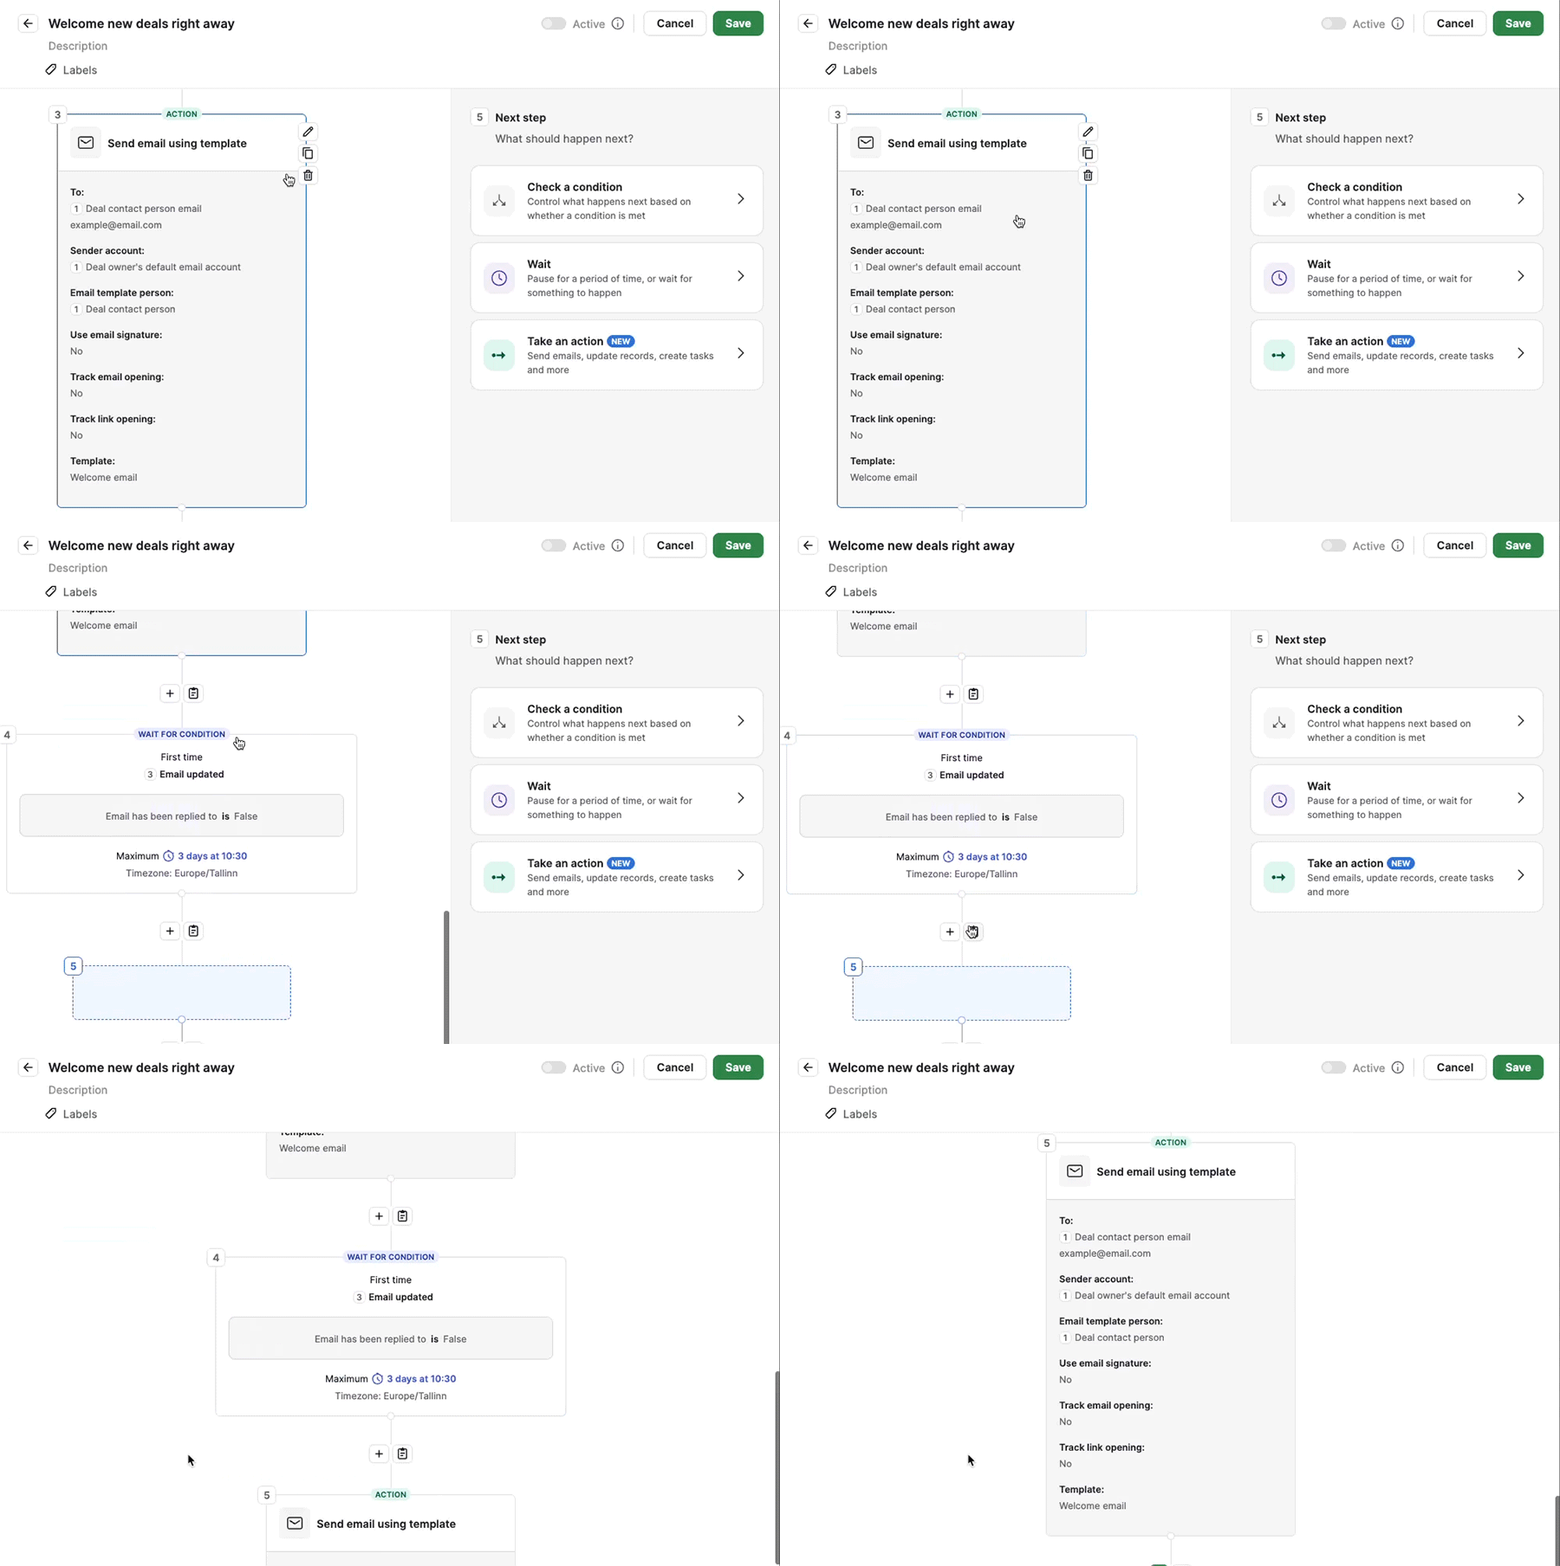
A common way to follow up is adding a wait for an event step after your first email, then sending another email if the recipient doesn’t reply within a set time period.
You can set the next email step by going to Take an action > Send email. If you don’t want to build this step from scratch, you can copy and paste the previous send email step. Then select the new step to make adjustments.
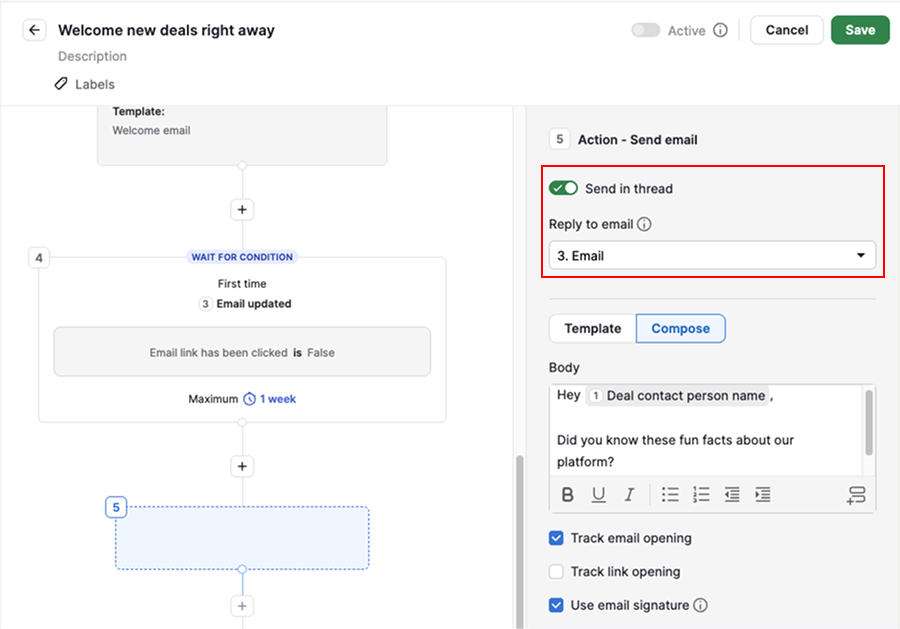
To send your reply within the original email’s conversation, turn on “Send in thread” and link it with your previous email step.
Continue the email automation
Sending an email doesn’t have to be the last step in your automation. Once it’s sent, you can keep building, for example, by updating the related deal or person, or creating a follow-up activity for your team.
If you’re having trouble sending emails, visit our troubleshooting guide.
Was this article helpful?
Yes
No